Complete Guide: What is cURL and how to use it specifically?
If you often deal with APIs in your daily life, you have surely heard of cURL. So, what is cURL? How do you use cURL? In this text, I would like to provide a complete explanation for these questions.
If you often deal with APIs in your daily life, you have surely heard of cURL. So, what is cURL? How do you use cURL? In this text, I would like to provide a complete explanation for these questions.
To address the shortcomings of cURL, such as its poor usability for request reuse and difficulties in test automation, it is recommended to use EchoAPI, which is perfectly compatible with cURL, to test APIs more efficiently.
What is cURL
cURL is an open-source library and tool for sending HTTP requests from the command line. It is widely used as an important tool for API testing. cURL mainly provides the following features:
- Supports various protocols (HTTP, HTTPS, FTP, SMTP, etc.)
- Easily specifies request methods such as GET and POST
- Simple customization of headers and request bodies
- Supports encrypted communication via SSL/TLS
- Allows communication through proxies
- Handles redirects, authentication, and cookies
- Displays response headers and body
To use cURL, you first need to install it. Below are the installation methods for different operating systems, so regardless of whether you are using Windows, macOS, or Linux, you can refer to the following steps.
cURL Installation Methods
The method for installing cURL differs depending on the operating system.
For Windows
The installation process for cURL can vary significantly based on the OS. If you are using a computer with Windows, please refer to the following steps to install cURL.
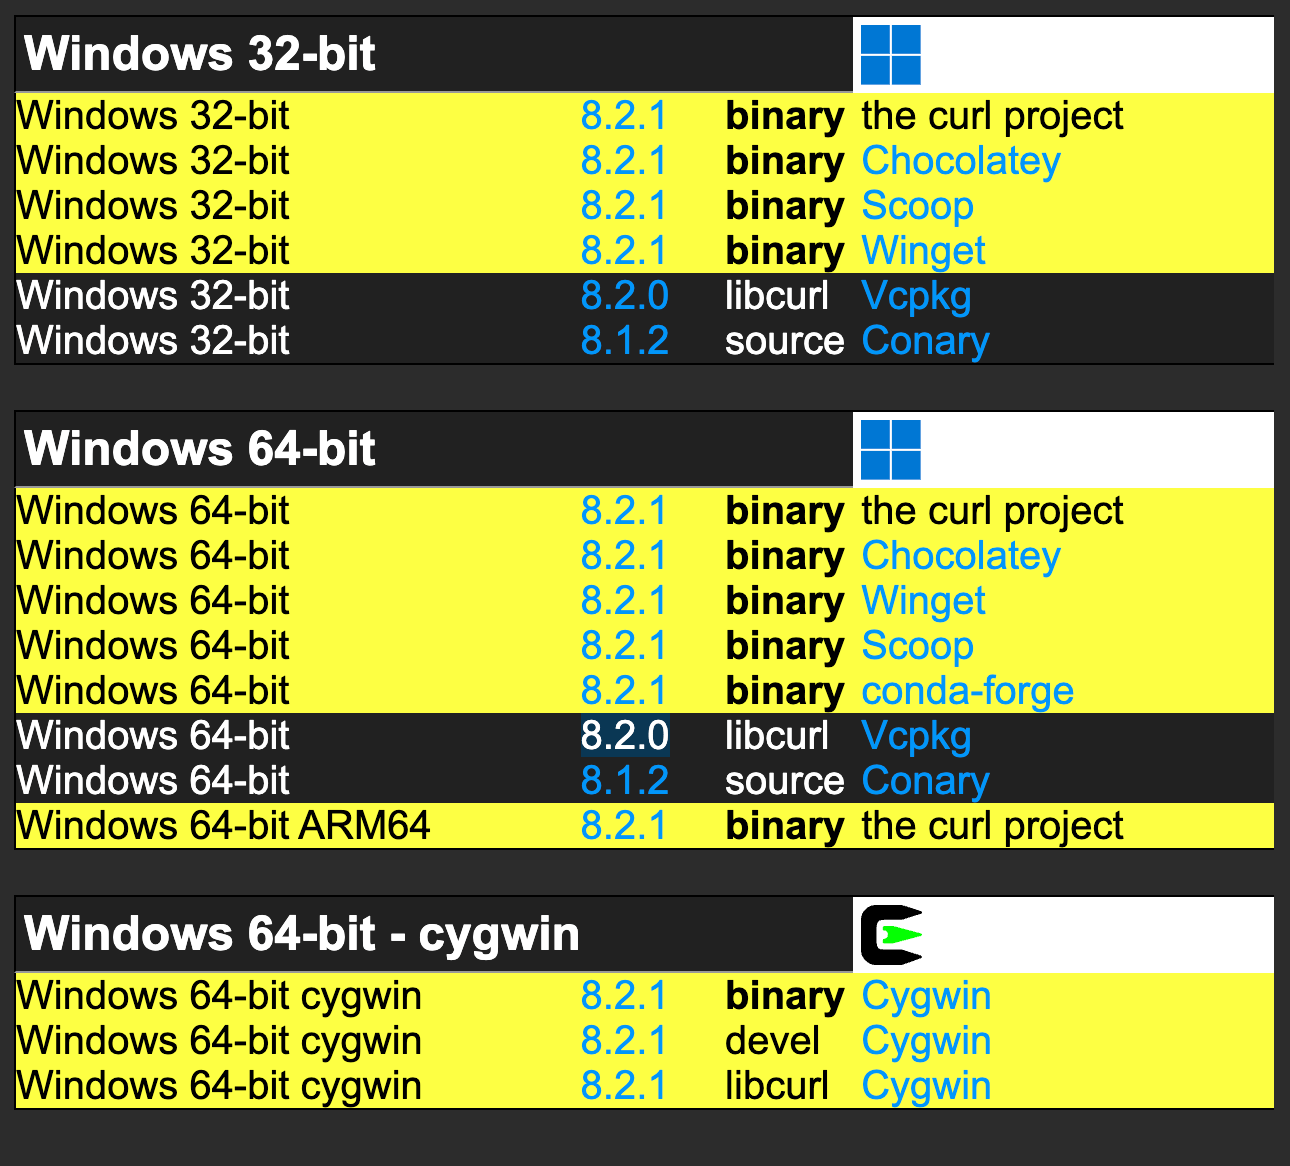
- Download the curl executable for Windows:https://curl.se/download.html
- Extract the downloaded zip file.
- Copy the curl.exe from the extracted folder.
- Add the path to the copied curl.exe to the environment variable PATH.
For Mac
Step 1: Open the terminal and enter the following command:
$ brew install curl
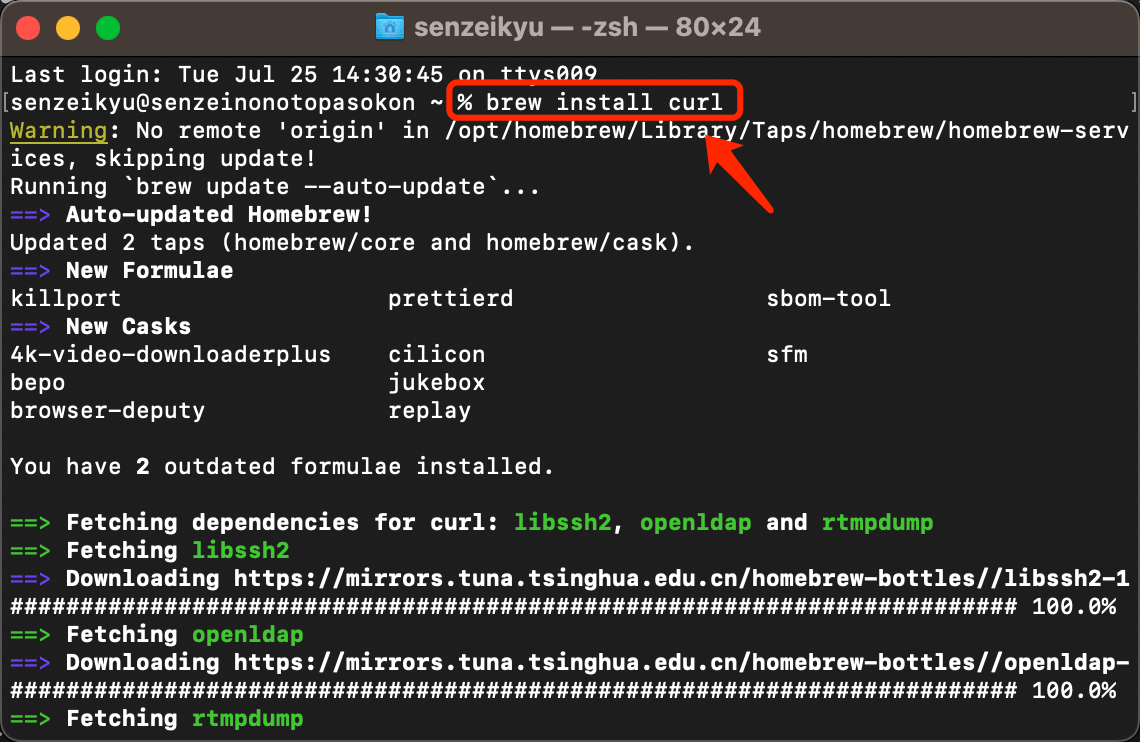
Step 2: Curl will be automatically installed. To check if the installation was successful, use the following command:
$ curl --version
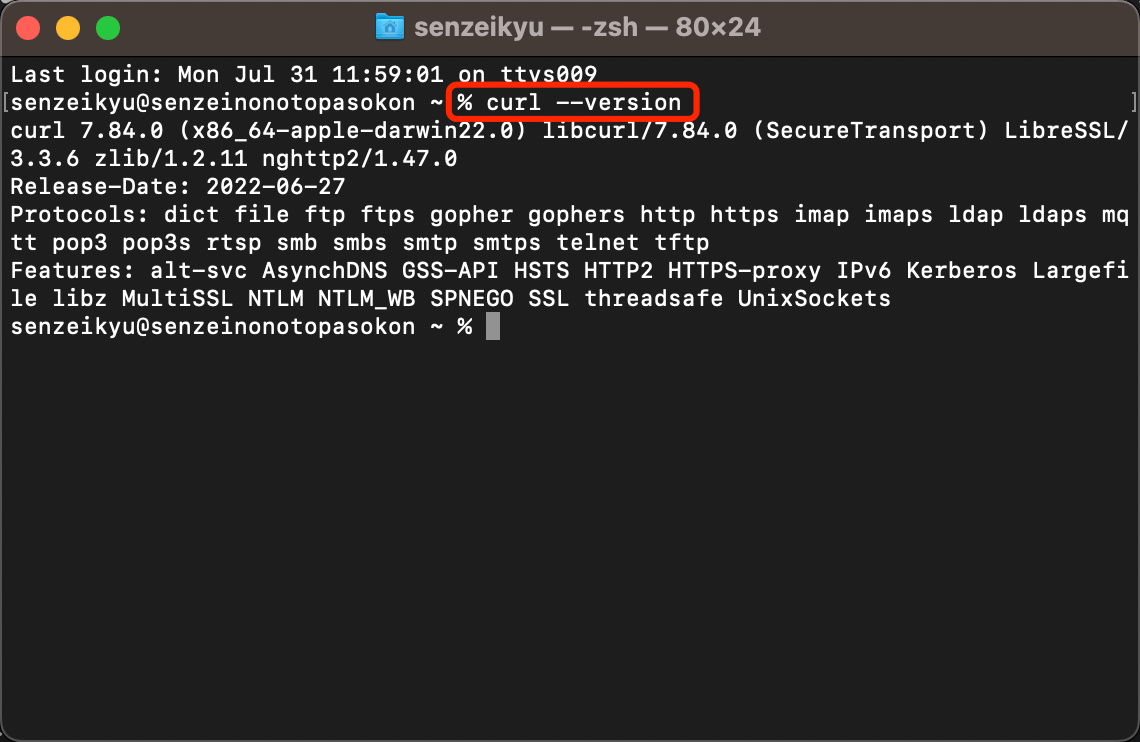
If Curl is successfully installed, the version number will be returned.
For Linux (Debian/Ubuntu), use:
$ sudo apt install curl
For Linux (CentOS/Fedora), use:
$ sudo yum install curl
In this way, on Windows, you can directly download the executable file, while on Mac and Linux, you can install it using a package manager.
cURL Options List (with Samples)
cURL has a variety of options available for customizing HTTP requests and saving responses. Below are some representative options for your reference.
- -b: Send cookies
- -c: Save cookies
- -d: Send POST data
- -F: Send multipart/form-data
- -H: Customize headers
- -i: Show response headers
- -k: Skip SSL certificate verification
- -L: Automatically follow redirects
- -o: Save response to a file
- -O: Save using the remote file name
- -s: Suppress command output messages
- -S: Show error messages
- -u: Basic authentication username and password
- -v: Show request and response headers and contents
- -X: Specify the HTTP method for the request
Additionally, you can use options like --data-binary for sending binary data, --compressed for compressed transfers, and --limit-rate to limit transfer speed. Next, I will introduce examples of how to use cURL to send requests.
cURL Options Usage Examples
How can you utilize the cURL options mentioned above? Here are examples of using cURL to send HTTP requests.
Here are the main cURL options:
-X: Specify the HTTP method for the request
curl -X POST http://example.com
-v: Show request and response details
curl -v http://example.com
-u: Basic authentication username and password
curl -u user:password http://example.com
-S: Show error messages
curl -S http://example.com
-s: Suppress command output messages
curl -s http://example.com
-O: Save using the remote file name
curl -O http://example.com/file.txt
-o: Save response to a file
curl -o response.html http://example.com
-L: Automatically follow redirects
curl -L -d "param1=value1" http://example.com
-k: Skip SSL certificate verification
curl -k https://example.com
-i: Show response headers
curl -i http://example.com
-H: Customize headers
curl -H "X-My-Header: 123" http://example.com
-F: Send multipart/form-data
curl -F "file=@myfile.txt" http://example.com
-d: Send POST data
curl -d "param1=value1¶m2=value2" http://example.com
-c: Save cookies
curl -c saved_cookies.txt http://example.com
-b: Send cookies
curl -b "cookie1=value1; cookie2=value2" http://example.com
The above examples use single options, but you can combine multiple options to send more complex HTTP requests.
Combining cURL Options
As mentioned earlier, you can combine options in cURL to send more complex HTTP requests.
For example, here are some combinations:
Sending binary data via POST:
curl --data-binary '@file.zip' -H 'Content-Type: application/zip' https://example.com
Basic authentication through a proxy:
curl -x proxy.server:8080 -u username:password https://example.com
Skipping SSL certificate verification and automatically following redirects:
curl -k -L https://example.com
Showing response headers and saving:
curl -i -o response.txt https://example.com
Sending POST data and request headers:
curl -d 'param1=value1' -H 'Content-Type: application/json' https://example.com
Sending cookies and headers:
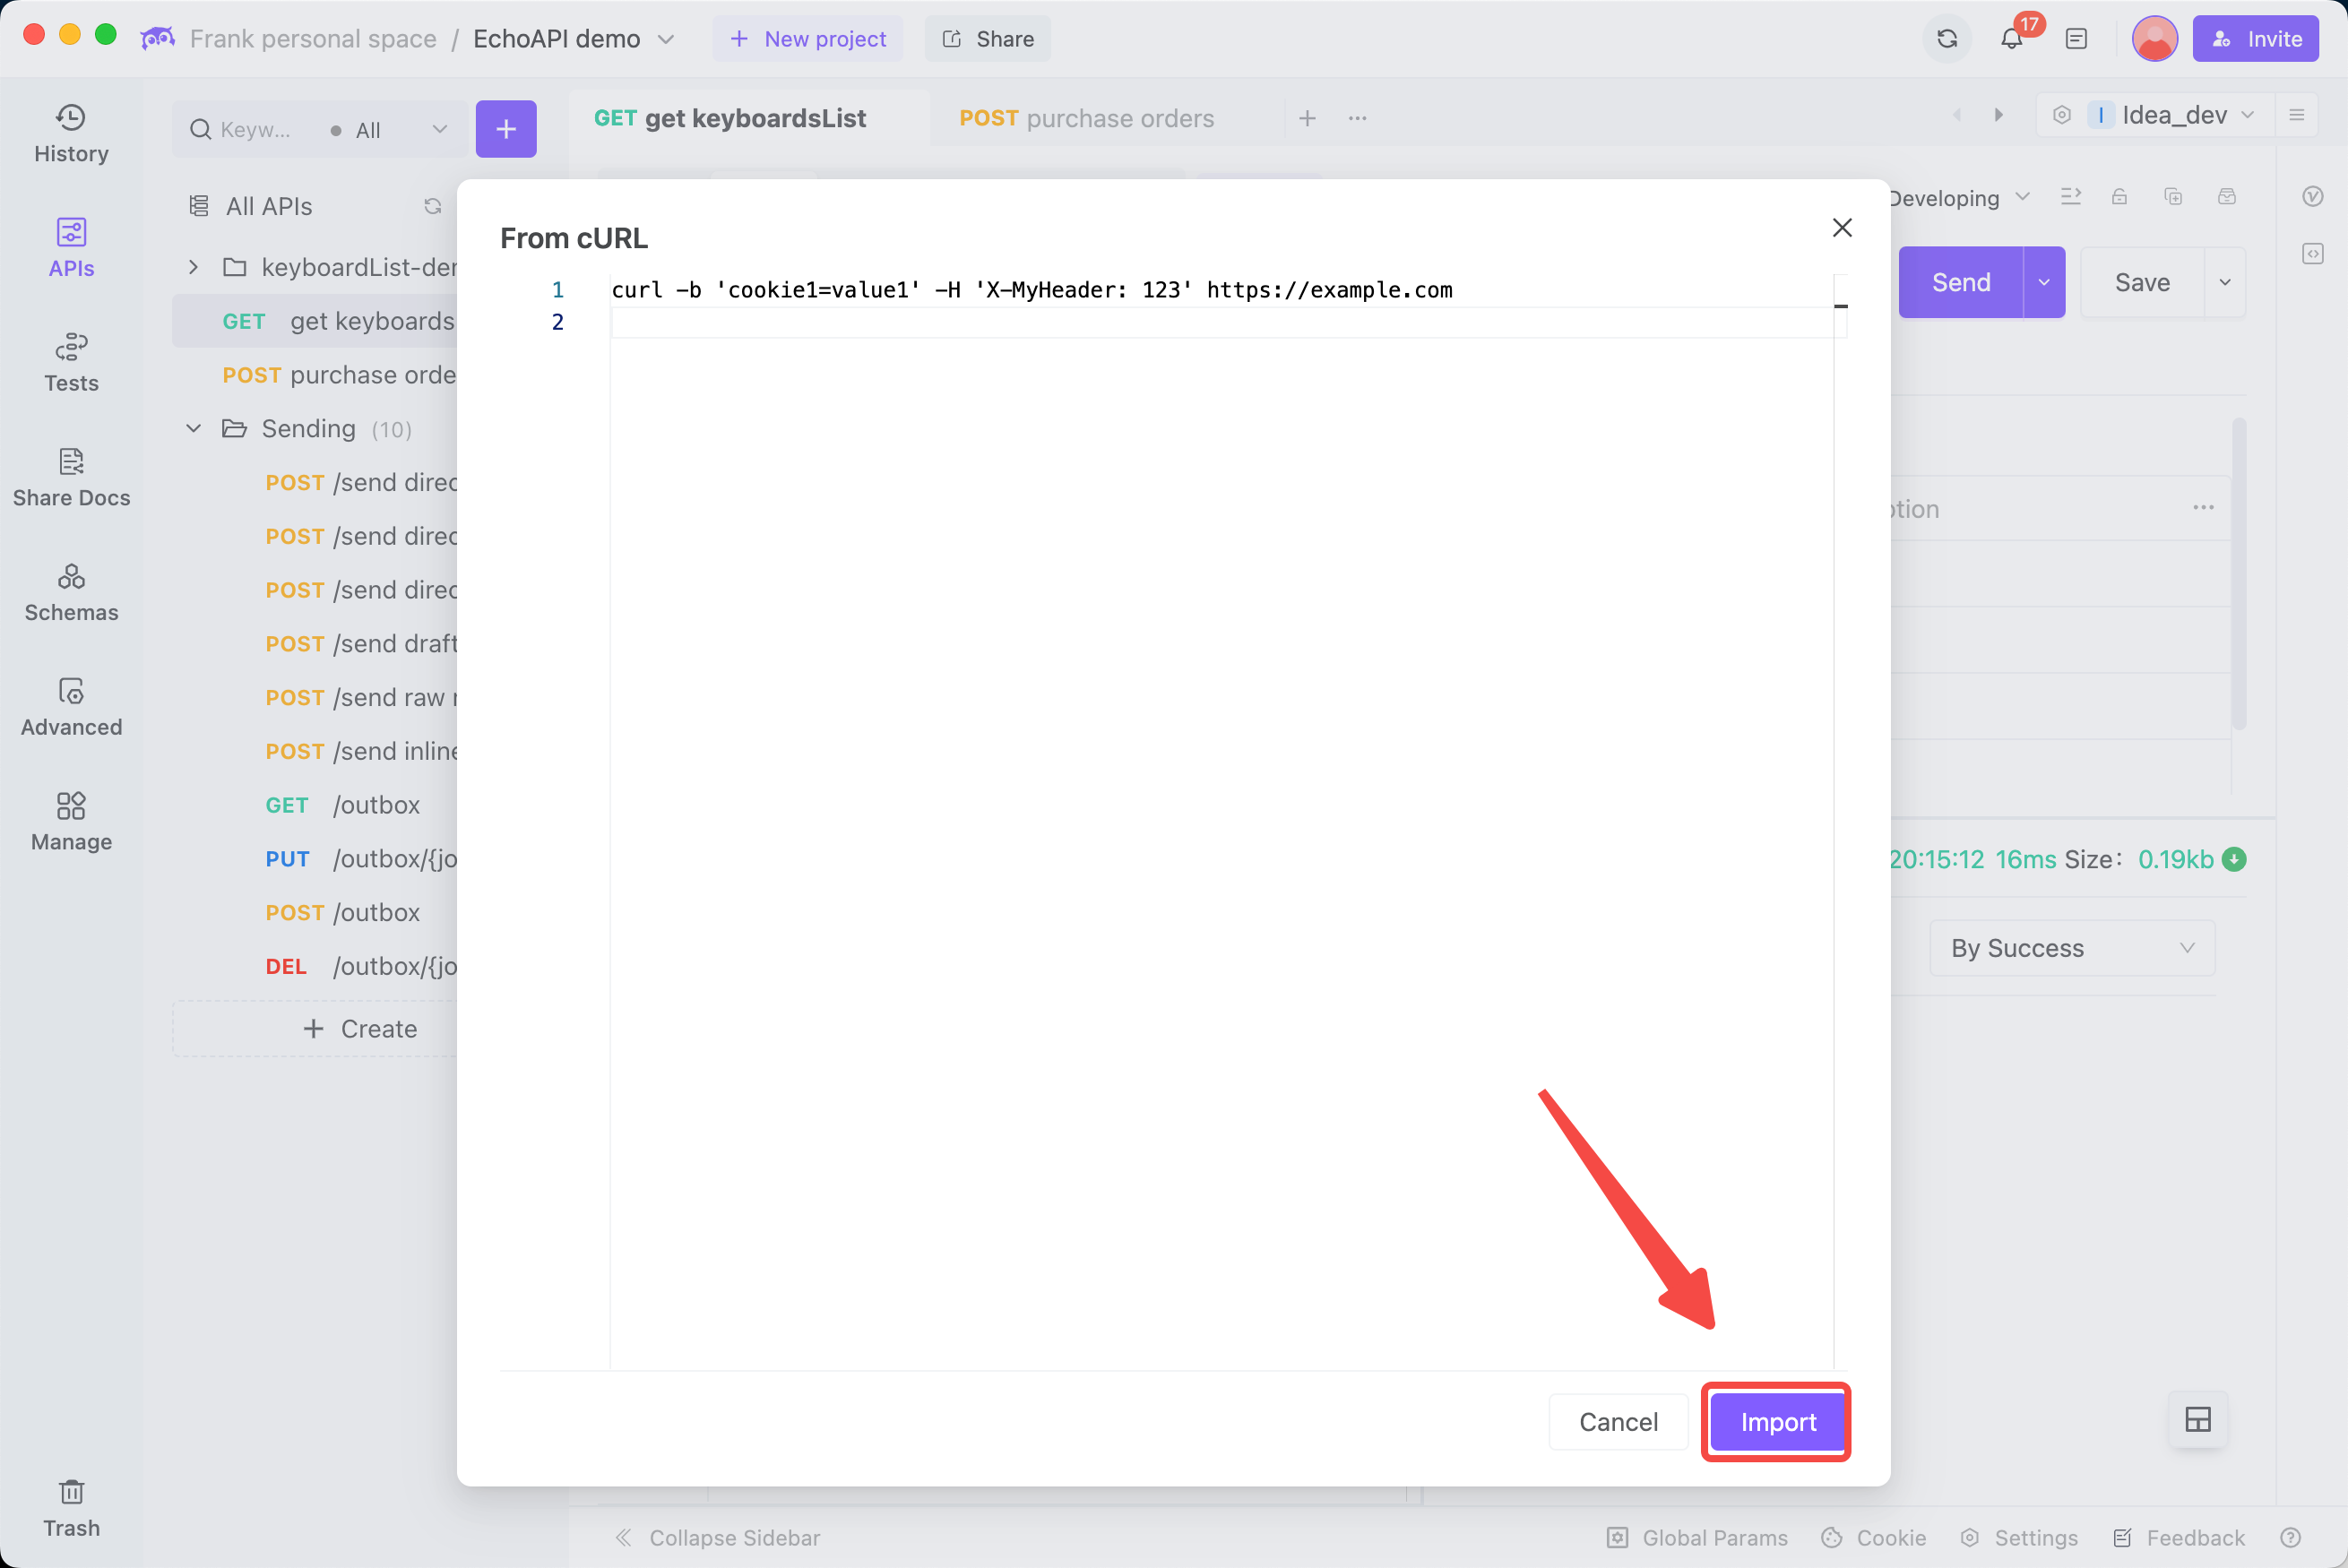
curl -b 'cookie1=value1' -H 'X-MyHeader: 123' https://example.com
In this way, cURL allows flexible option specifications, and combining them enables complex API testing. It's important to refer to the cURL documentation and master the options according to your needs.
Differences in cURL Usage Across Windows, Mac, and Linux
The basic usage of cURL is the same across Windows, Linux, and Mac, but there are some notable differences:
- Installation Methods:
- On Windows, you download the executable directly.
- On Mac and Linux, install via a package manager.
- SSL Certificate Verification:
- Windows: Verifies by default.
- Linux: Does not verify by default (no
-koption needed). - Mac: Verifies by default.
- Proxy Settings:
- Windows: Automatically uses the system proxy.
- Linux: Needs explicit settings with
-x. - Mac: Automatically uses the system proxy.
- Redirect Handling:
- Windows: Defaults to following up to 10 redirects.
- Linux: Does not follow redirects by default.
- Mac: Defaults to following up to 10 redirects.
- Response Format:
- Windows: Binary format.
- Linux: Text format.
- Mac: Text format.
cURL Limitations and GUI Tool Benefits
Currently, GUI tools like EchoAPI, Postman, and Swagger are gaining popularity. Why should you use these tools? When using cURL to send HTTP requests, cURL has several limitations:
- Requires command-line operation, making it difficult to master.
- Sometimes hard to check the contents of the response.
- Creating complex requests can be cumbersome.
- Managing cookies and sessions can be complicated.
- Writing and re-running test scenarios can be challenging.
- Not suitable for transferring large amounts of data.
- Cannot generate graphical reports.
Therefore, many users turn to GUI tools like EchoAPI or Postman. Compared to these GUI tools, cURL is less user-friendly, making request reuse and test automation difficult, as well as making response visualization challenging.
EchoAPI: An API Management Tool Fully Compatible with cURL
EchoAPI is an ultra-lightweight collaboration tool for API development that supports Scratch Pad. It allows for API design, documentation generation, and automated testing.
More convenient for testing and managing APIs than cURL
EchoAPI is an intuitive API management tool that allows you to test APIs more conveniently than cURL through a user-friendly GUI.
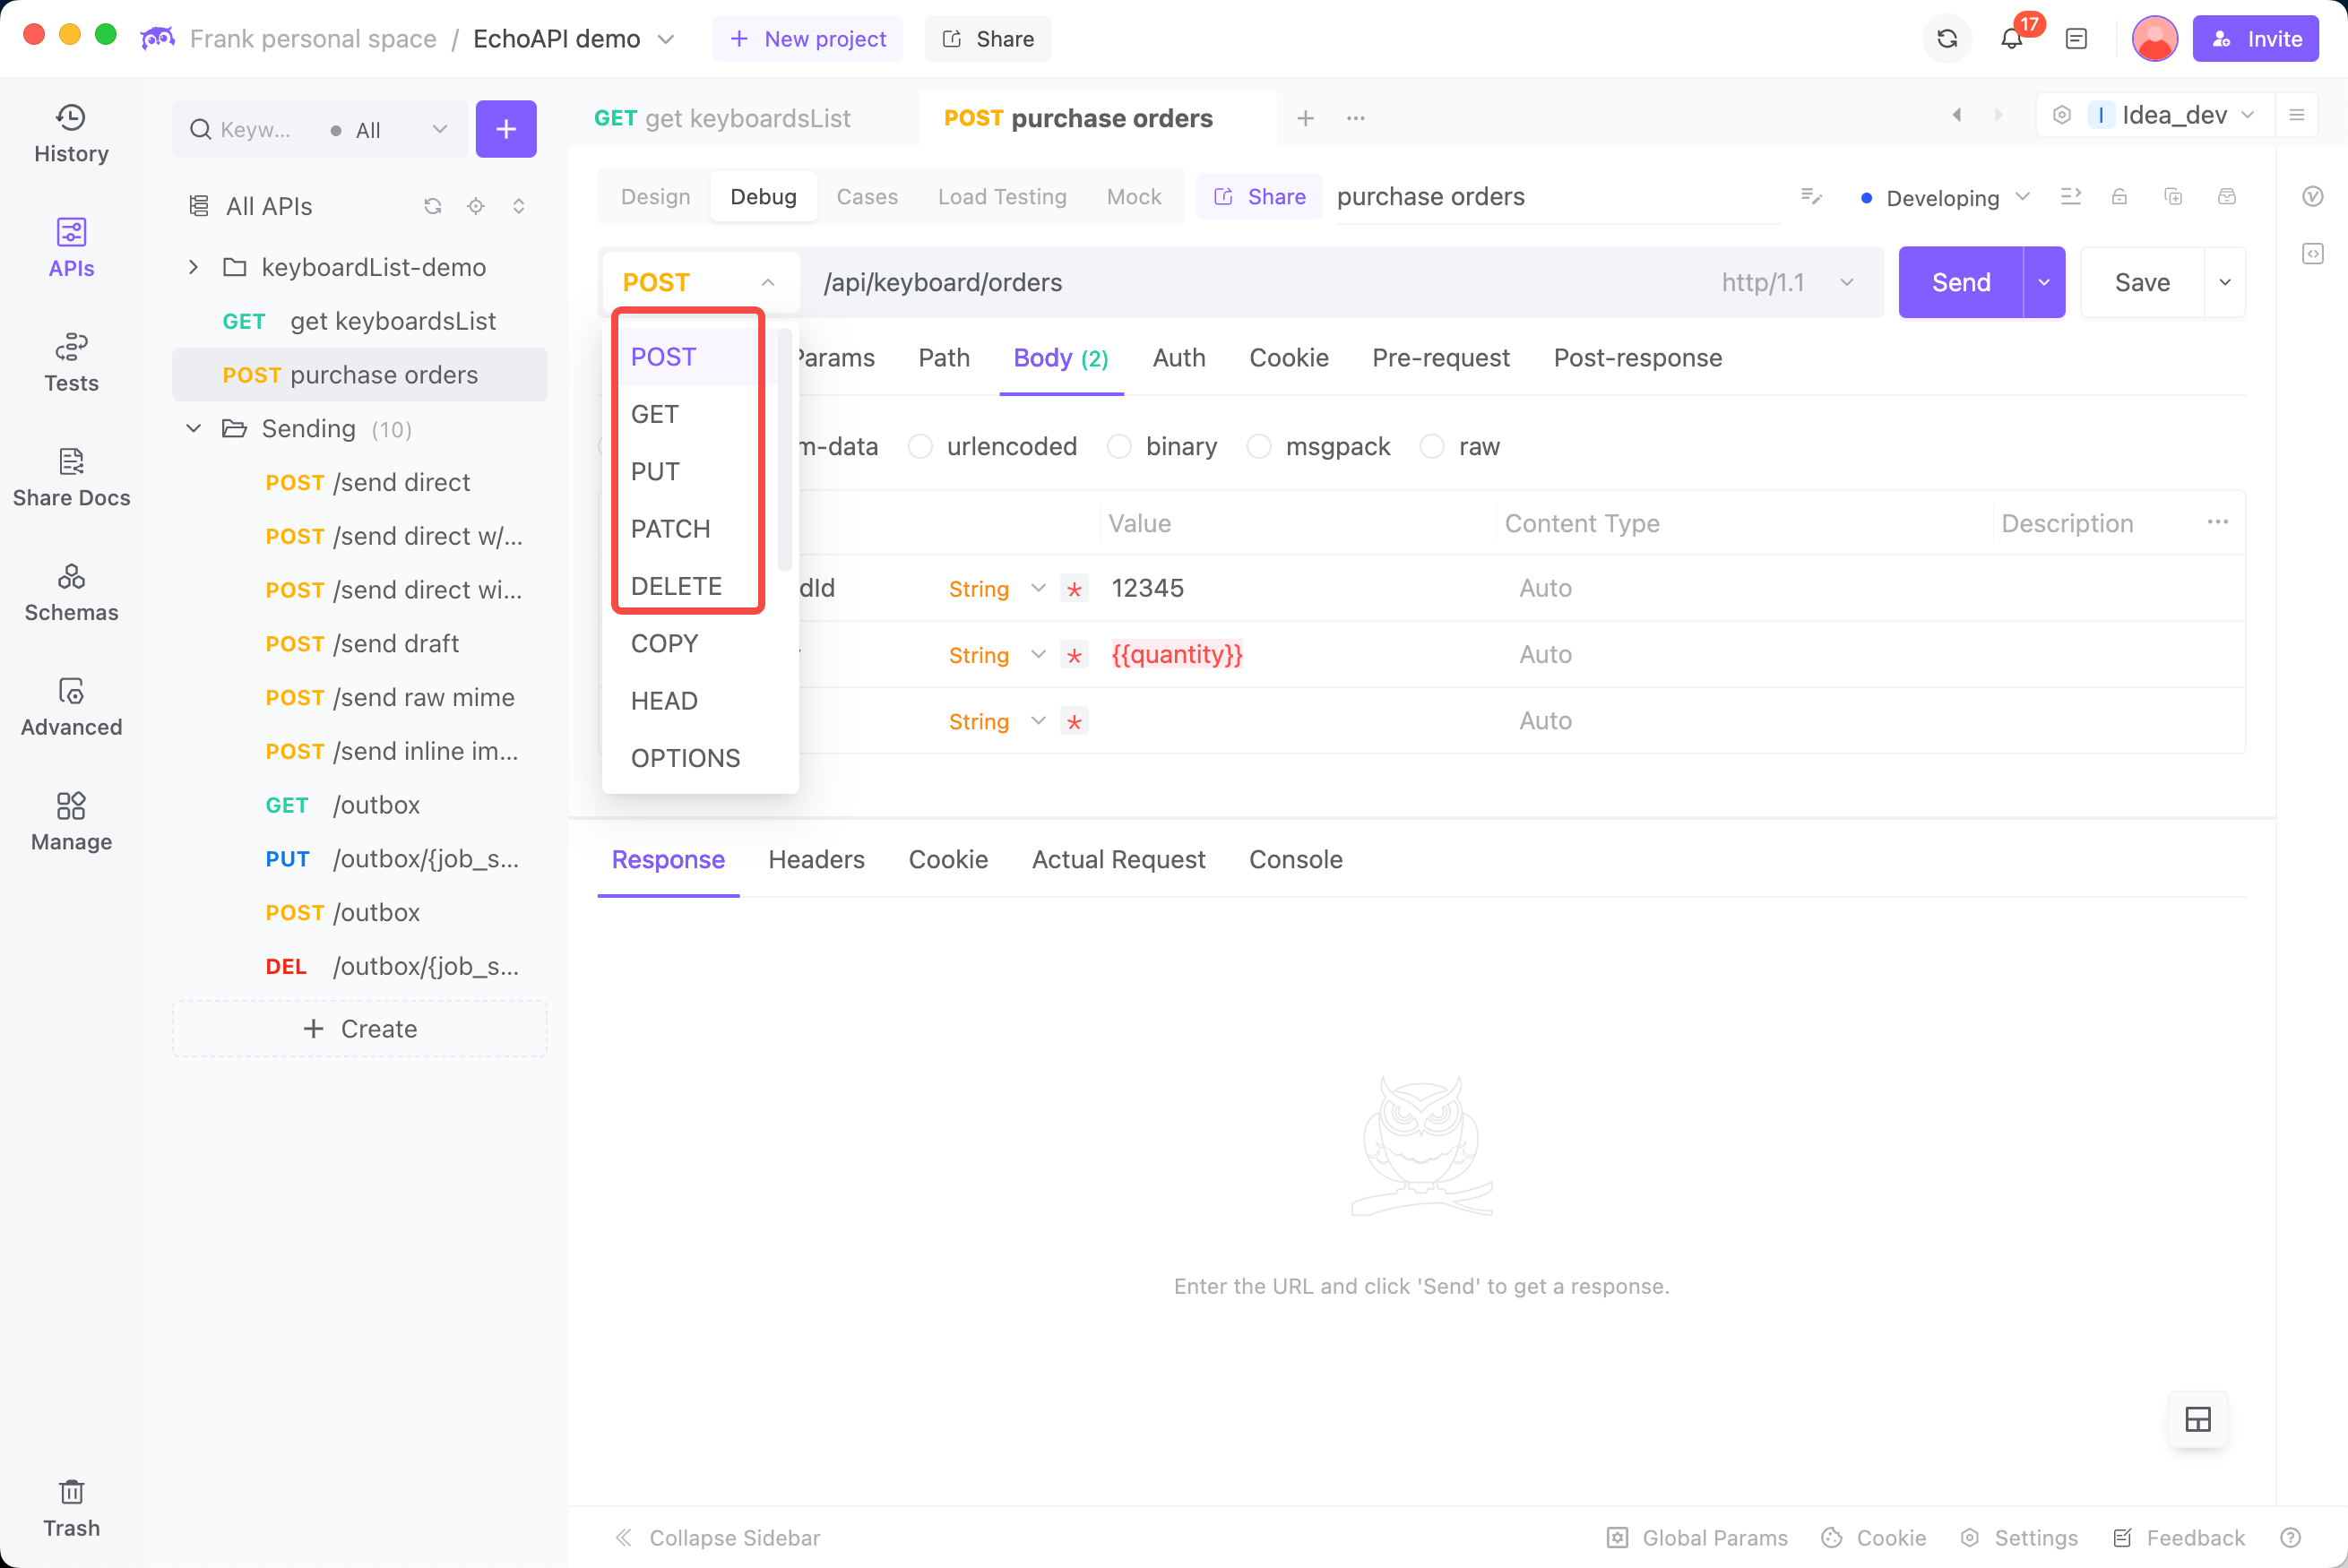
Import cURL with One Click
EchoAPI is perfectly compatible with cURL, allowing you to easily import cURL requests into EchoAPI with just one click. You can also reverse-generate cURL commands from the APIs saved in EchoAPI, which is highly convenient.
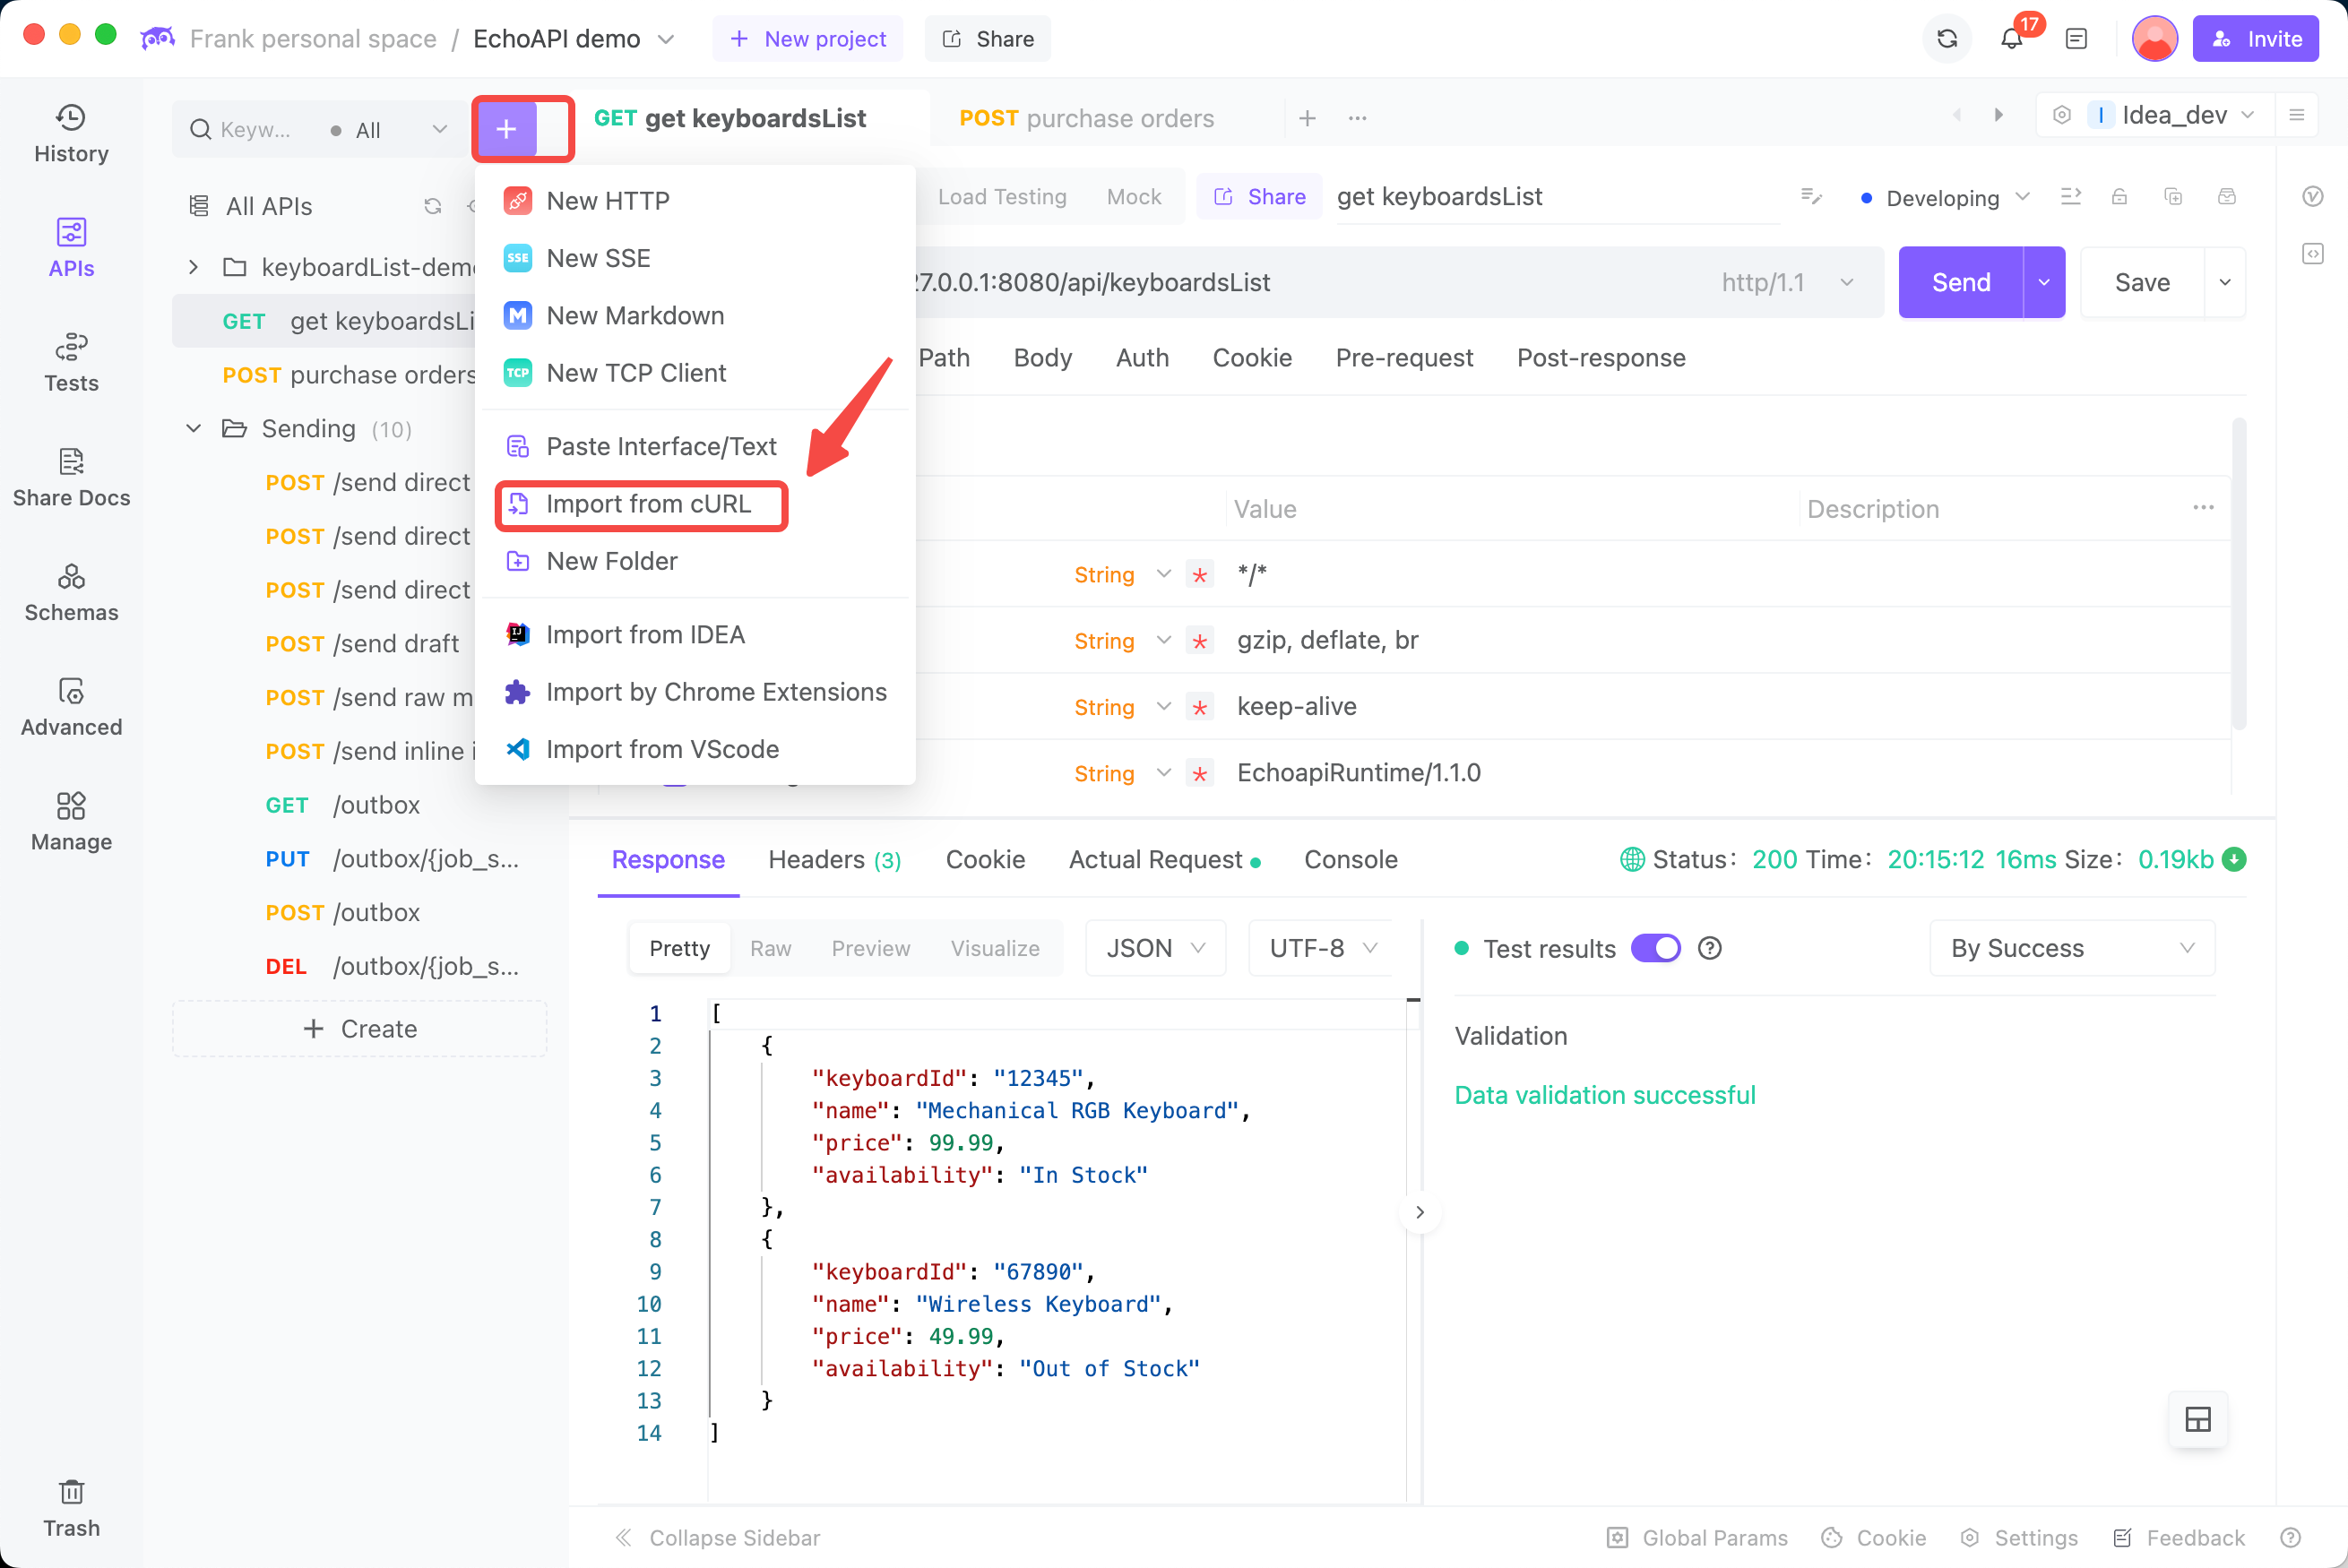
Step 1
Open EchoAPI and hover over the “+” button in the top left, then click on "Import from cURL."
Step 2
Paste your cURL command into the input box and click the "Import" button.
Step 3
EchoAPI will quickly parse the cURL command, enabling you to review the definitions in each tab. If everything looks correct, click "Send" to effortlessly make the request.
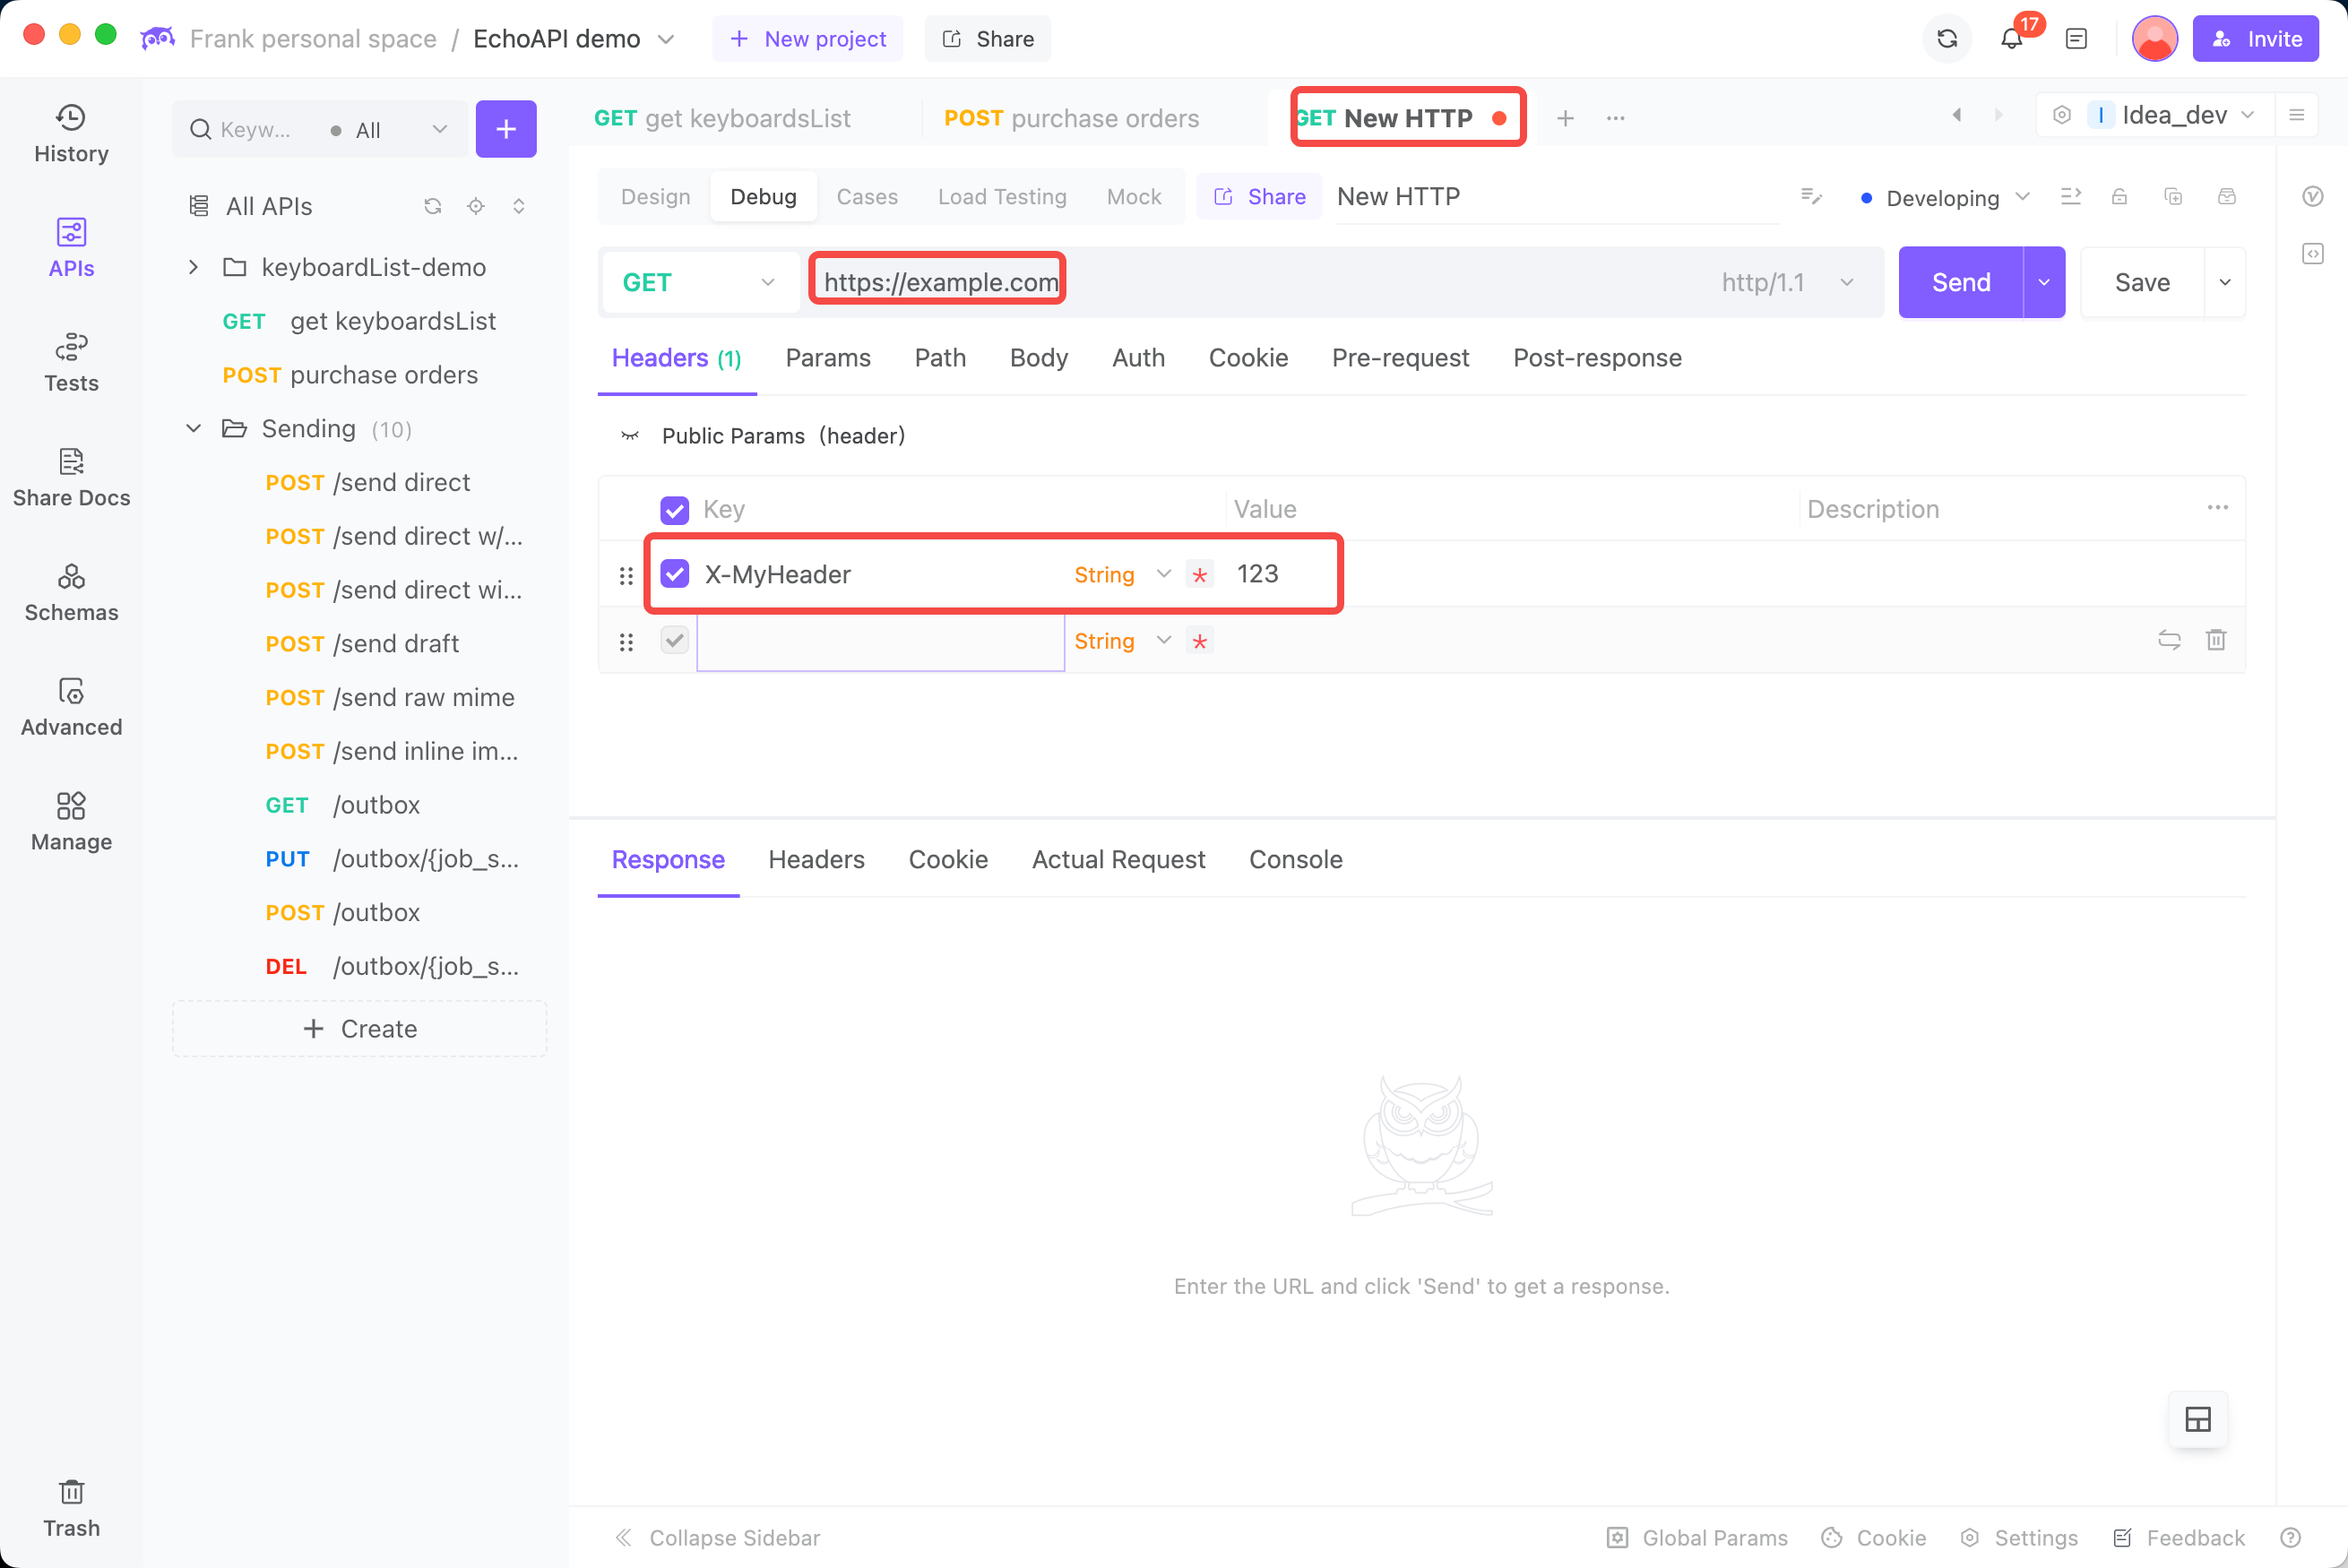
As shown above, EchoAPI is a highly user-friendly API management tool that allows you to import and utilize cURL requests in a simple way.
Conclusion
cURL is a powerful tool for sending HTTP requests from the command line, but it has limitations, such as difficulties in request reuse and result visualization. To complement these limitations, EchoAPI serves as an easy-to-use, powerful GUI-based tool.
EchoAPI allows for the effortless importation, visualization, saving, and automation of cURL requests, enabling more efficient and effective API testing when used in conjunction with cURL.


 EchoAPI for VS Code

 EchoAPI for IntelliJ IDEA

 EchoAPl-Interceptor

 EchoAPl CLI
 EchoAPI Client
 API Design
 API Debug
 API Documentation
 Mock Server


