In-Depth Understanding of WebSocket and Socket.IO
This article delves into the core functionalities of WebSocket and Socket.IO, highlighting their differences, debugging techniques, and the advantages of using EchoAPI for efficient real-time communication in web development.
In modern web development, real-time communication has become a core requirement for application interaction. WebSocket and Socket.IO are two important technologies for implementing real-time communication. This article will explore the definitions of both, their main differences, debugging methods, and the advantages of EchoAPI in debugging these technologies.
WebSocket
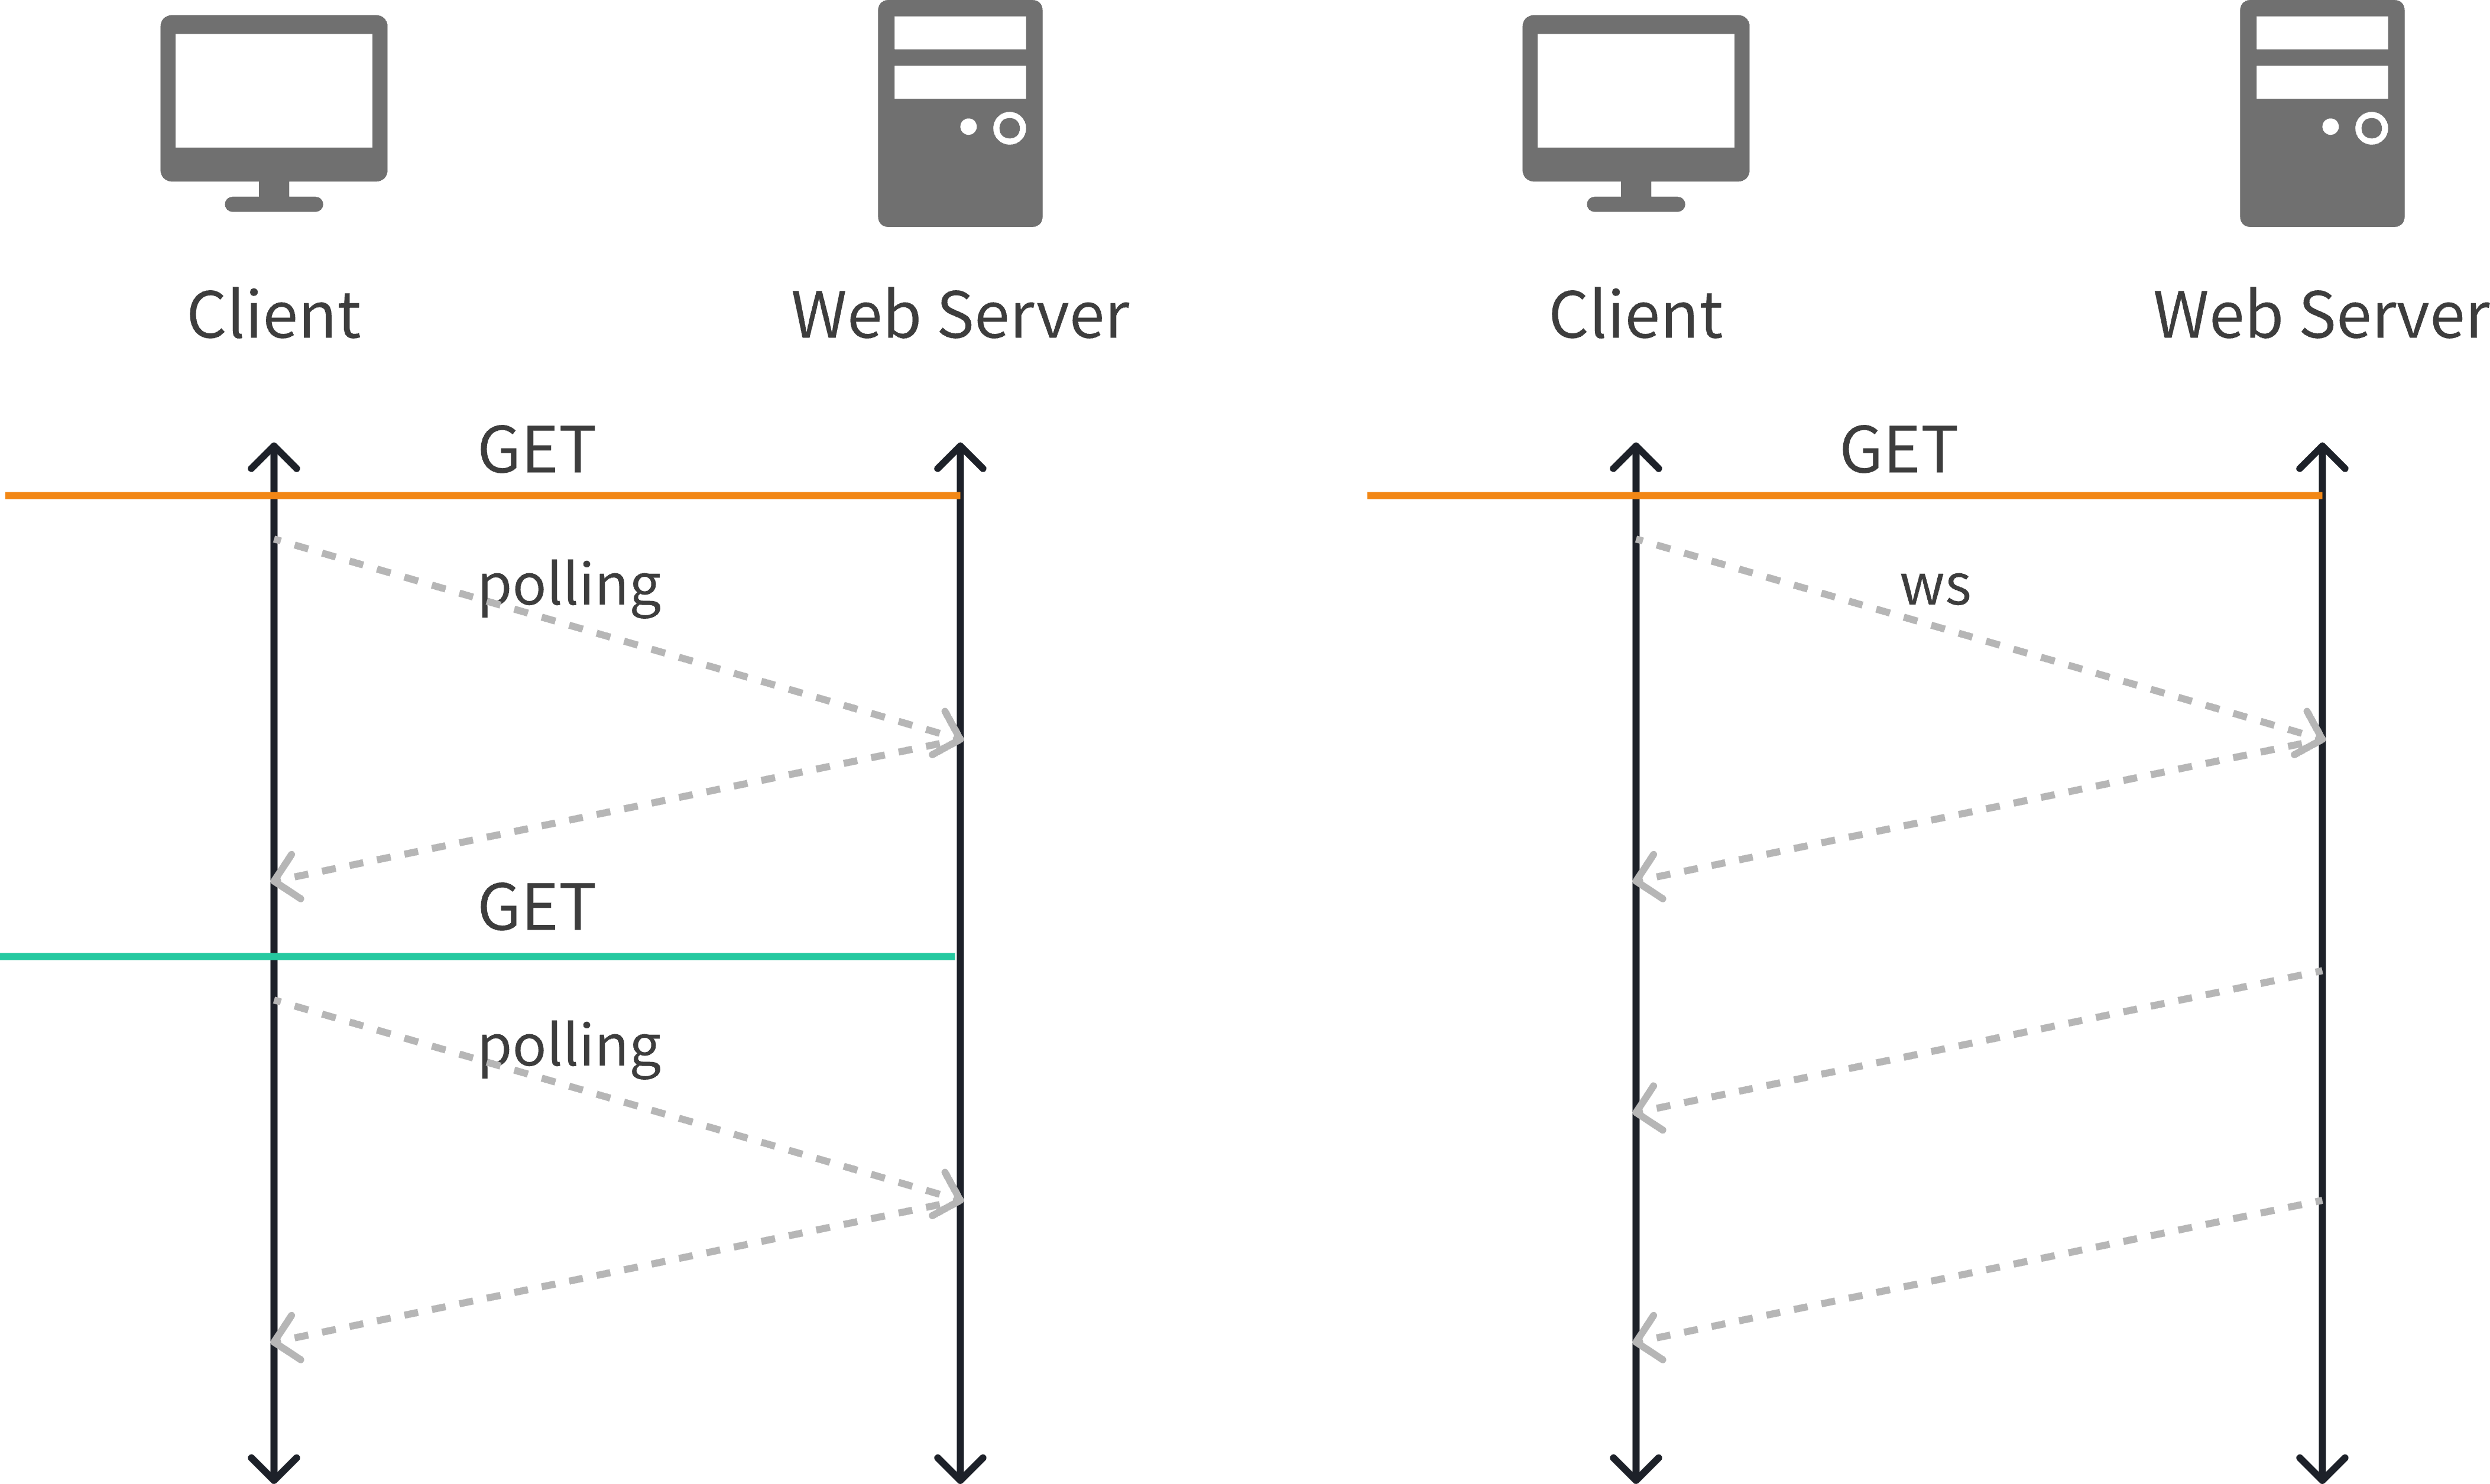
WebSocket is a network communication protocol that provides a full-duplex communication channel, allowing for simultaneous bidirectional data transmission. Unlike the traditional HTTP protocol, WebSocket allows long-lived communication over a single connection while reducing overhead.
- Advantages:
- Real-time Updates: Reduces latency, making it suitable for applications that require real-time data updates.
- Bandwidth Savings: By establishing a persistent connection, it avoids the overhead of frequent HTTP requests.

Socket.IO
Socket.IO is a JavaScript library built on top of WebSocket, providing a simplified API for real-time event-driven bidirectional communication. It not only supports WebSocket but also falls back to other transport methods (such as HTTP polling) to ensure functionality in all environments.
- Advantages:
- Cross-browser Support: Socket.IO can automatically select the best transport method, ensuring compatibility across different browsers.
- Event-driven: Facilitates convenient data exchange through event listening and emitting.
Differences Between WebSocket and Socket.IO
| Feature | WebSocket | Socket.IO |
|---|---|---|
| Protocol Type | Native protocol | Library, built on WebSocket and supports other transport methods |
| Compatibility | Requires browser support for WebSocket | Supports various browsers, ensuring compatibility through an automatic fallback mechanism |
| Functionality | Implements low-latency bidirectional communication | Provides rich features such as event mechanisms, rooms, and middleware support |
| Performance | Higher performance, suitable for scenarios requiring low latency | Performance may be slightly lower than WebSocket under high load due to events and fallback mechanisms |

How to Debug WebSocket and Socket.IO
Debugging WebSocket
To test WebSocket using EchoAPI, follow these steps for setup.
Step 1: Create a New Request
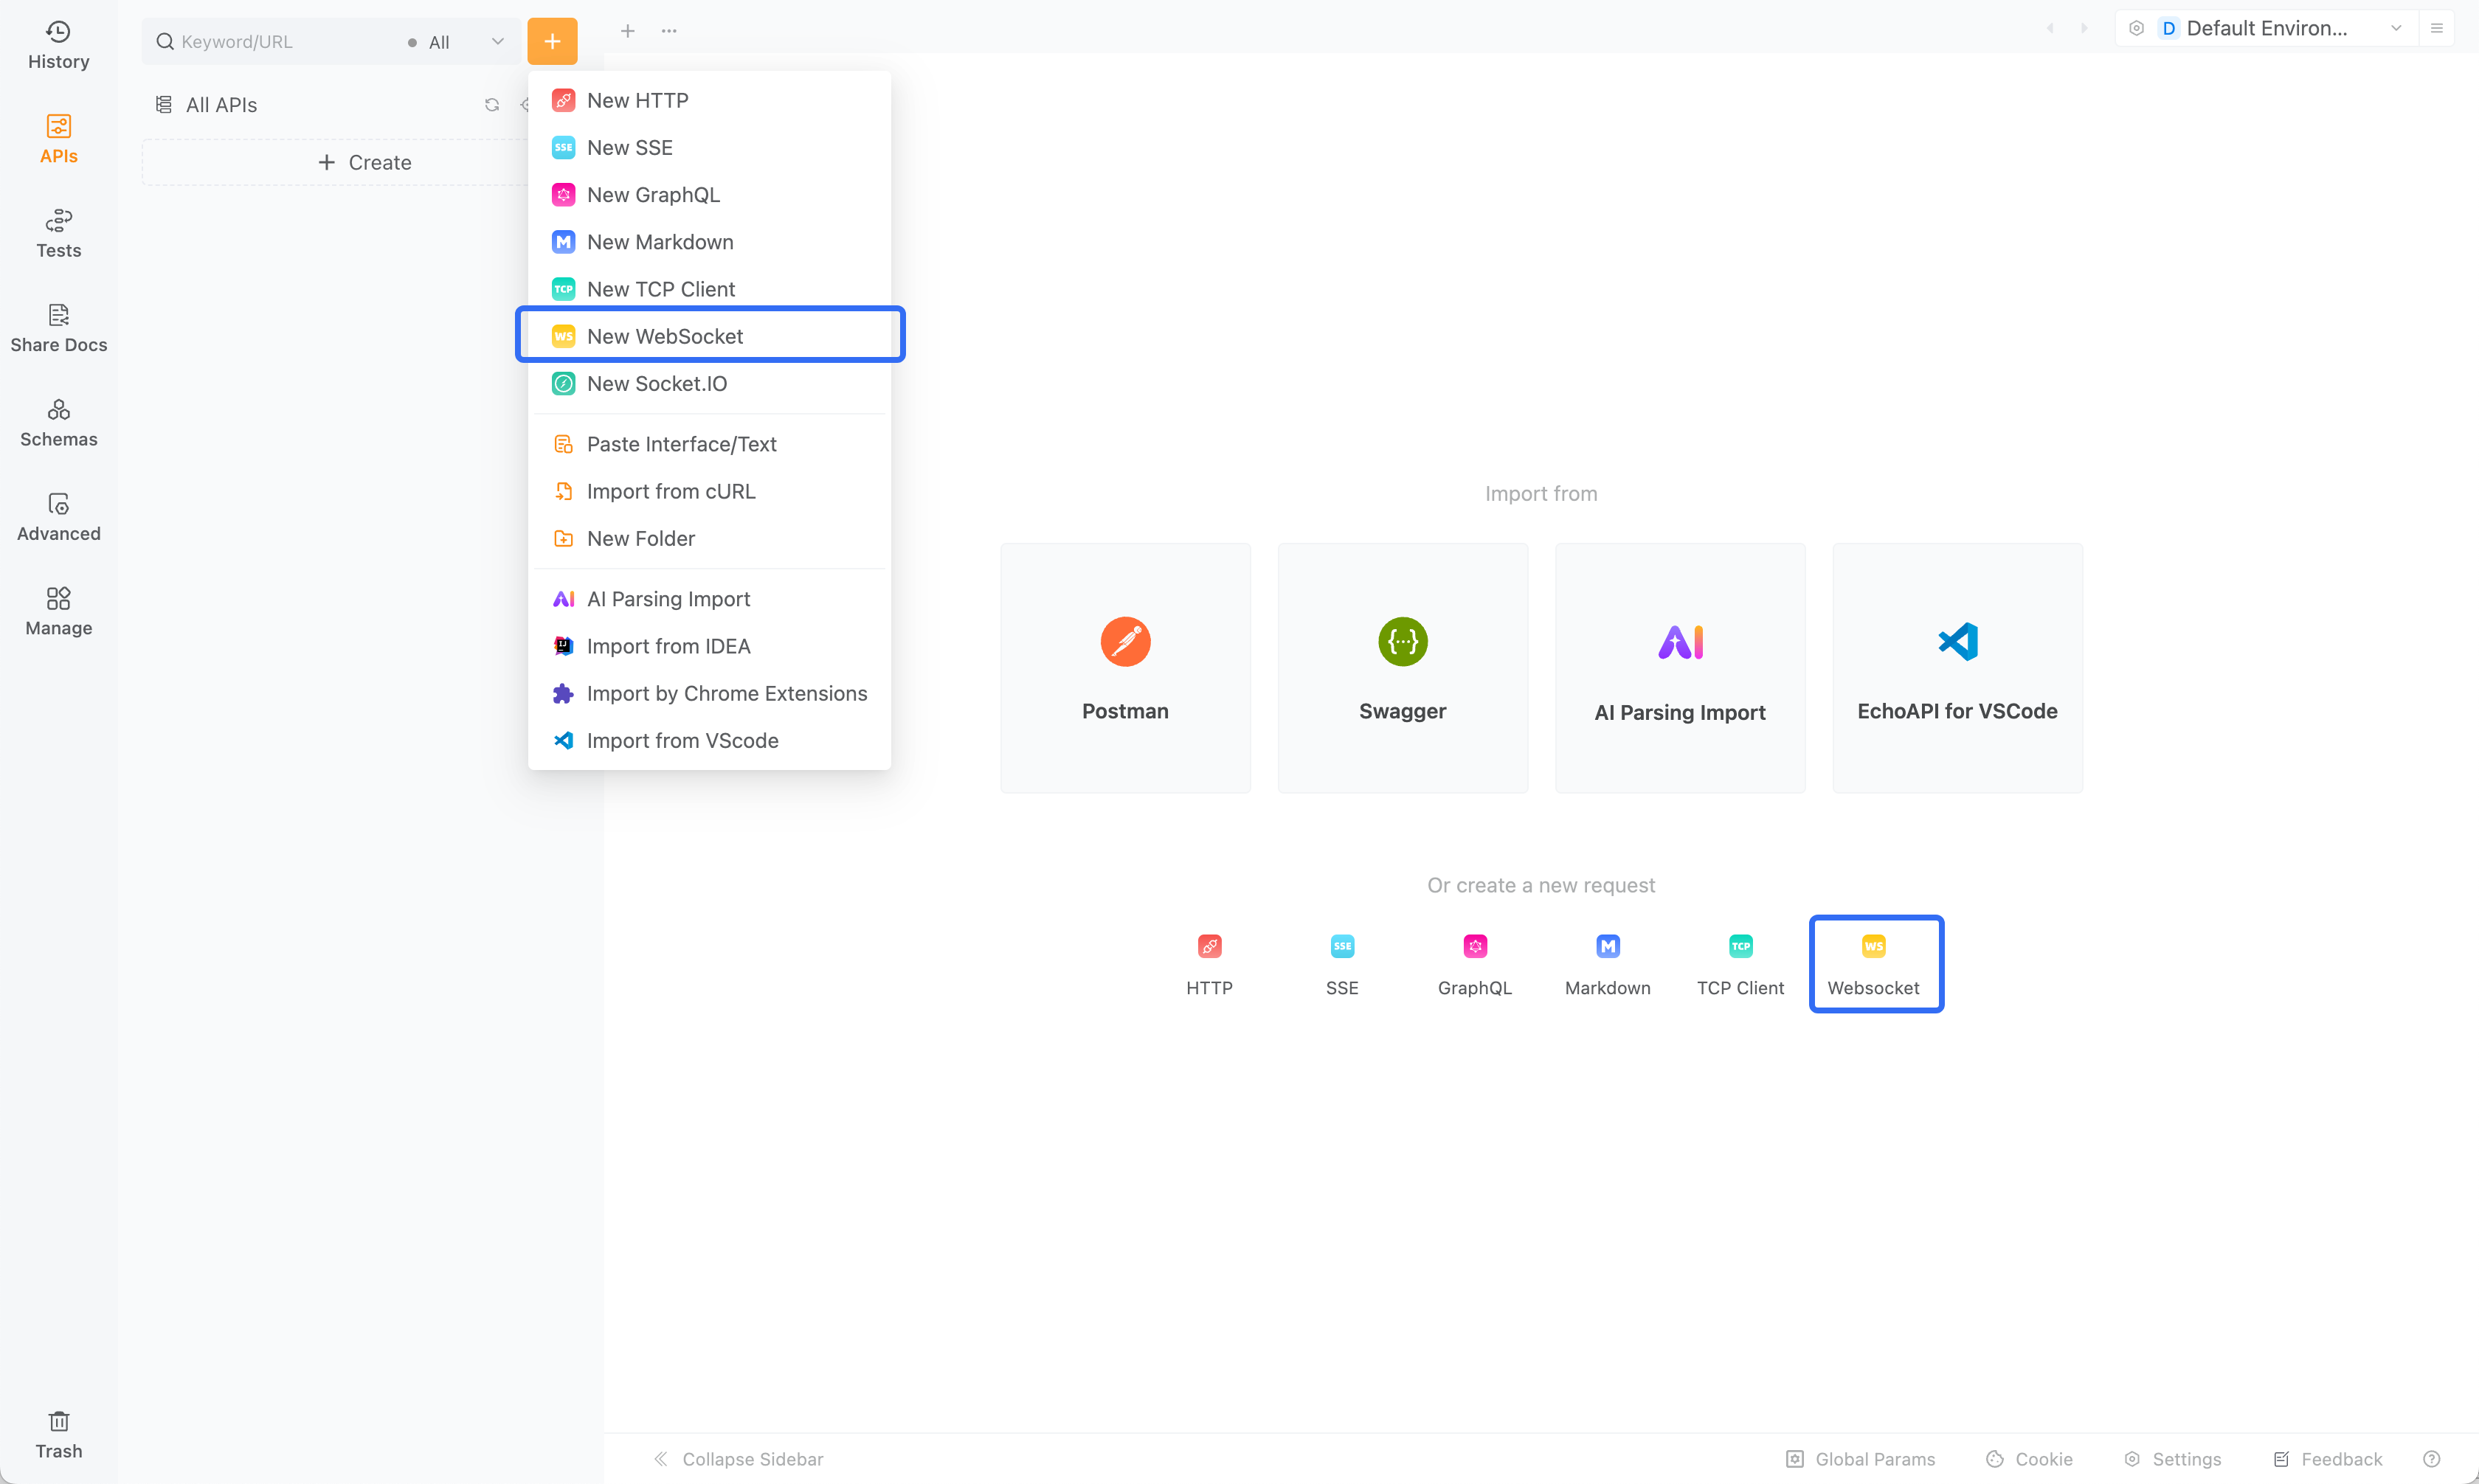
Open EchoAPI and click the “+” button in the left menu to create a new request. In the request type dropdown menu, select WebSocket.
Step 2: Configure the WebSocket Connection
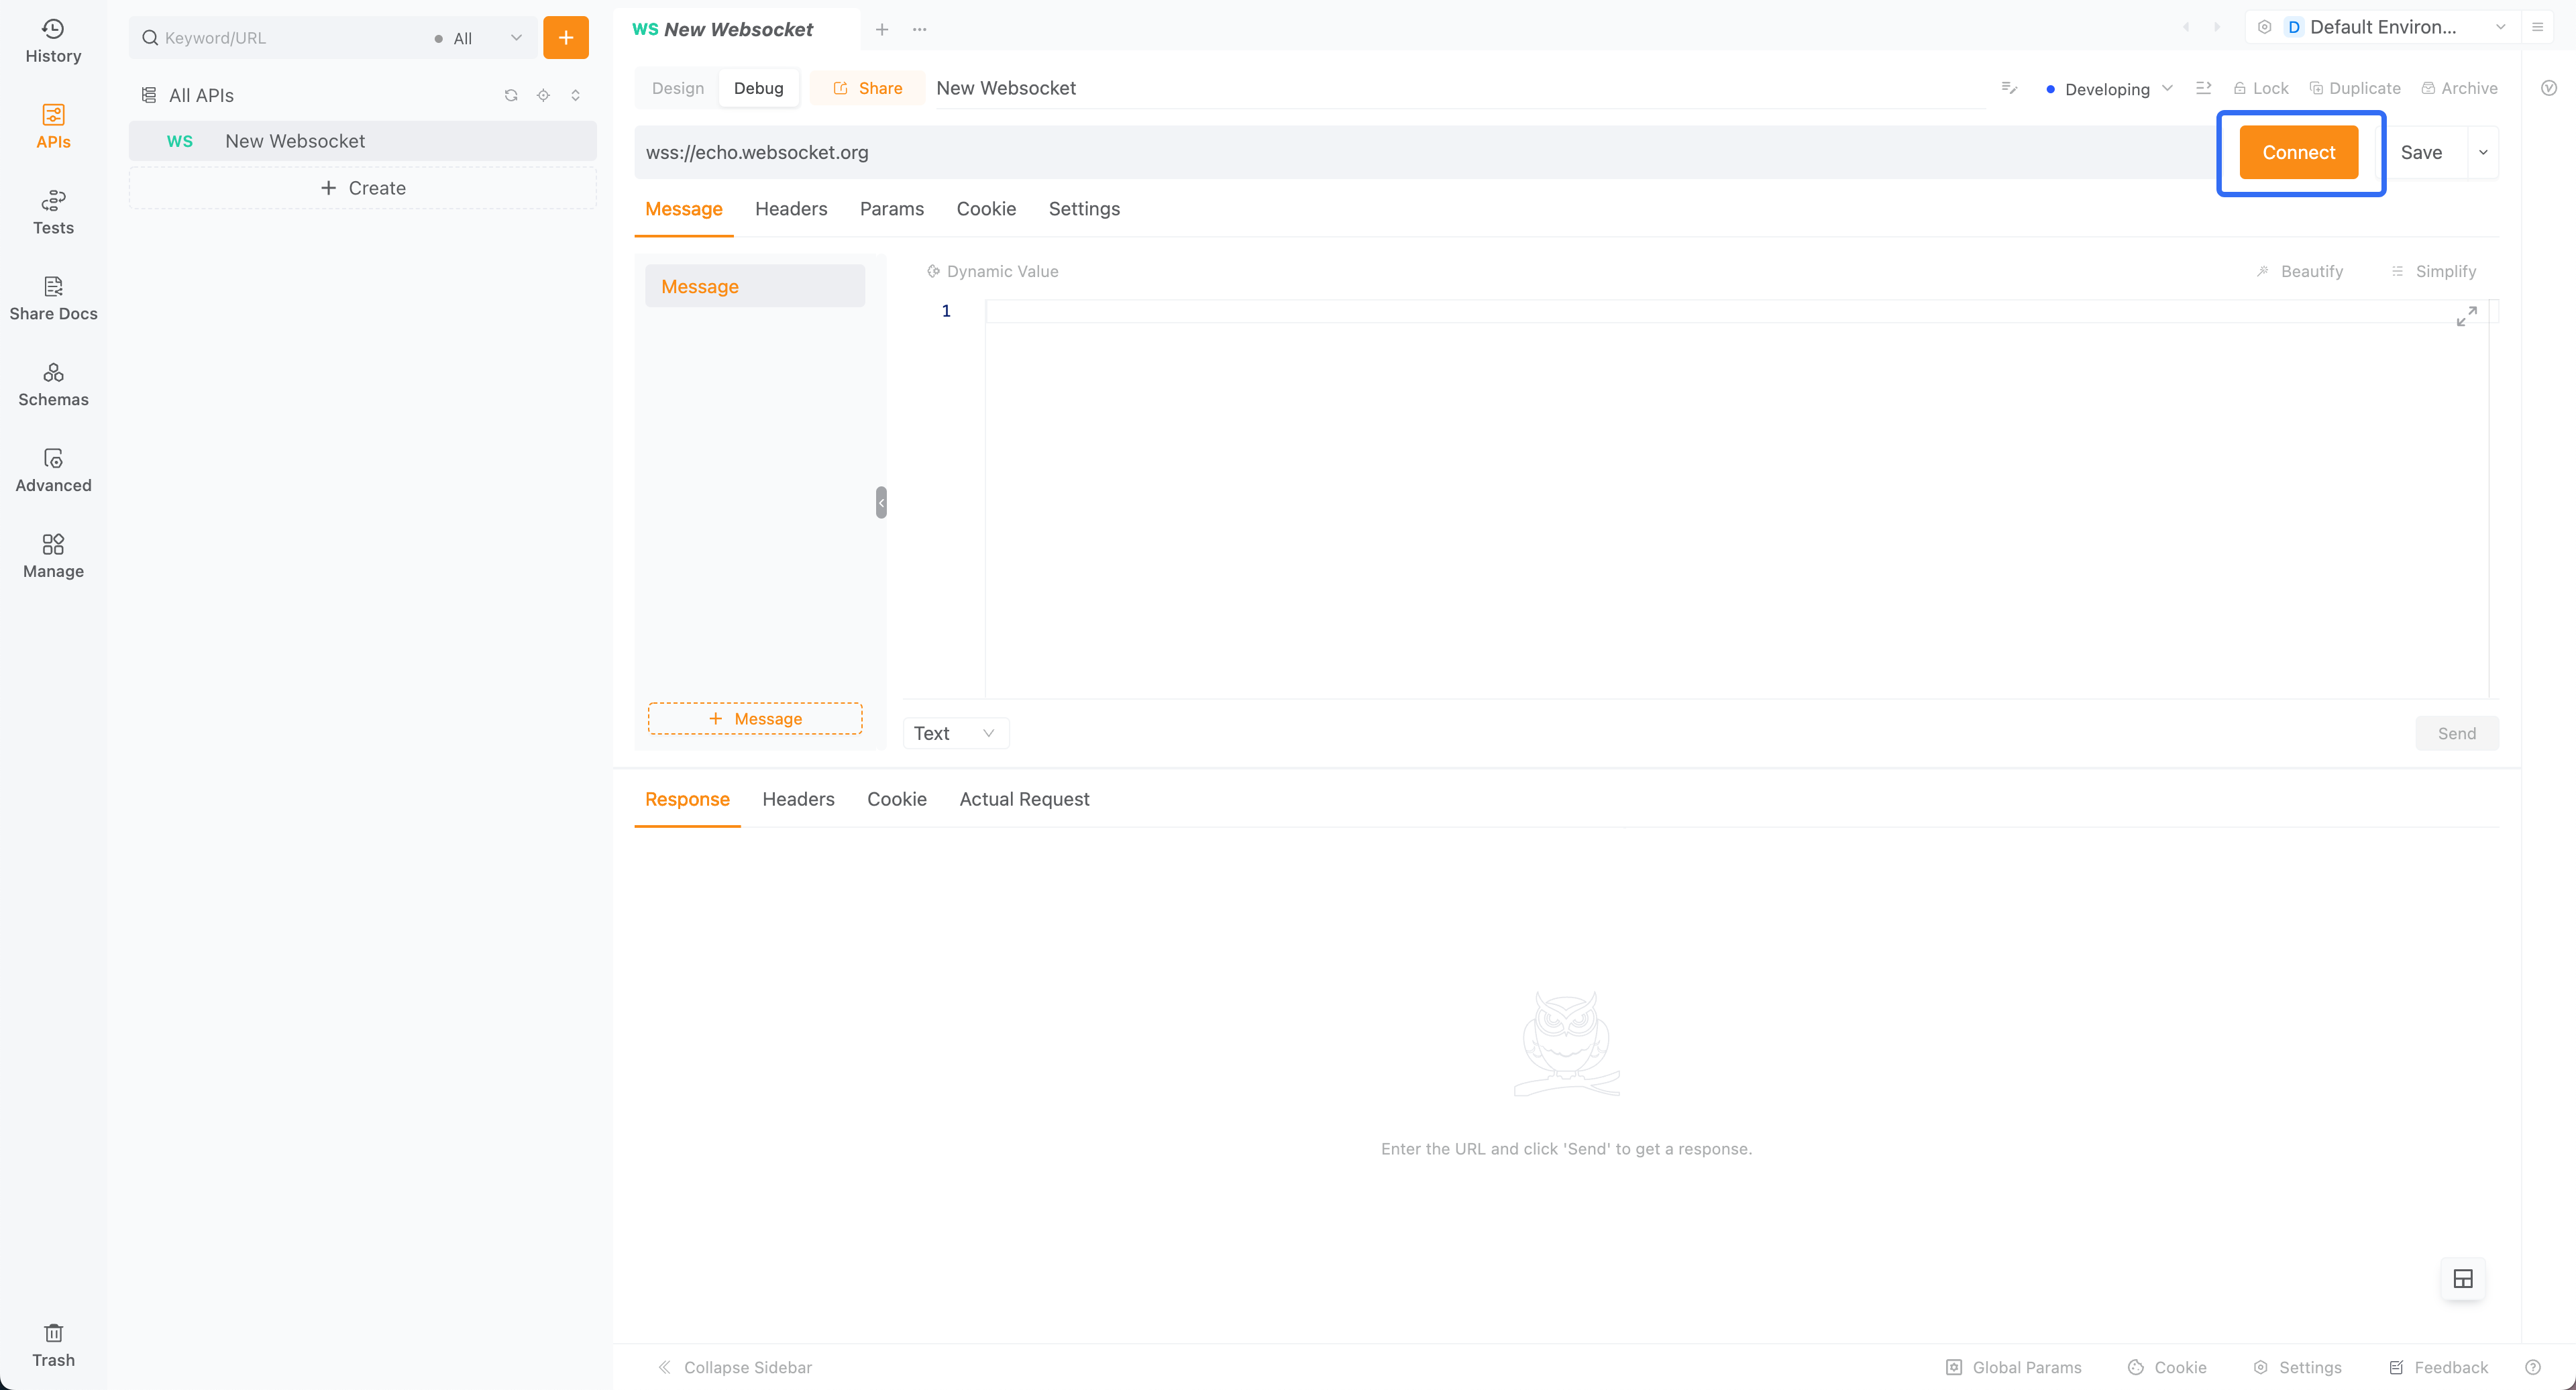
Ensure you are on the Debug page. In the URL box, enter the WebSocket server URL, for example, wss://echo.websocket.org. Make sure to replace it with your actual WebSocket server address and port. Note that the address should start with ws:// or wss://.
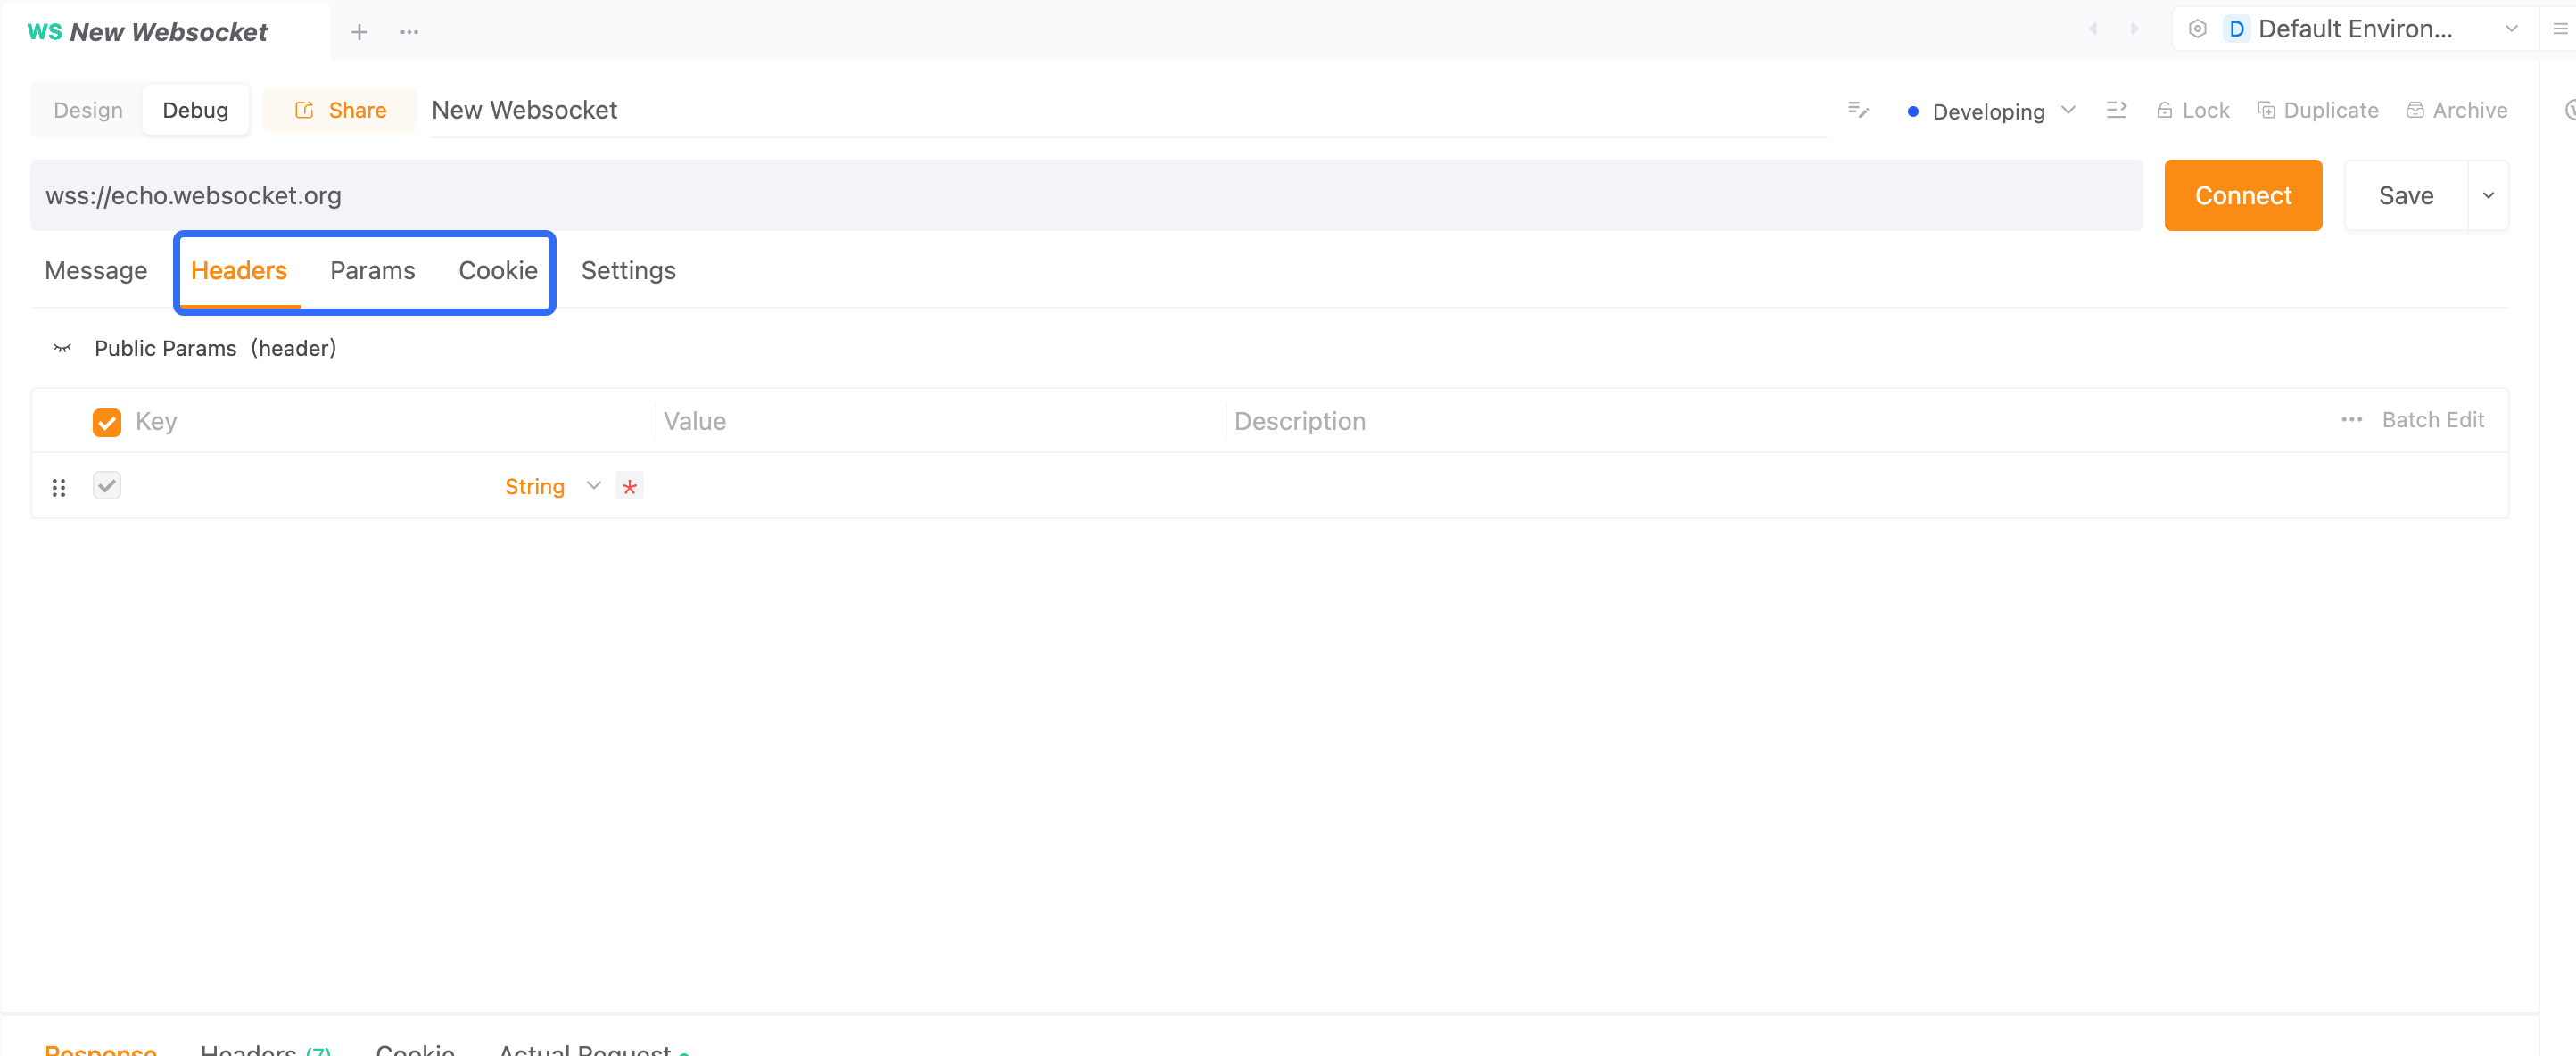
If you need to enter request headers or parameters, you can configure them in the position shown in the image below.
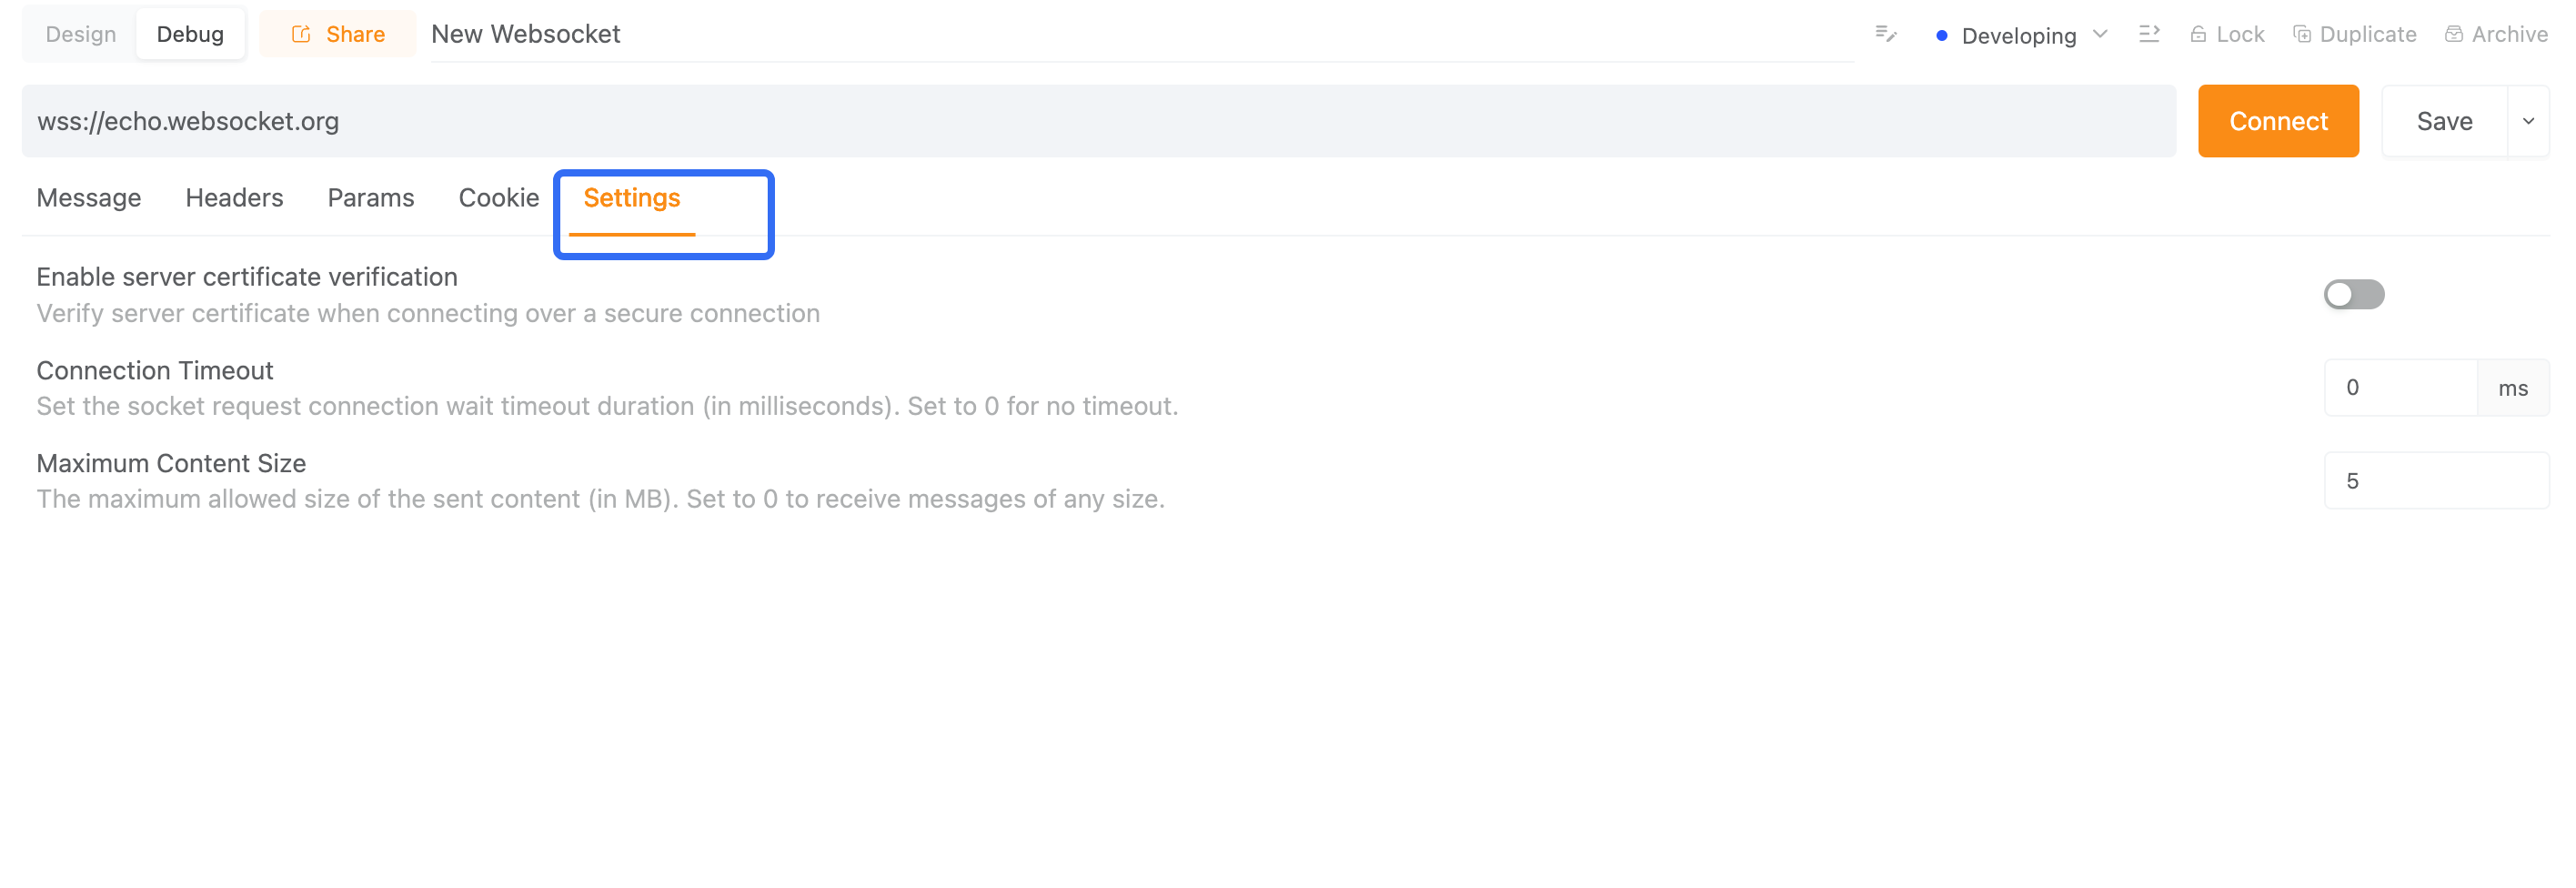
In the settings tab, you can also configure timeout and other settings.
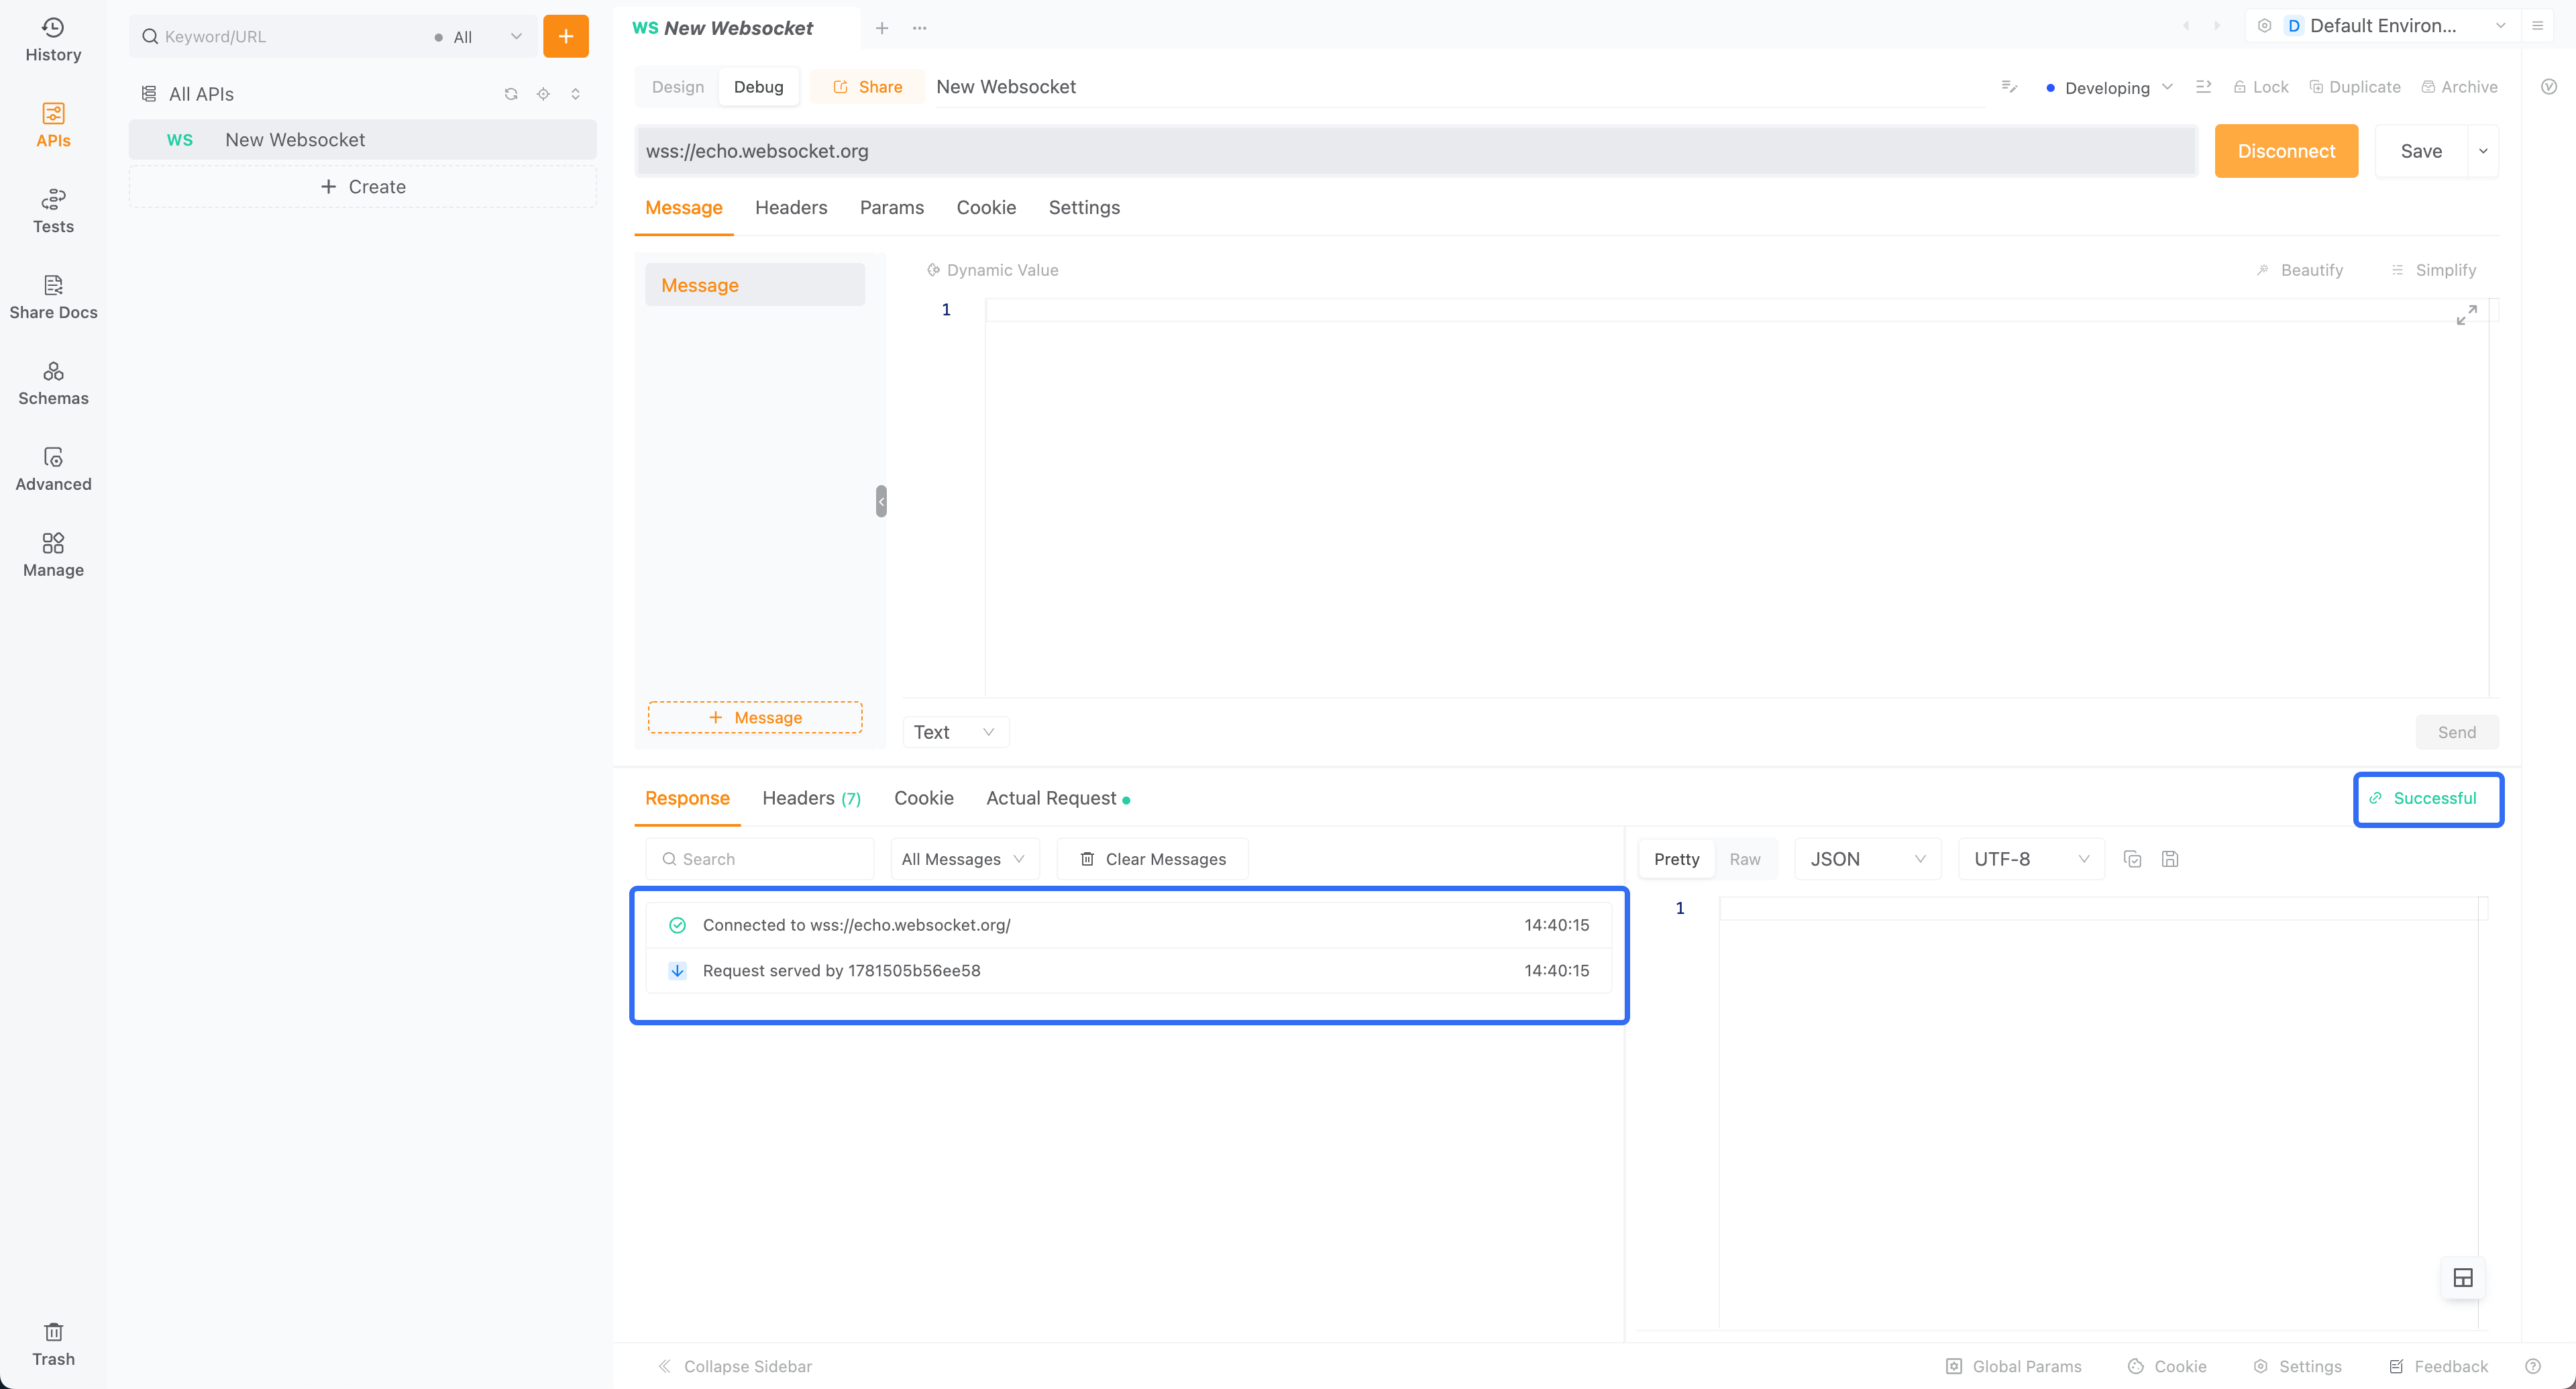
Click the "Connect" button to establish the connection.
Step 3: Send a Message
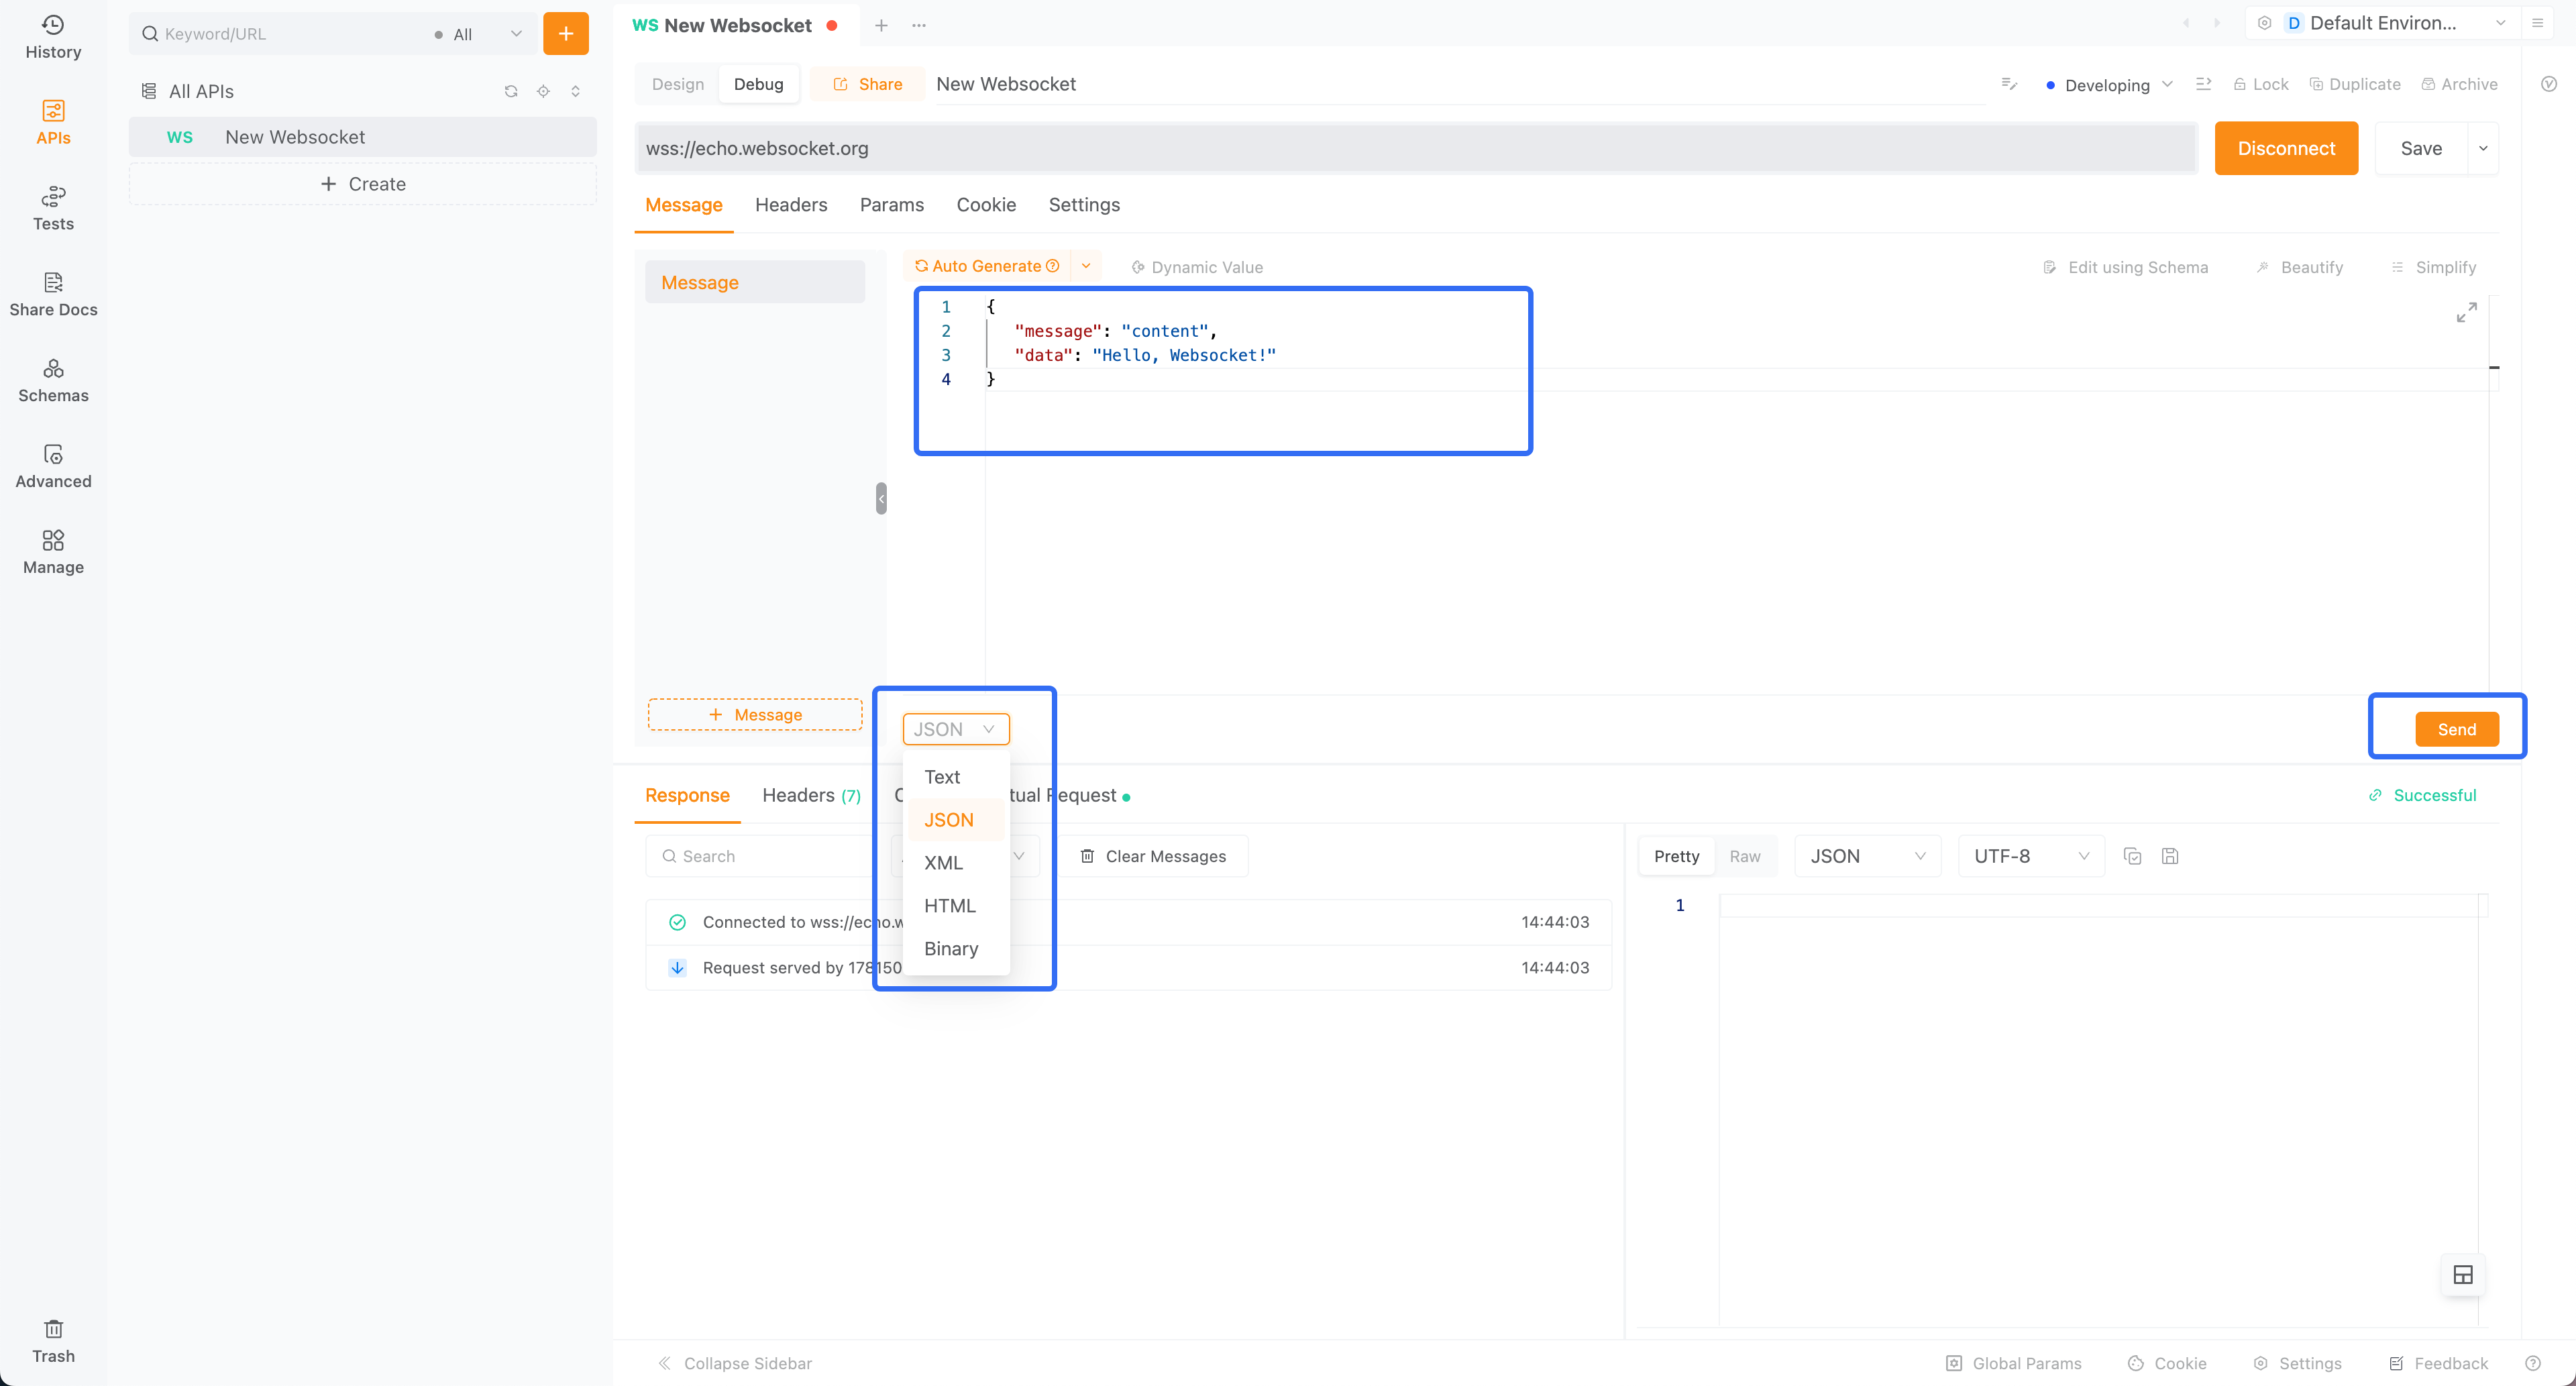
Once connected successfully, you can send WebSocket messages. WebSocket messages typically have a type, and you can send them as a JSON object. In the input box, enter the message you want to send. For example:
{
   "message": "content",
   "data": "Hello, WebSocket!"
}
:::tip tips
On the left side, you can quickly create multiple messages for debugging, eliminating the need to create multiple WebSocket connections for each different message type. You can add various types of message requests in the same WebSocket connection for archiving, making subsequent debugging faster and more efficient!
:::
You can also double-click the name to rename it.

Step 4: Receive Messages
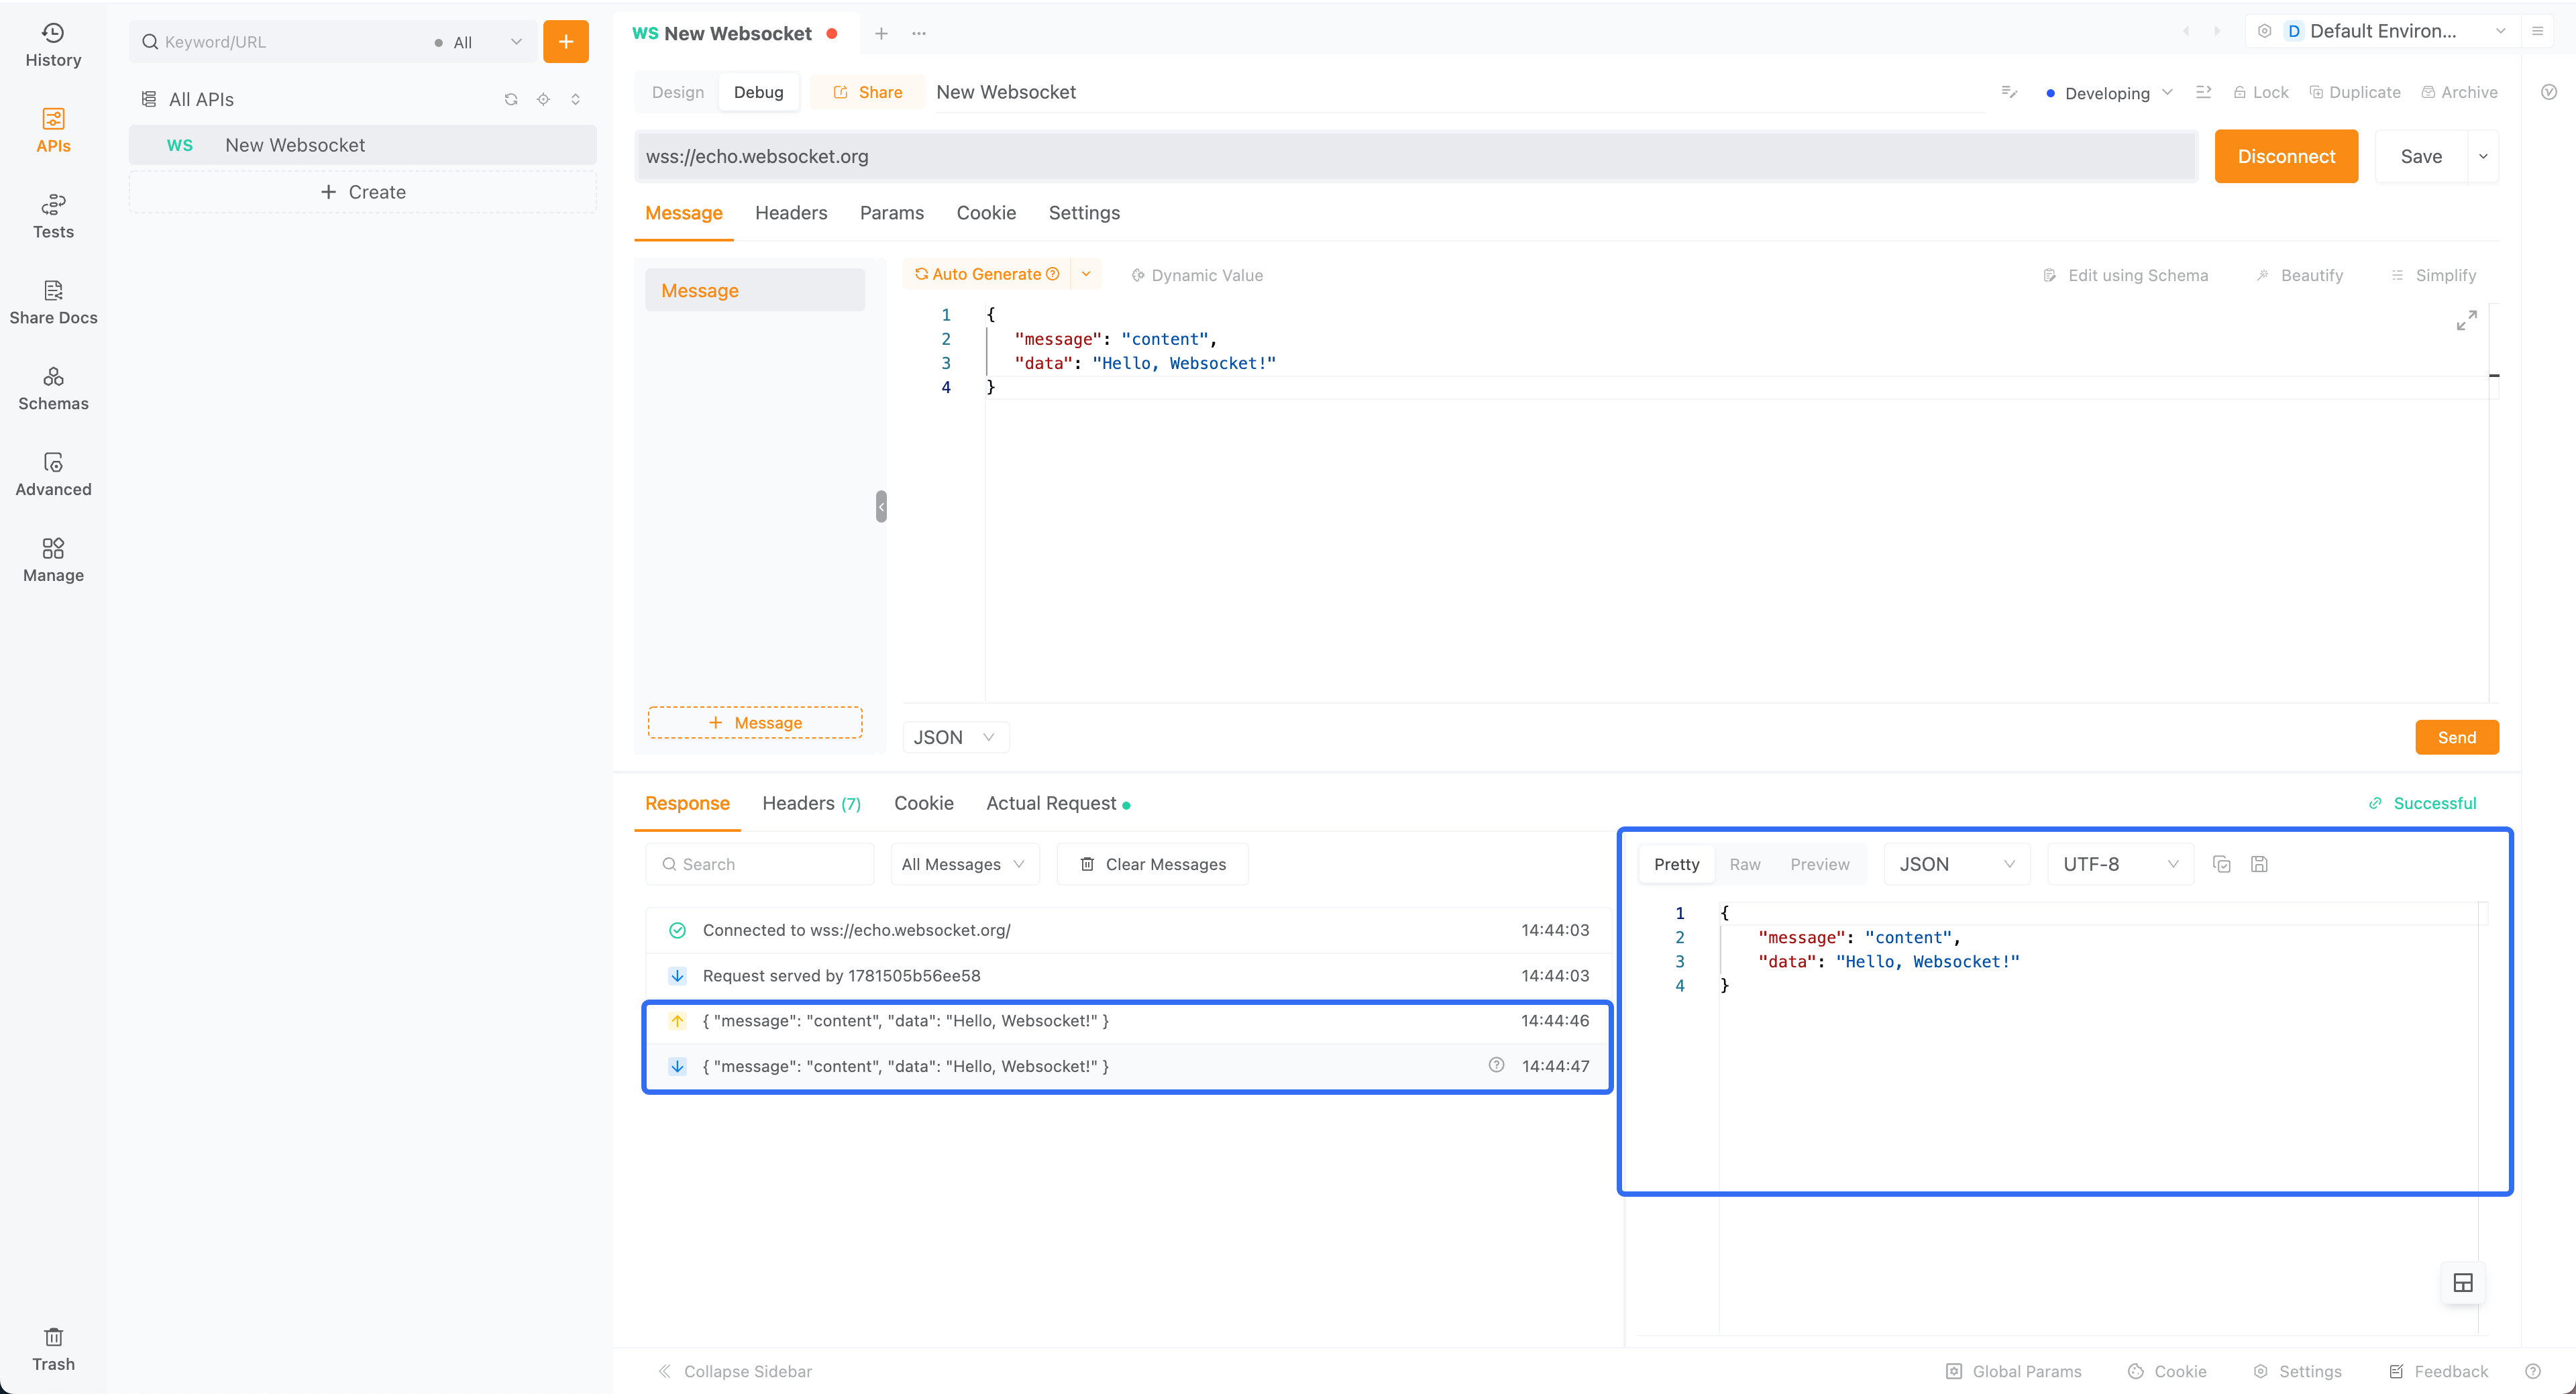
After successfully sending a message, you can start receiving messages from the server. All received messages will be displayed in the “Response” section of EchoAPI.
Debugging Socket.IO
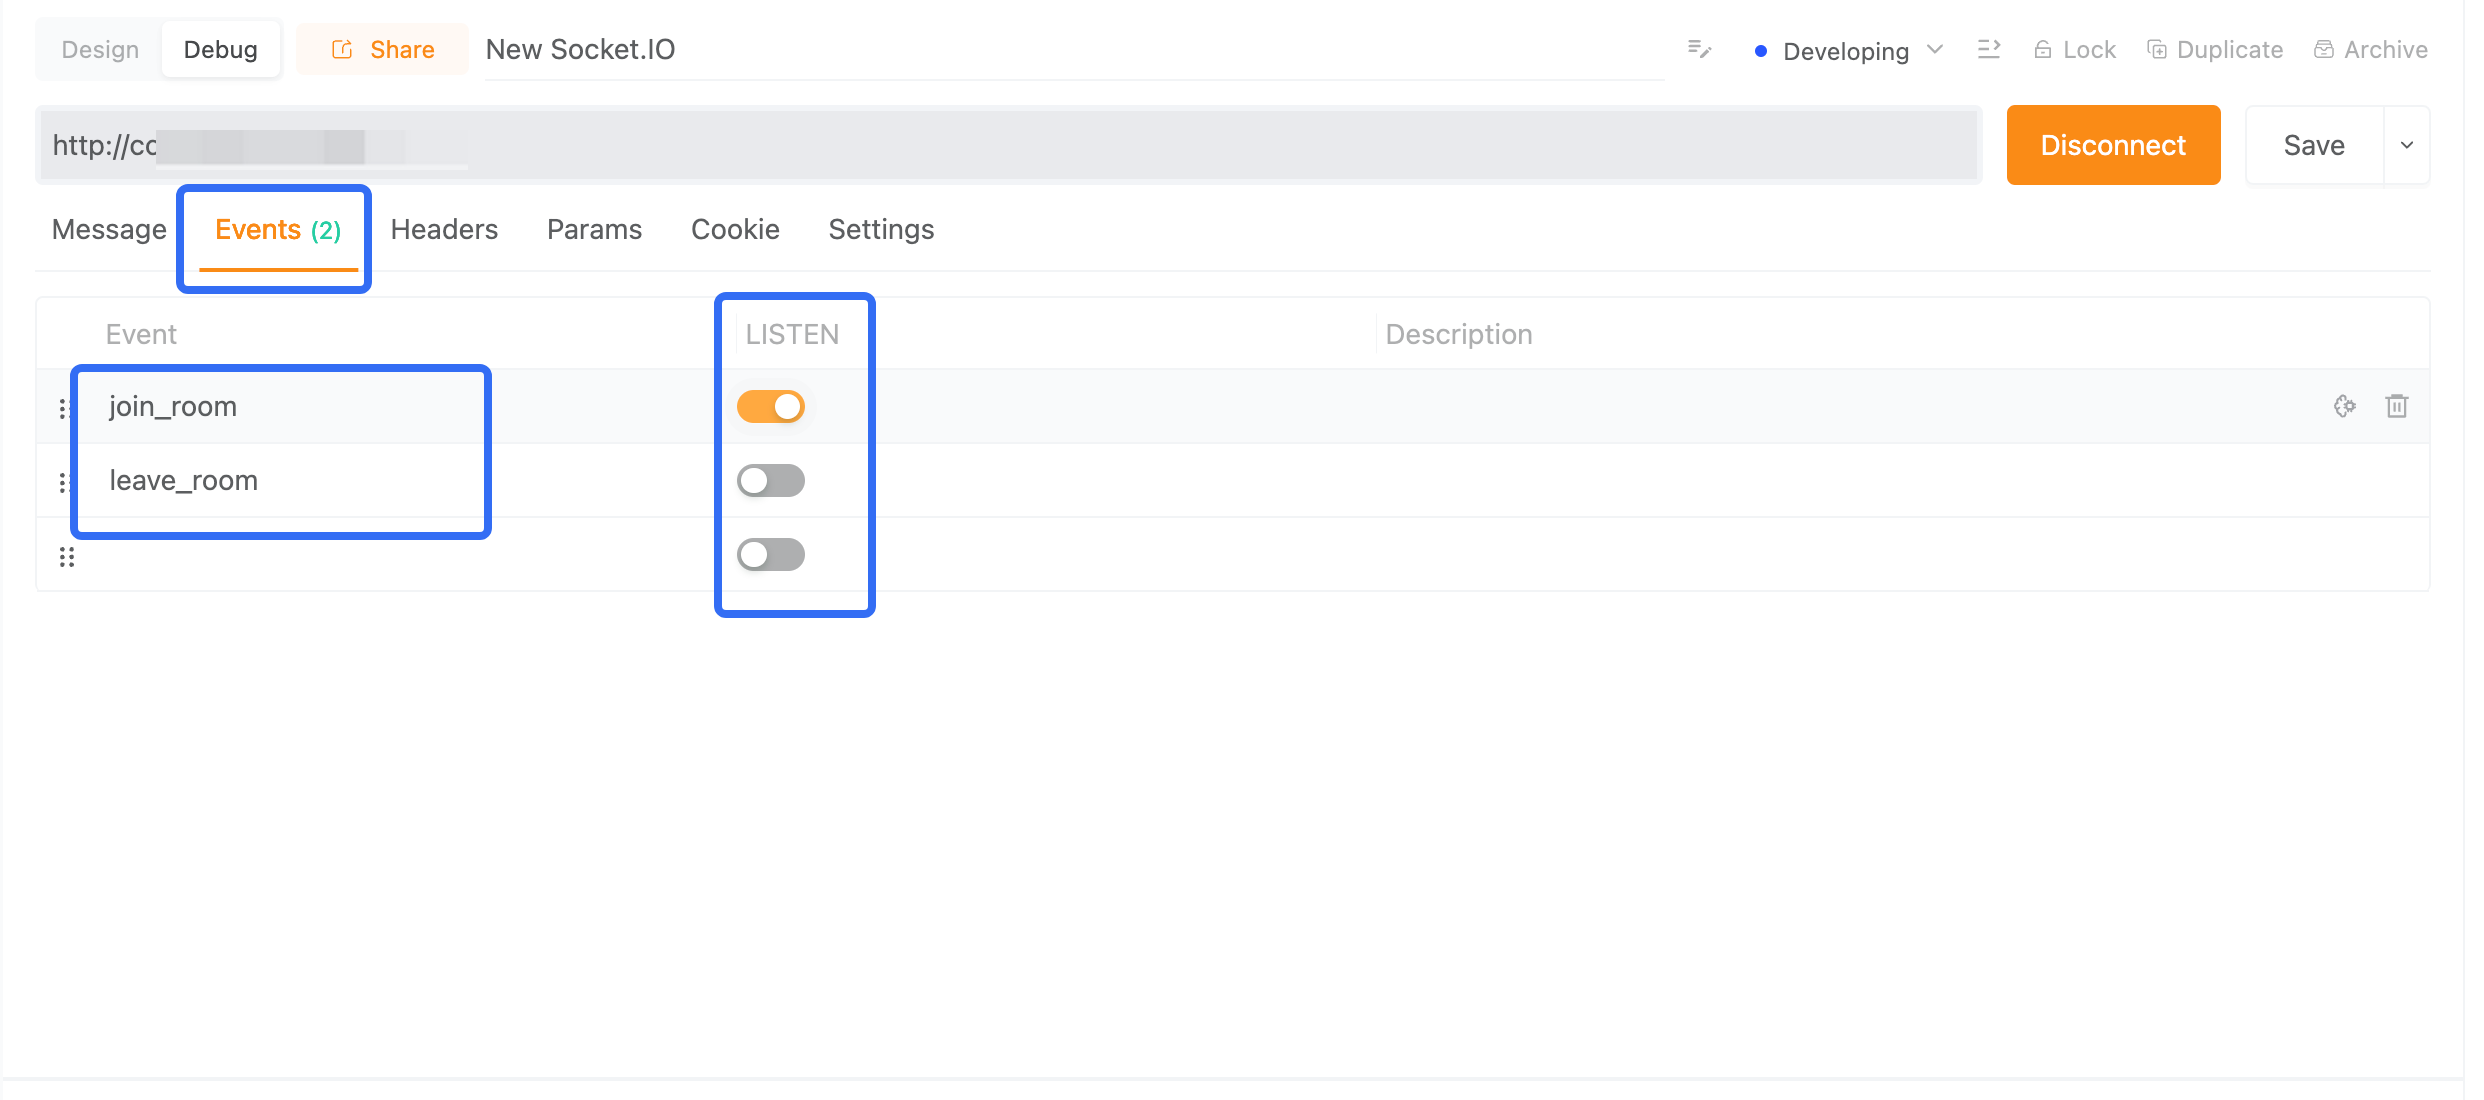
The debugging steps for Socket.IO are 90% similar to those for WebSocket, with the addition of event settings to support event listening.
EchoAPI Features for WebSocket and Socket.IO
1. Clear API Documentation
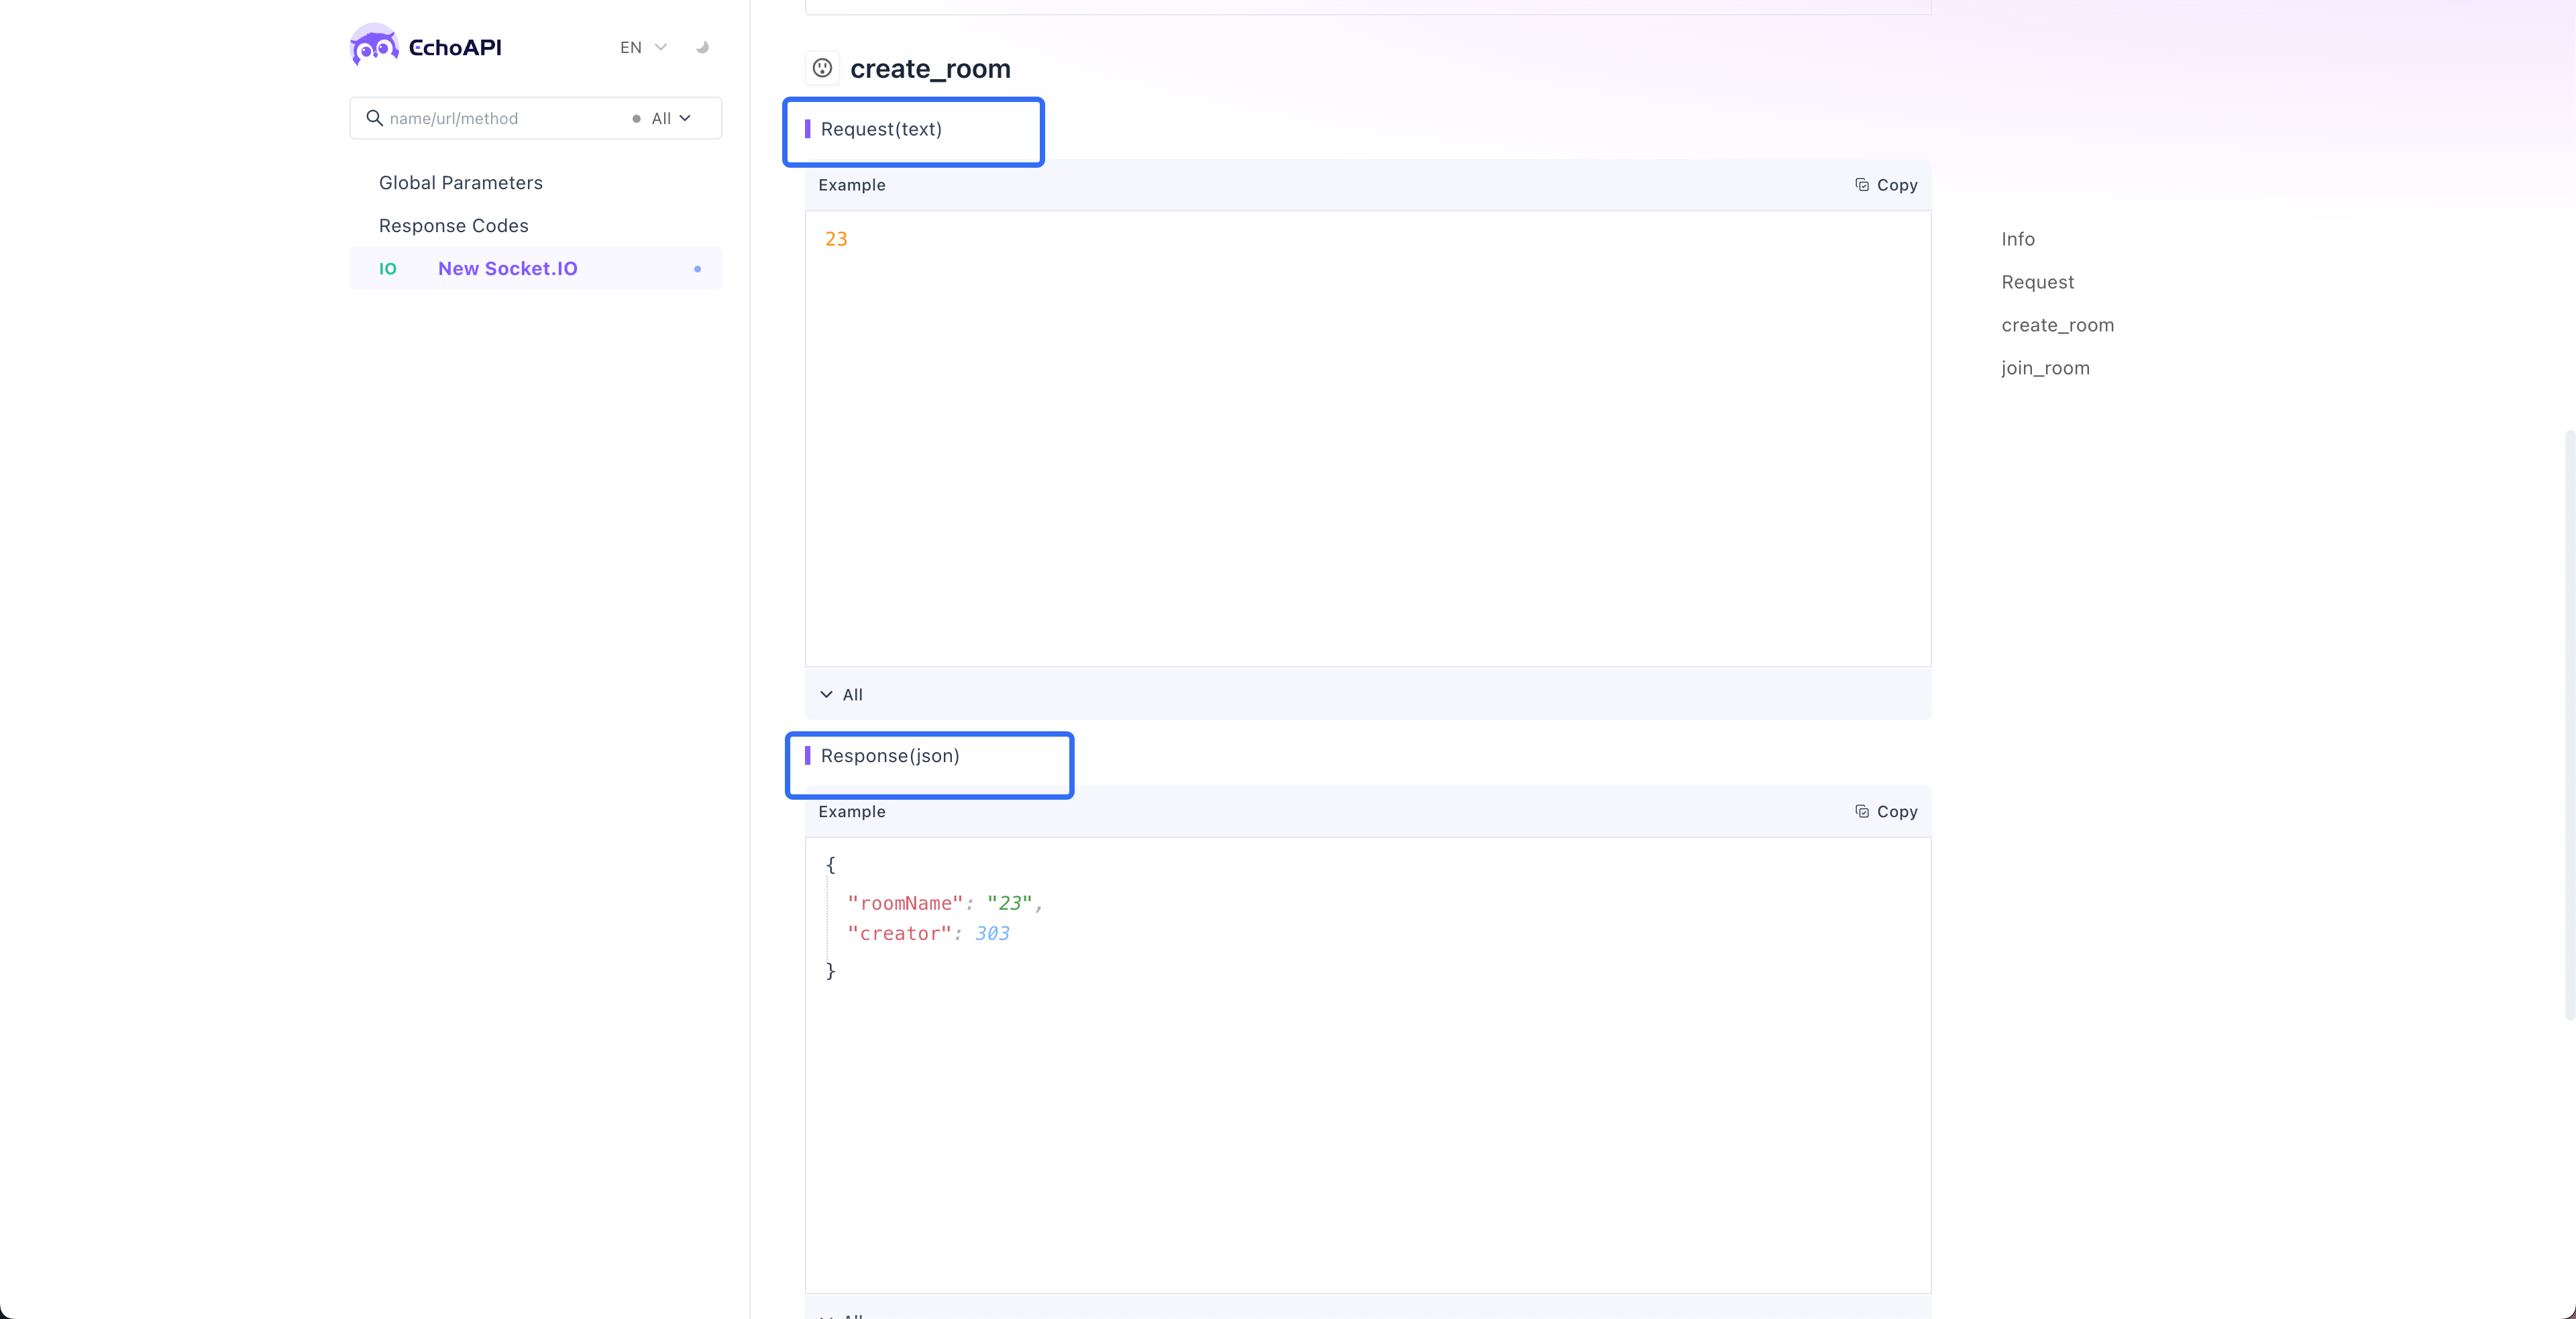
In addition to debugging, EchoAPI allows you to generate API documentation for WebSocket and Socket.IO at the click of a button. The request and response messages are clearly paired in the documentation, making it easier to read and debug the API.
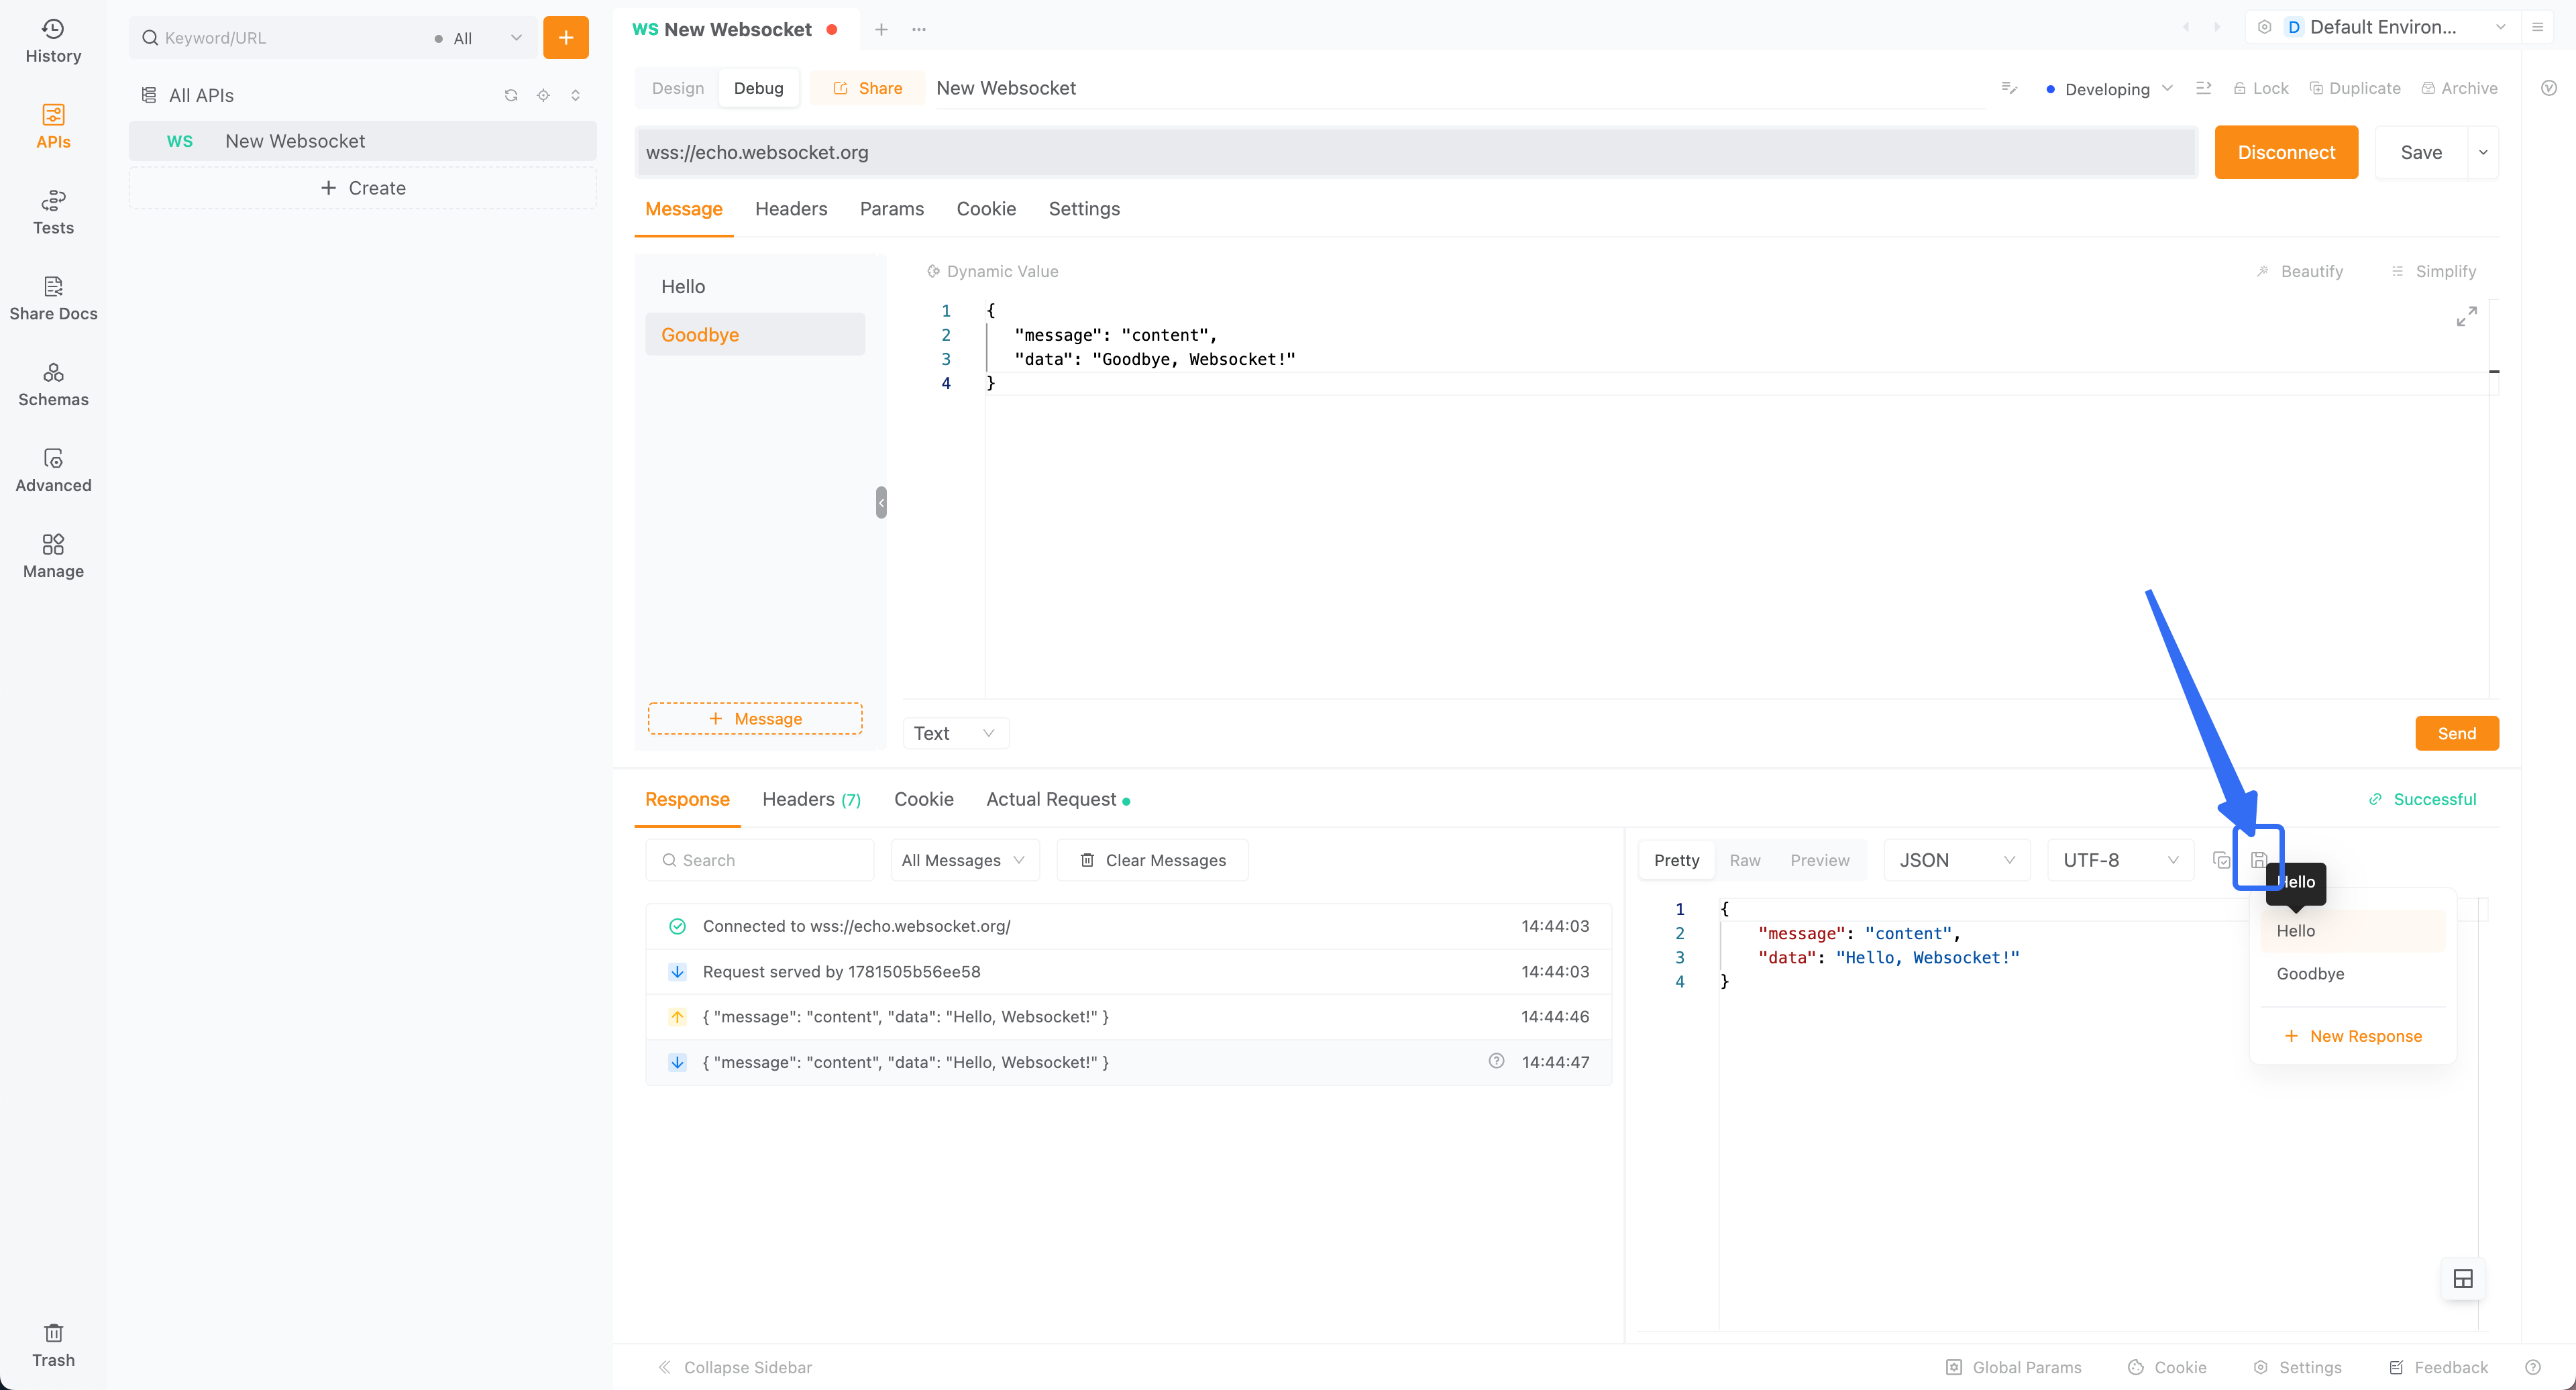
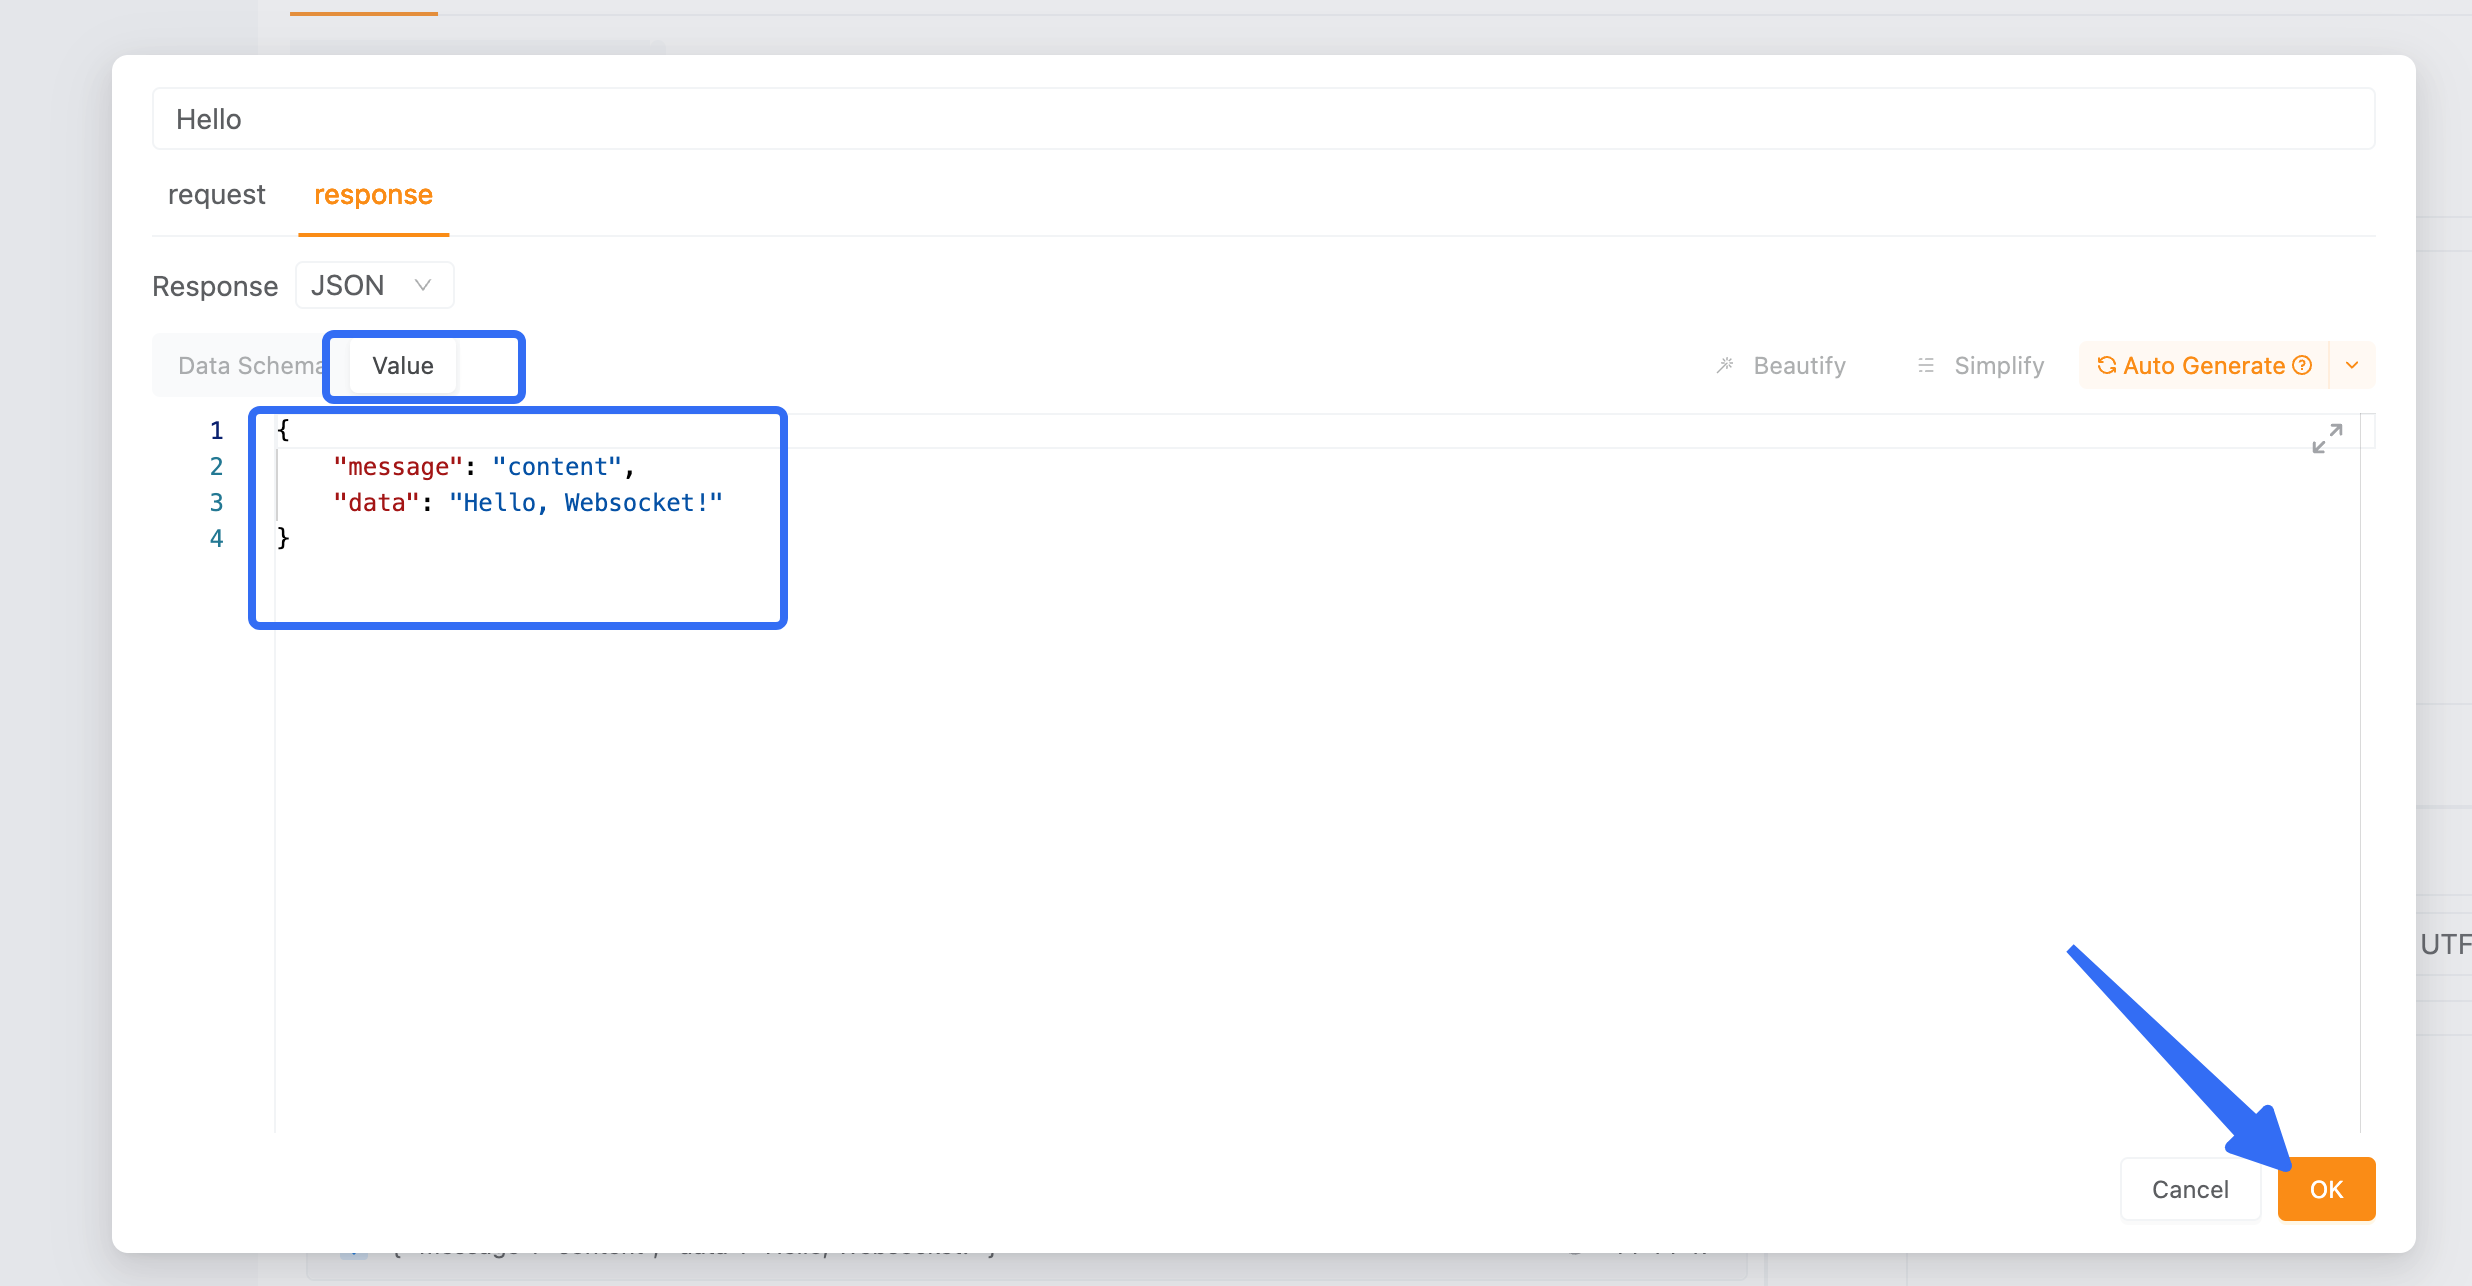
In the response area, you can quickly save the current response content as an example response for a particular message, allowing you to generate more complete API documentation later.
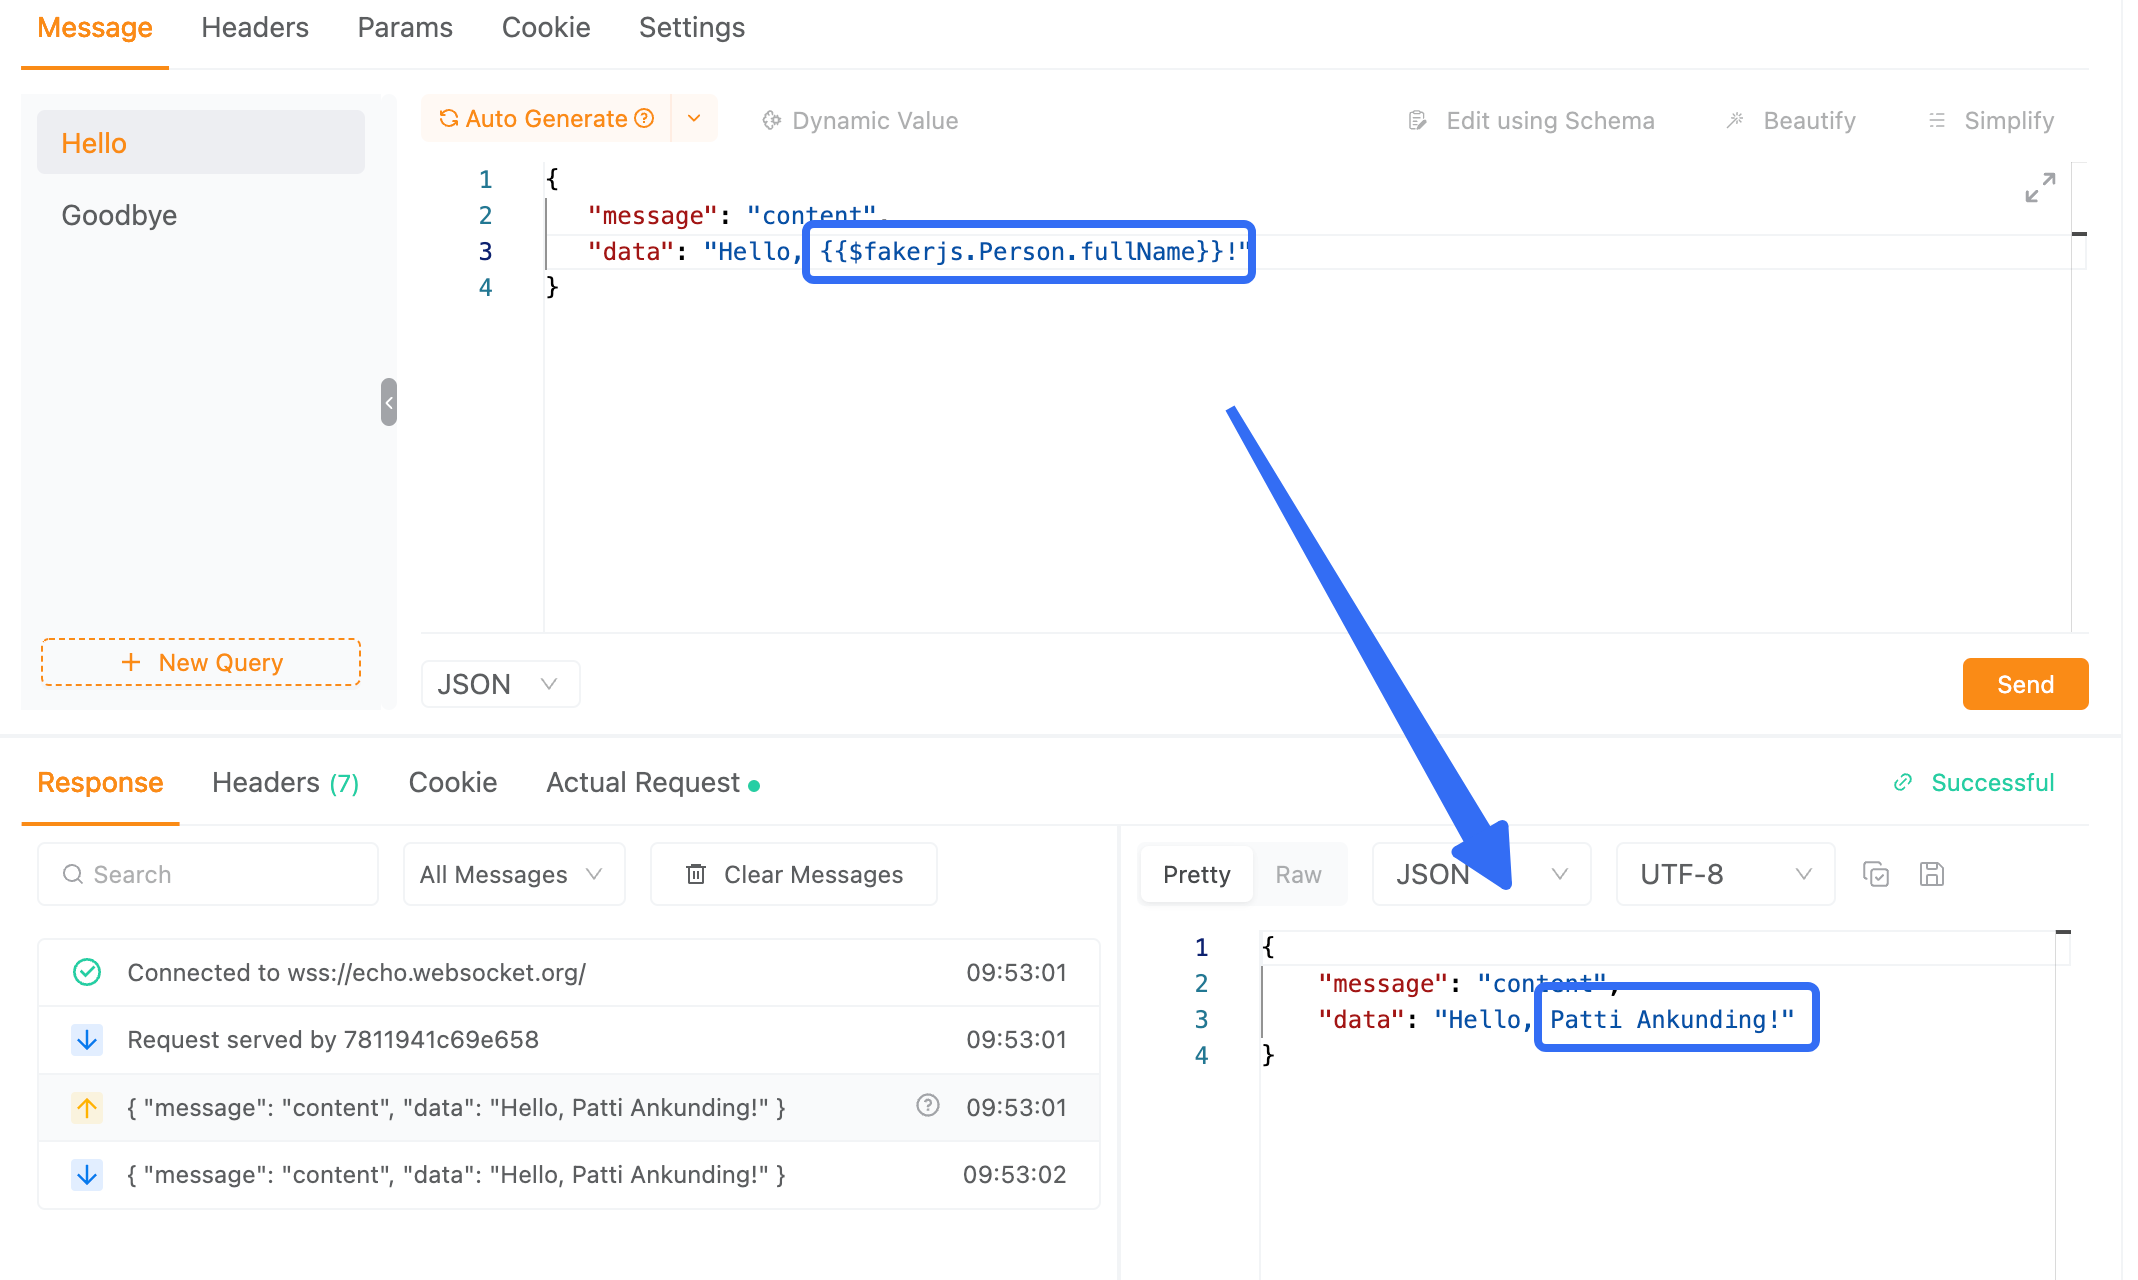
2. Use of Dynamic Values
EchoAPI supports the use of global variables, environment variables, and dynamic values, making it simple and efficient to quickly switch query parameters in different environments without having to manually change configurations each time.
Conclusion
WebSocket and Socket.IO are both important technologies for implementing real-time communication. Although they have their differences, each has its unique advantages and applicable scenarios. With the right debugging tools and methods, developers can effectively build and maintain real-time applications. With the powerful features of EchoAPI, debugging these technologies becomes more efficient and convenient.


 EchoAPI for VS Code

 EchoAPI for IntelliJ IDEA

 EchoAPl-Interceptor

 EchoAPl CLI
 EchoAPI Client
 API Design
 API Debug
 API Documentation
 Mock Server


