Mastering EchoAPI: A Comprehensive Guide to API Development, Testing, and Collaboration
This comprehensive guide on EchoAPI is divided into the following sections: Overview of EchoAPI, Introduction to Basic Features, Building API Requests, Debugging and Testing, Team Collaboration and API Management, Environment Variables, and Automated Testing.
This comprehensive guide on EchoAPI is divided into the following sections: Overview of EchoAPI, Introduction to Basic Features, Building API Requests, Debugging and Testing, Team Collaboration and API Management, Environment Variables, and Automated Testing.
What is EchoAPI?
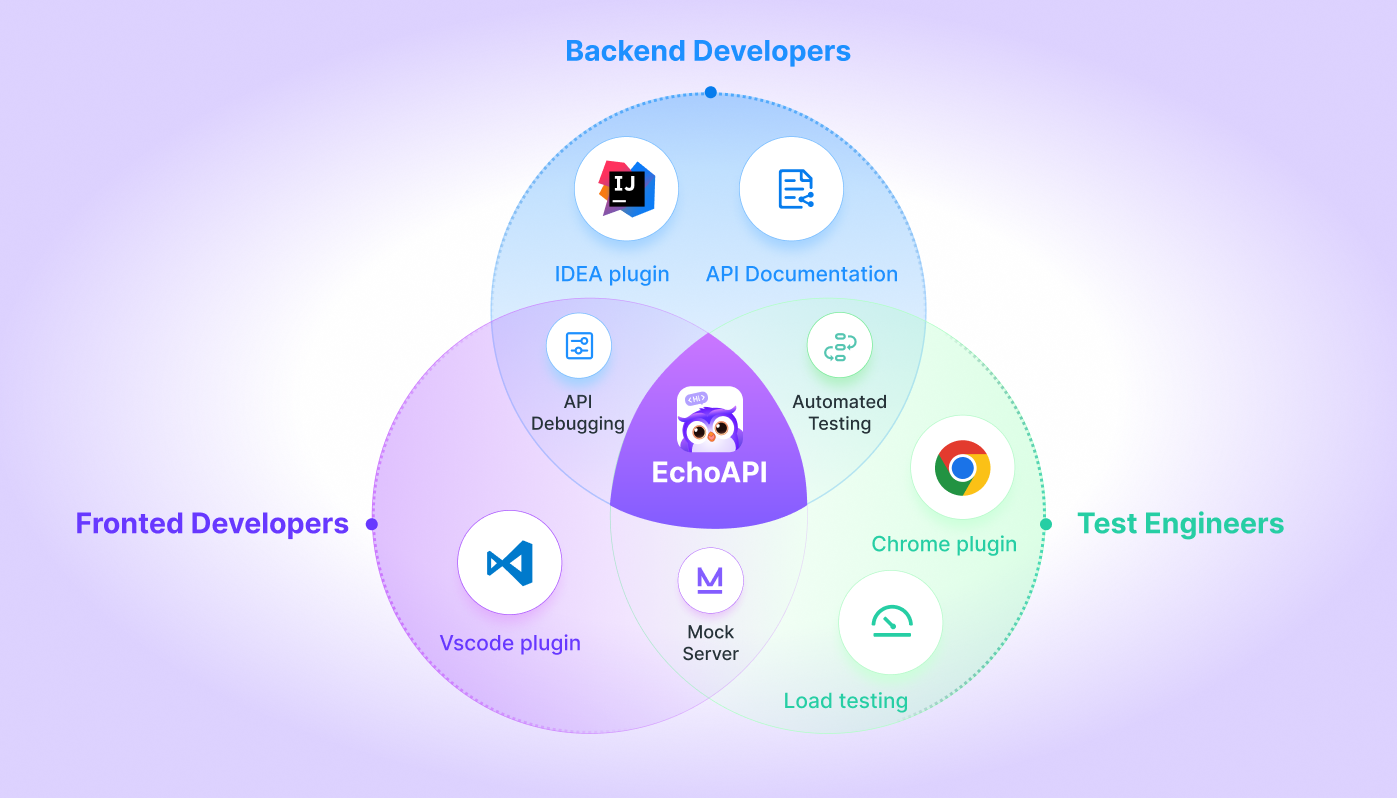
EchoAPI is a powerful tool designed for modern developers, aimed at simplifying and accelerating the API development and testing process. Similar to Postman, it enhances team collaboration and documentation management, offering complete offline functionality. EchoAPI supports API design, API debug, performance testing, automated testing, mock services, and bulk API documentation generation, making it easier to manage interface debugging and testing tasks.
In addition to these features, EchoAPI includes numerous lightweight plugins that integrate seamlessly with various development environments, further streamlining your workflow.

Installing EchoAPI
Visit the EchoAPI official website to download and install the version suitable for your operating system.
Overview of the EchoAPI Interface
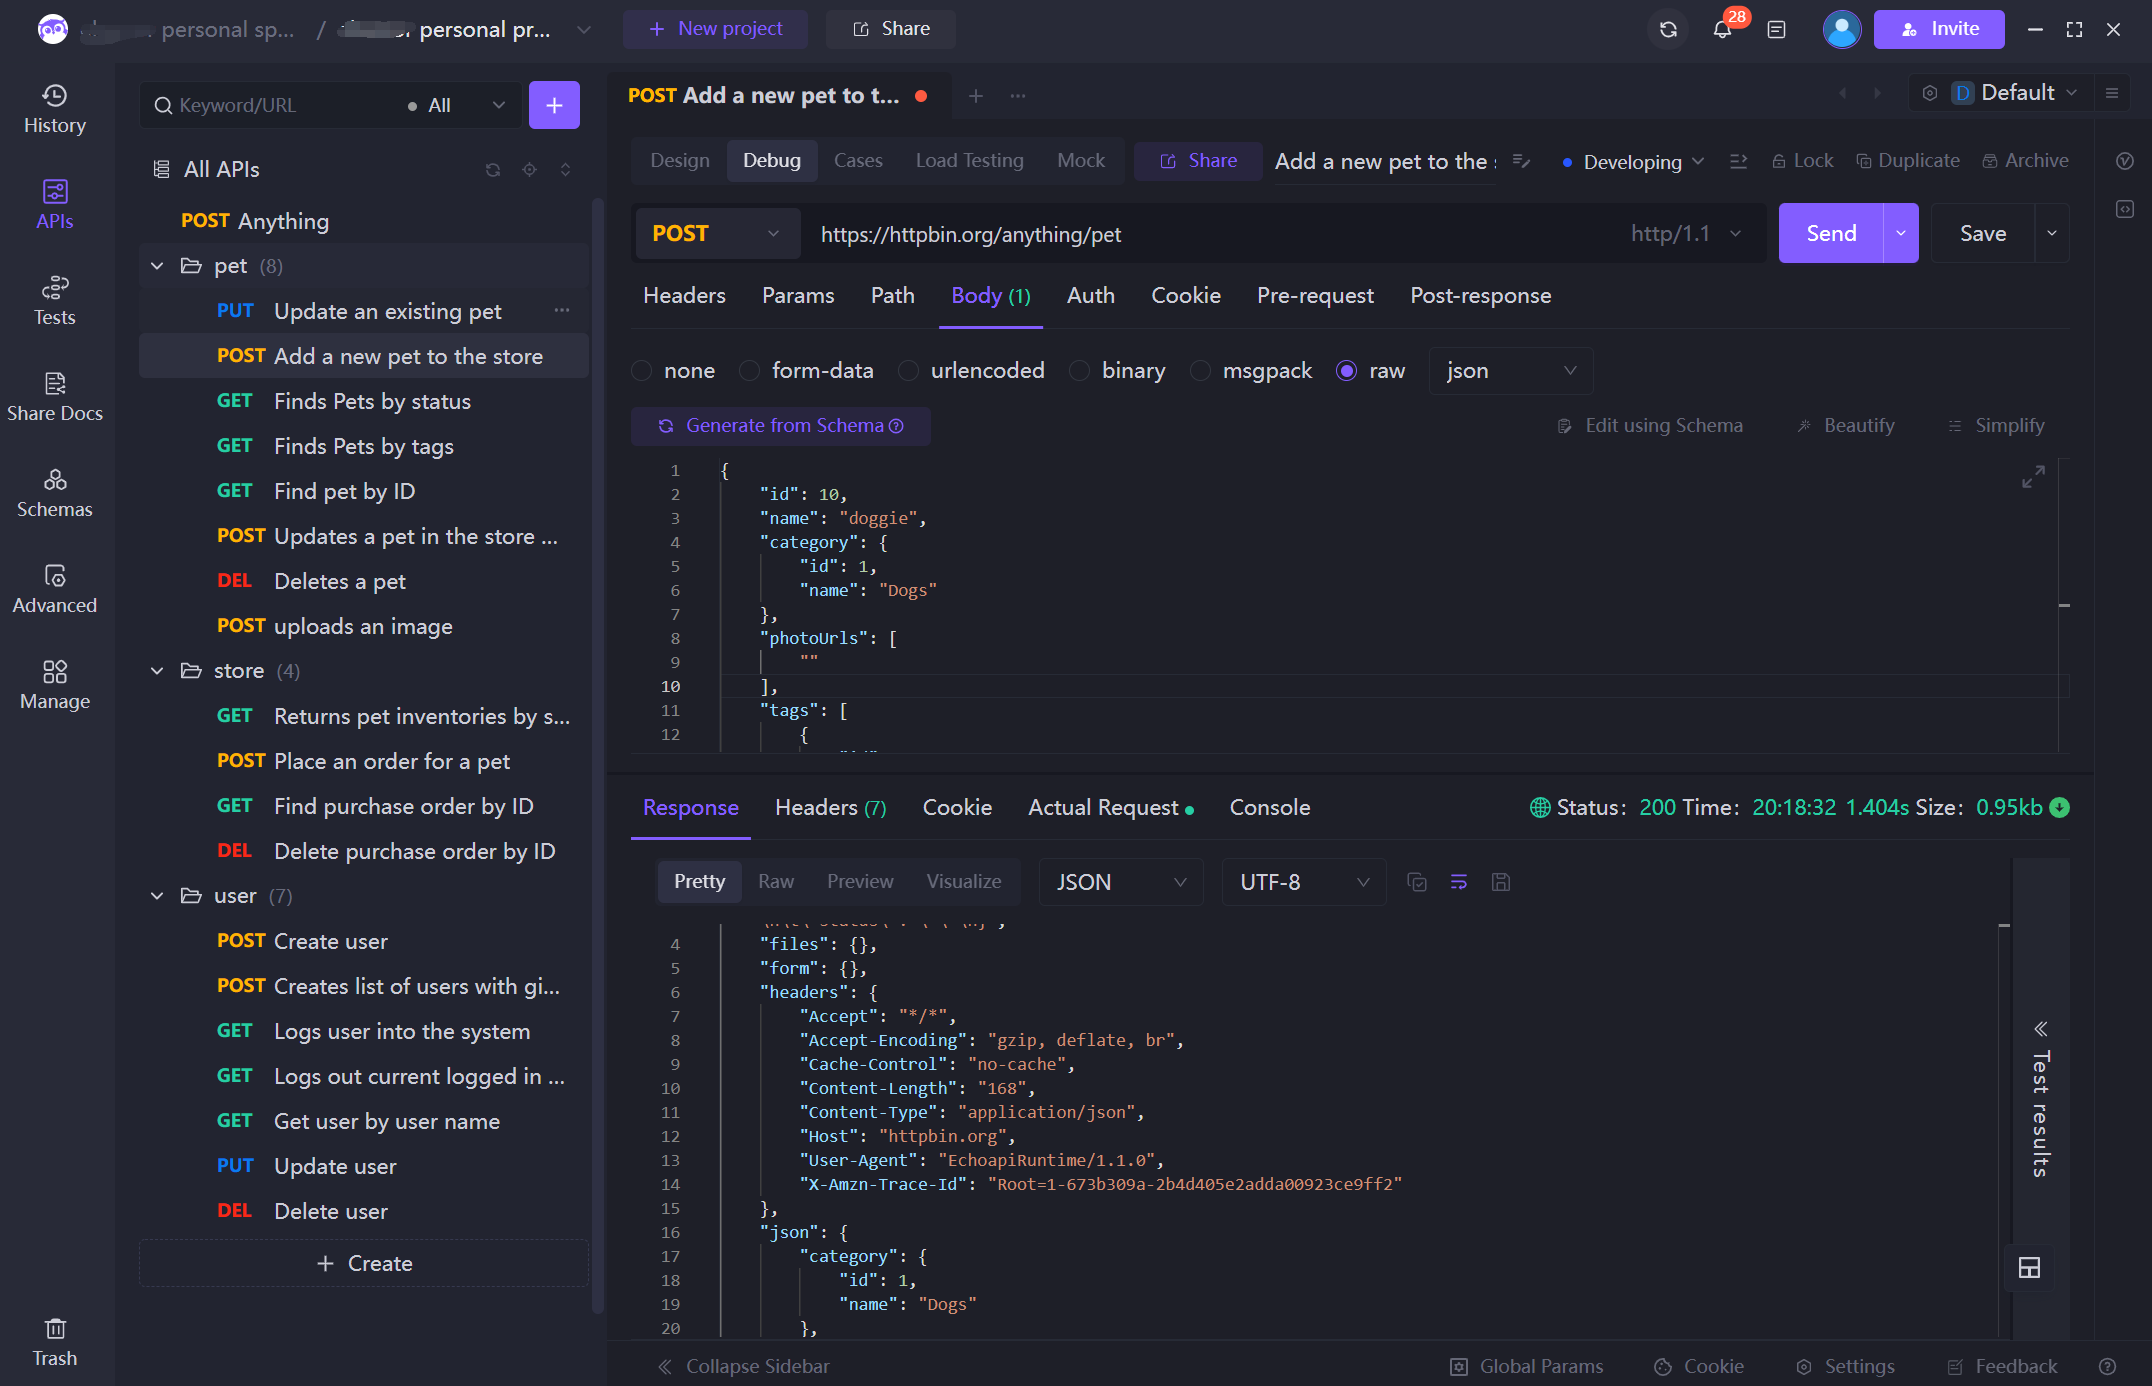
The EchoAPI UI mainly consists of the following areas:
- APIs Sidebar: Manage your API and API Tests.
- Request Builder: Create and send API requests.
- Response Window: Display the contents of the API response.
- Environment Variable Configuration: Manage variables used in requests (like API addresses, tokens, etc.).
- Team Collaboration: Allow you and your team members to share APIs, documentation, and test data.

Introduction to Basic Features
Creating a New Request
Click the “New Request” button on the left, select the HTTP method you wish to use (GET, POST, PUT, DELETE, etc.), enter the API URL, and fill in the request headers, body, and query parameters as needed. Click the “Send” button to send the request to the specified URL, and view the response results below.
Setting Request Headers and Parameters
- Headers: Set header information such as Content-Type, Authorization, etc.
- Params: Query parameters, applicable for GET requests.
- Body: For POST, PUT, etc., you can specify the request body, supporting formats like form-data, raw (JSON, etc.), binary, and more.
Viewing Response Results
Once the request is successfully sent, you can see the following in the response area:
- Status Code (e.g., 200, 400, 500): Indicates the request status.
- Response Time: The duration of the response.
- Response Body: The content returned by the server, which could be in JSON, HTML, XML, etc.
- Headers: Response header information.
Saving Requests
After completing an API request, you can save it in your project for future use. You can name the request and categorize it into different folders.
Environment Variable Configuration
Creating Environment Variables
To test APIs in different environments (like development, testing, production), you can use environment variables:
- Click the “Environment Settings” button at the top.
- Create different environments (e.g., Development, Production).
- Configure different variables for each environment, such as
{{base_url}}, with values that can differ across the environments.
Using Environment Variables in Requests
In the API request’s URL, headers, and body, you can directly use variables like:
{{base_url}}/api/v1/user
EchoAPI will automatically replace the variable values with the current environment's values.

API Testing and Debugging Features
Mocking
EchoAPI provides a Mock service that simulates API responses, useful for frontend-backend development or testing when backend APIs are unfinished. You can find the Mock functionality in your project, create new mock data, define API paths and expected responses, and make requests through the mock URL.
Automated Testing
EchoAPI supports automated testing. You can write scripts for assertions after receiving a response. In the Test tab, you can write JavaScript to check the returned results. For example, to check if the status code is 200:
pm.test("Status code is 200", function () {
    pm.response.to.have.status(200);
});
Scheduled Tasks and Continuous Integration
EchoAPI allows you to set up scheduled tasks to run API tests automatically at specified intervals. You can integrate CI/CD tools like Jenkins for automated test reporting and workflow management.
Team Collaboration and API Documentation Management
Sharing Requests
EchoAPI provides project collaboration features, allowing you to share API requests with team members. Create a new project in the sidebar and invite team members, making API requests and test cases accessible to everyone.
Automatic API Documentation Generation
EchoAPI auto-generates API documentation, detailing request URLs, methods, parameters, and responses based on the requests you create. Click “Export Documentation” to export it in formats like Markdown or HTML for easier sharing and viewing.
Advanced Features: Traffic Recording and Analysis
EchoAPI offers a traffic recording feature that captures API requests and responses for performance analysis and security auditing. Start the recording feature, and EchoAPI will log all API requests within a specified timeframe, helping you identify potential performance bottlenecks or security issues.
Practical Exercises
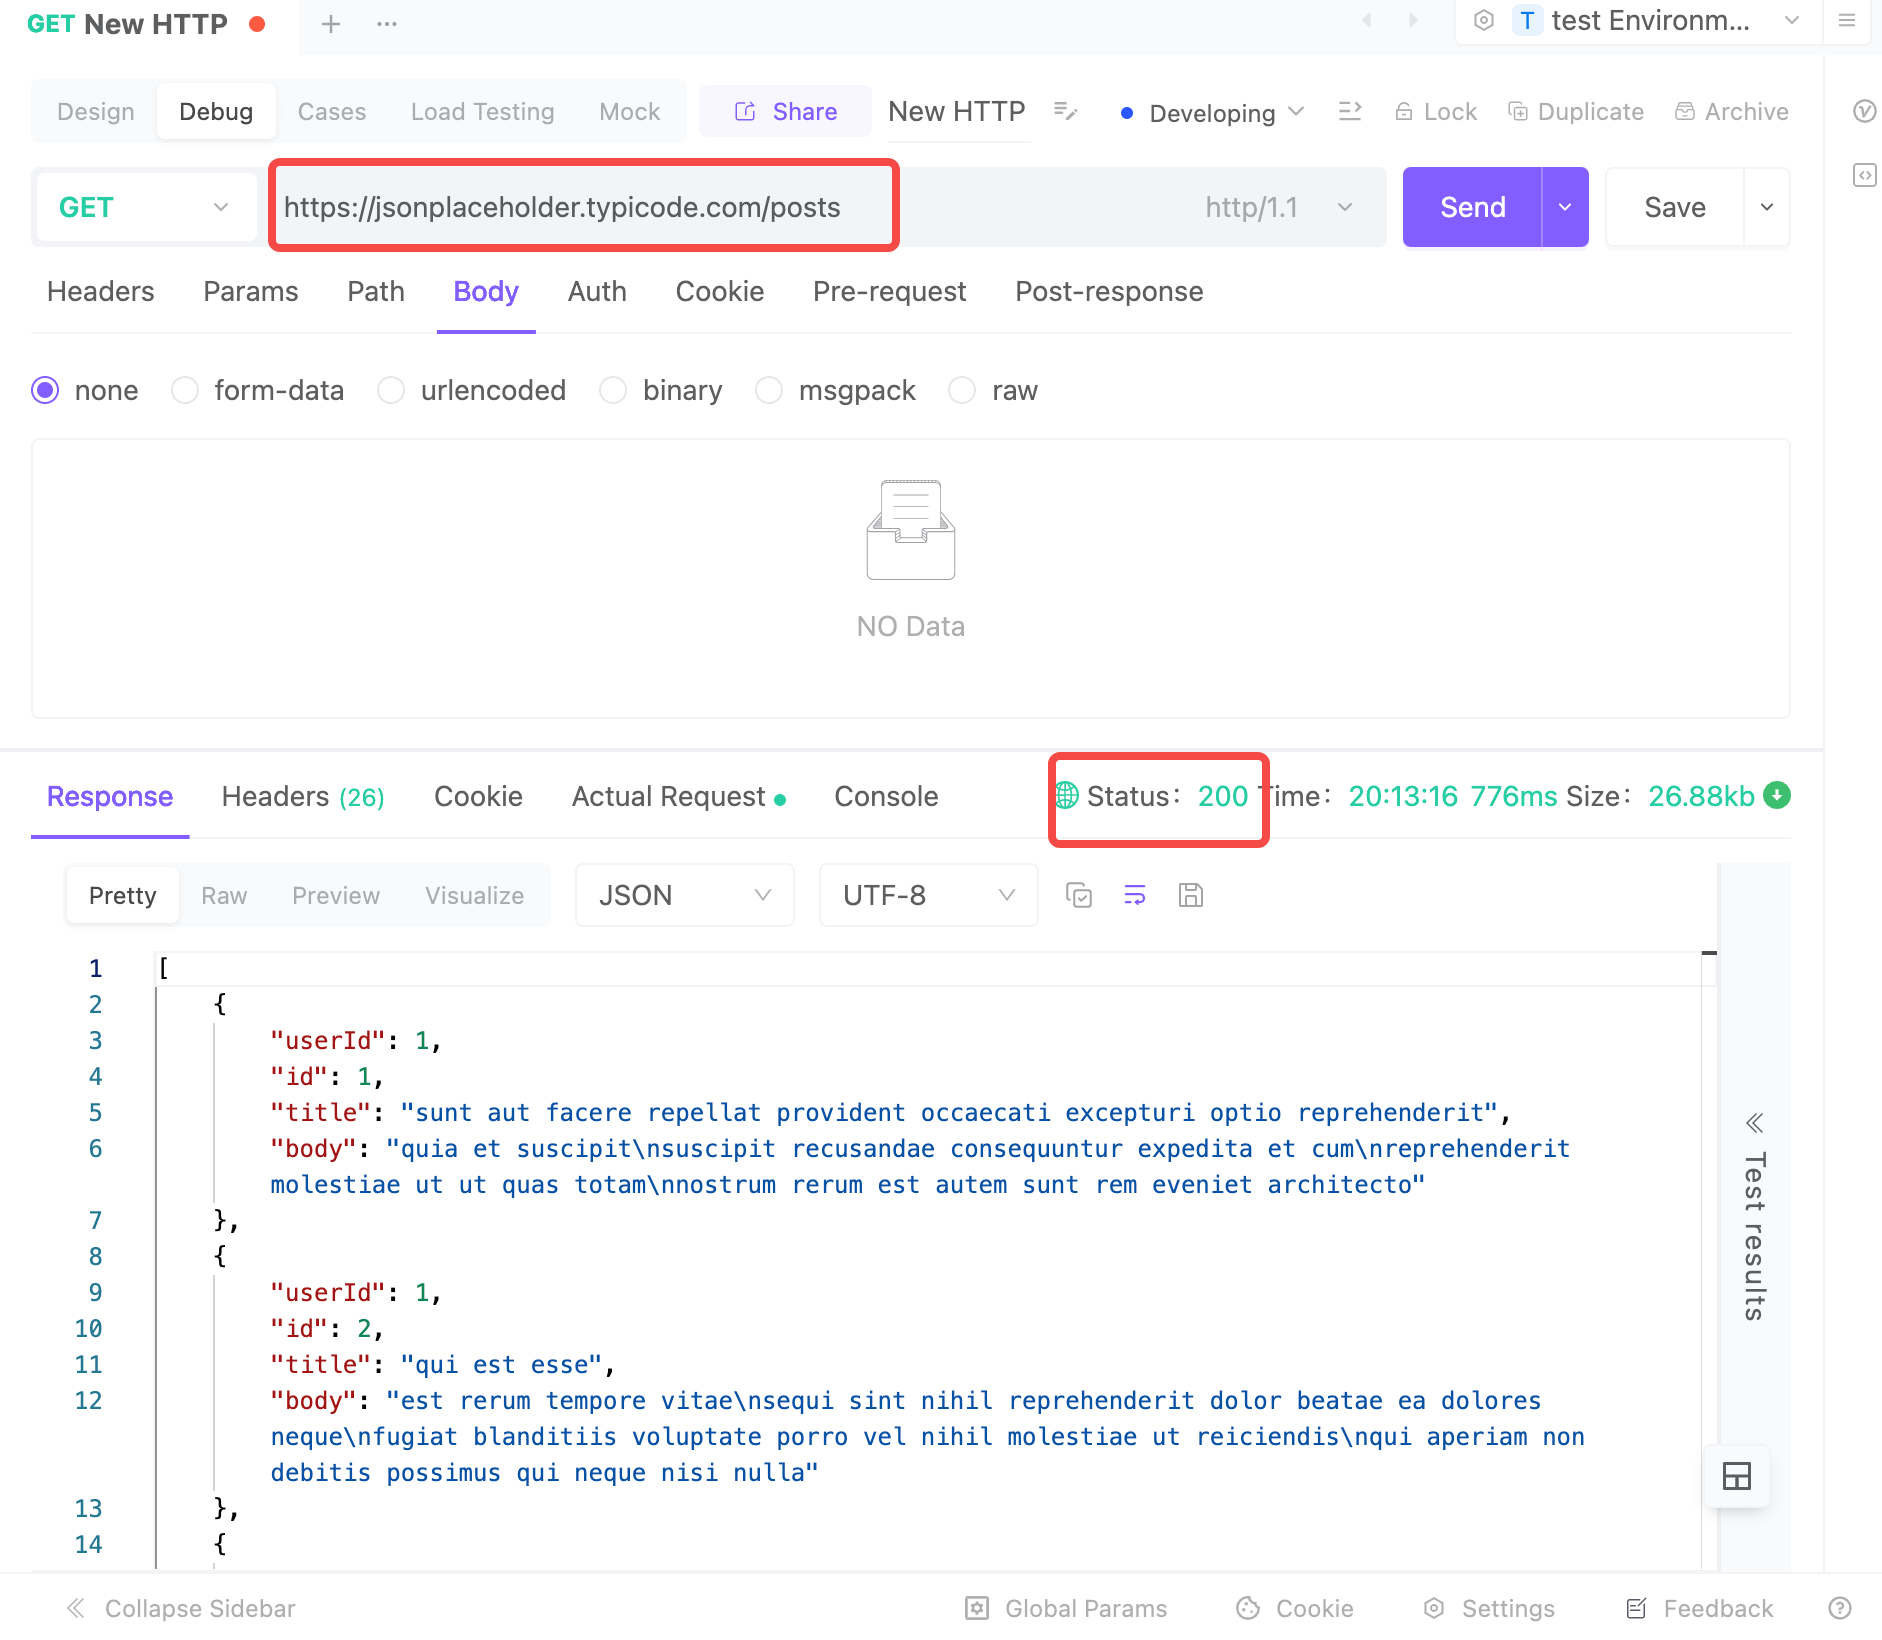
Exercise 1: Simple GET Request
Objective: Send a GET request and validate the JSON response status code.
Sample API: https://jsonplaceholder.typicode.com/posts
Steps:
- Create a new request, selecting the GET method.
- Input the URL:
https://jsonplaceholder.typicode.com/posts - Click “Send” and check the returned response data.
- Write an assertion to ensure the status code is 200.

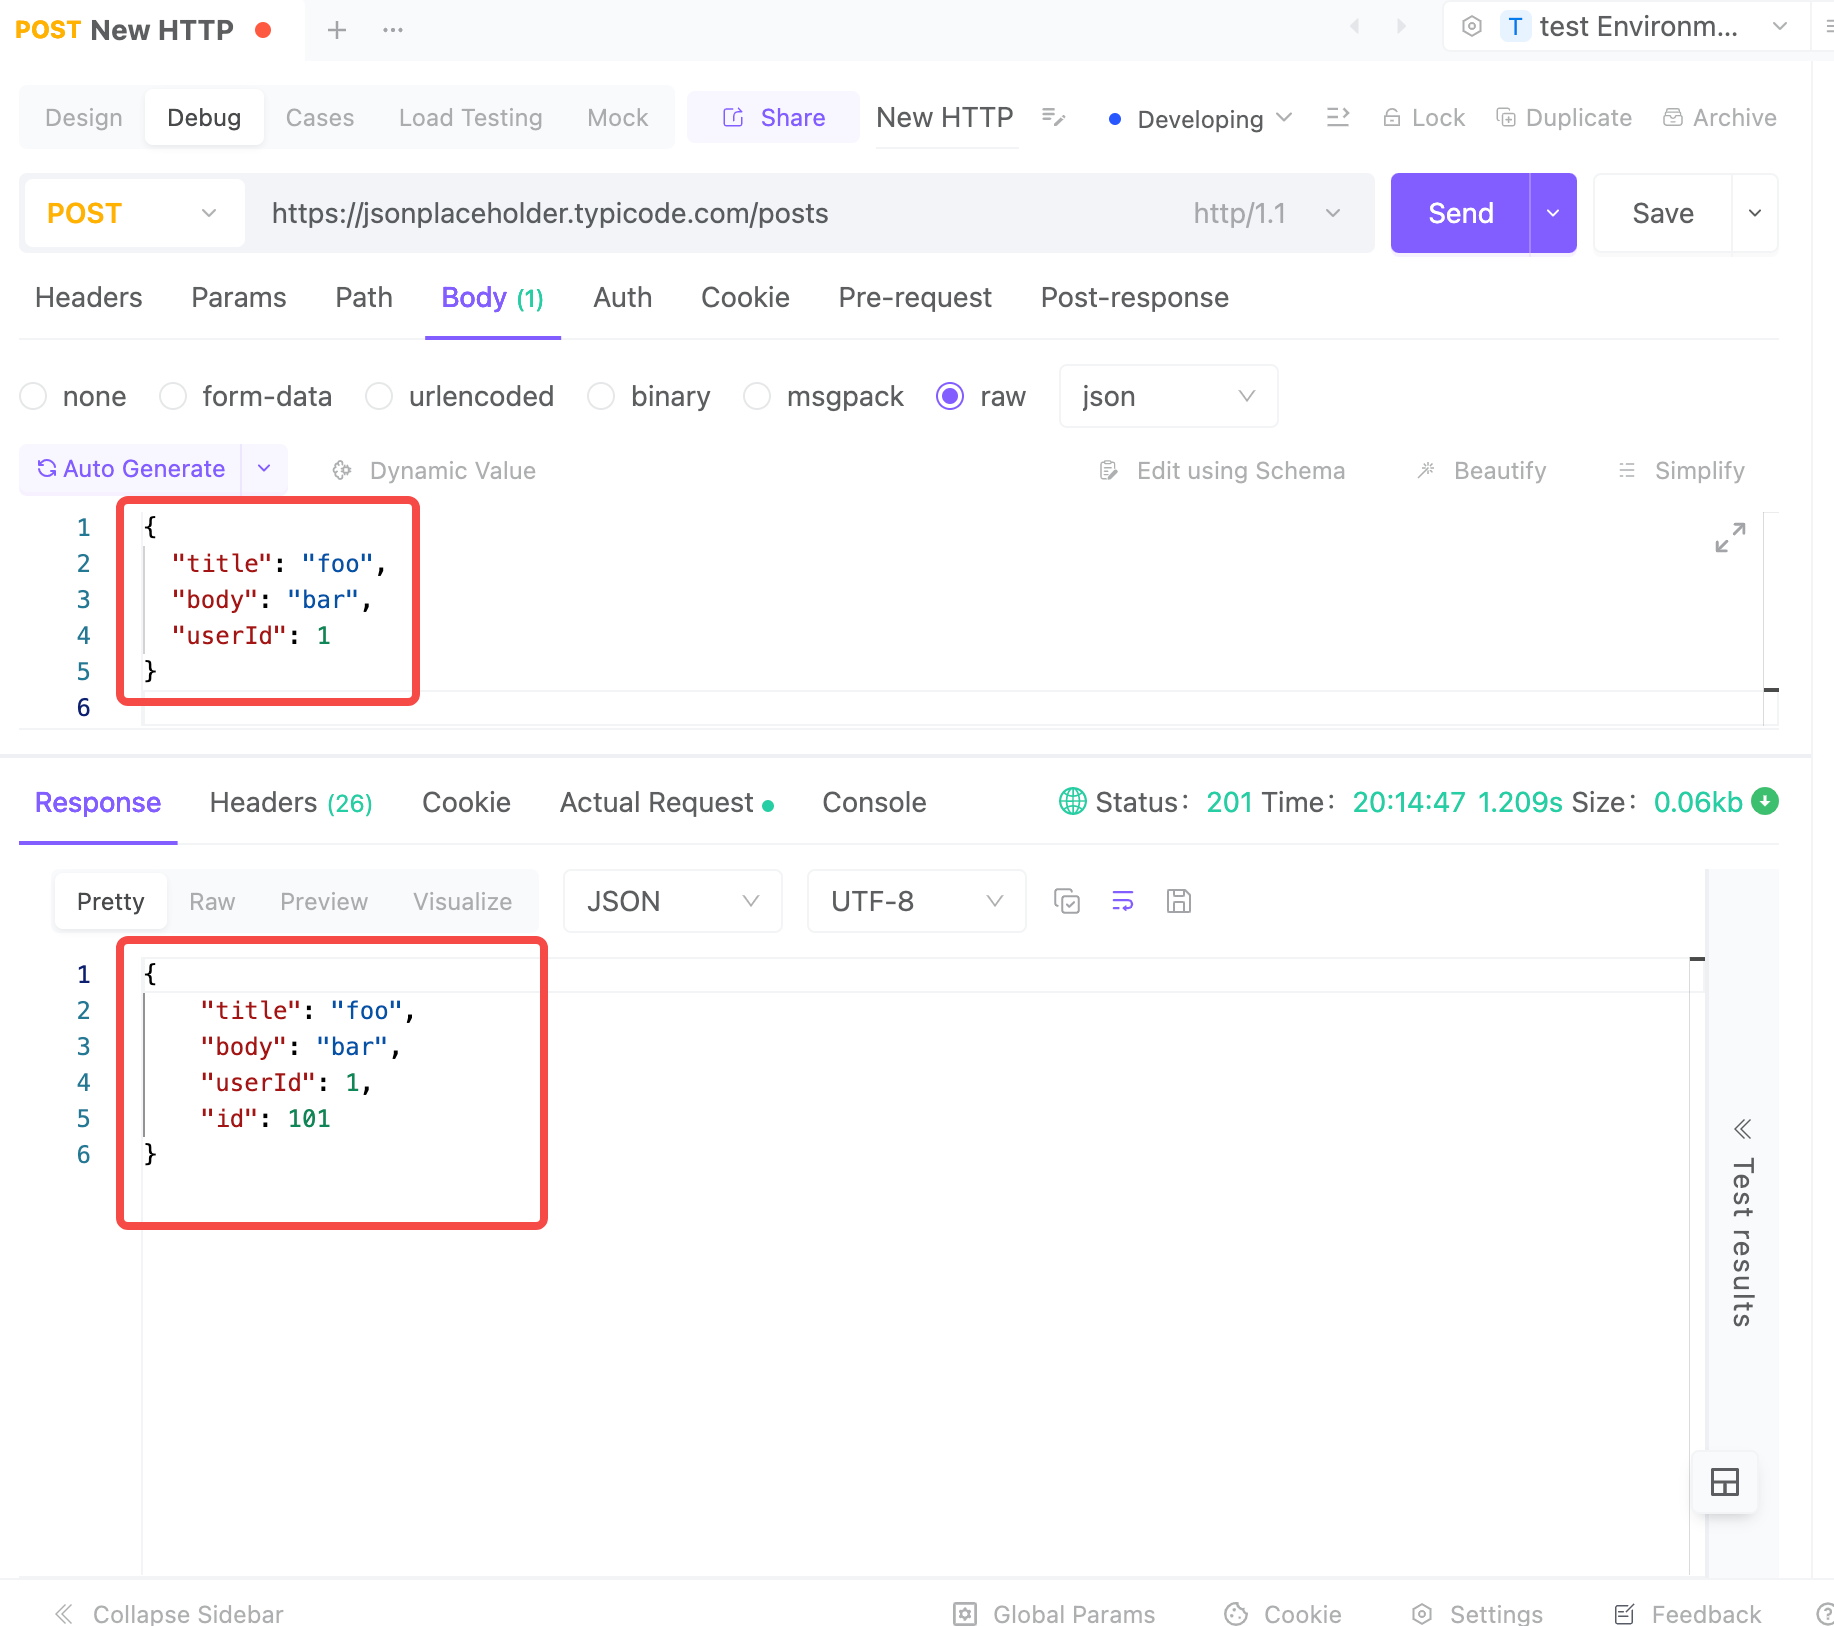
Exercise 2: Creating a Resource with POST Request
Objective: Send a POST request to create a new resource.
Sample API: https://jsonplaceholder.typicode.com/posts
Steps:
- Create a new request, selecting the POST method.
- Set the header:
Content-Type: application/json. - Send the request and check the response data to ensure the
idfield is not empty.
In the body, enter the following:
{
  "title": "foo",
  "body": "bar",
  "userId": 1
}

Integrating with a Simple Spring Boot Backend
Assuming you have a simple Spring Boot backend running locally on port 8080, here are practical tests:
Exercise 1: Simple GET Request
- Goal: Send a GET request to fetch user data and validate the status code is 200.
- Sample API (Java Backend):
/api/v1/users
Steps:
- Start your local Java project at
http://localhost:8080. - In EchoAPI, click “New Request” and select GET.
- Enter the local API URL:
http://localhost:8080/api/v1/users. - Click “Send” and check the expected JSON response.
- Write an assertion in the Test tab to validate the status code.
Exercise 2: Creating a User with POST Request
Goal
Send a POST request to create a new user and verify the success of the operation.
Sample API (Java Backend)
Assuming we have an interface for creating users at /api/v1/users, this interface accepts a POST request to create a new user and returns the user data upon successful creation.
{
  "id": 3,
  "name": "foo",
  "email": "foo@example.com"
}
Practice Steps
- Create a New Request:
In EchoAPI, click “New HTTP” and select the POST method. - Set the URL:
Enter the URL: http://localhost:8080/api/v1/users. - Set the Request Header:
In Headers, set the request header Content-Type: application/json, as we are going to send JSON data.- Click the Send button and check the response data. The expected response should return a new user object containing an id, as shown below:
- Write an assertion:
Send the Request:
{
  "id": 3,
  "name": "foo",
  "email": "foo@example.com"
}
Fill in the Request Body:
In Body, choose the raw mode and select JSON format. In the request body, enter the following data to simulate creating a new user:
{
  "name": "foo",
  "email": "foo@example.com"
}
In the Test tab, write a test script to verify whether the id field exists. For example:
pm.test("ID exists in response", function () {
    var jsonData = pm.response.json();
    pm.expect(jsonData).to.have.property("id");
});
Example Spring Boot Code
Here’s an example of the API implementations in a Java Spring Boot application:
GET /api/v1/users (Fetch User List):
@RestController
@RequestMapping("/api/v1/users")
public class UserController {

    private List<User> users = Arrays.asList(
        new User(1, "John Doe", "john.doe@example.com"),
        new User(2, "Jane Doe", "jane.doe@example.com")
    );

    @GetMapping
    public List<User> getAllUsers() {
        return users;
    }
}
POST /api/v1/users (Create New User):
@RestController
@RequestMapping("/api/v1/users")
public class UserController {

    private List<User> users = new ArrayList<>(Arrays.asList(
        new User(1, "John Doe", "john.doe@example.com"),
        new User(2, "Jane Doe", "jane.doe@example.com")
    ));

    @PostMapping
    public User createUser(@RequestBody User user) {
        user.setId(users.size() + 1);  // Auto-generate ID
        users.add(user);
        return user;
    }
}
User Class Definition:
public class User {
    private int id;
    private String name;
    private String email;

    // Constructor, Getters, and Setters omitted for brevity
}
By following this guide, you can proficiently utilize EchoAPI to test and manage your Java backend projects efficiently. Happy testing!


 EchoAPI for VS Code

 EchoAPI for IntelliJ IDEA

 EchoAPl-Interceptor

 EchoAPl CLI
 EchoAPI Client
 API Design
 API Debug
 API Documentation
 Mock Server


