Mastering Postman: Advanced Techniques for GET Requests and Response Analysis
This detailed explanation covers everything you need to know about sending GET requests and analyzing responses in Postman.
Welcome to a detailed guide on how to effectively use Postman to send GET requests and understand responses. This resource is crucial for developers looking to enhance their API testing and development capabilities.
The Crucial Role of Postman for Developers

Postman is an indispensable tool for developers engaged in API development and testing. It not only simplifies the process of sending requests and analyzing responses but also provides an organized environment for managing multiple API versions and collaborative projects. If you're unfamiliar with the basic functionalities of Postman's interface, you may want to check this guide on Postman's user interface.

Sending a GET Request in Postman
Step 1: Create a Collection
First, create a collection where all related requests can be organized. Simply click on 'Create a Collection', and name it appropriately to reflect the APIs it will contain.
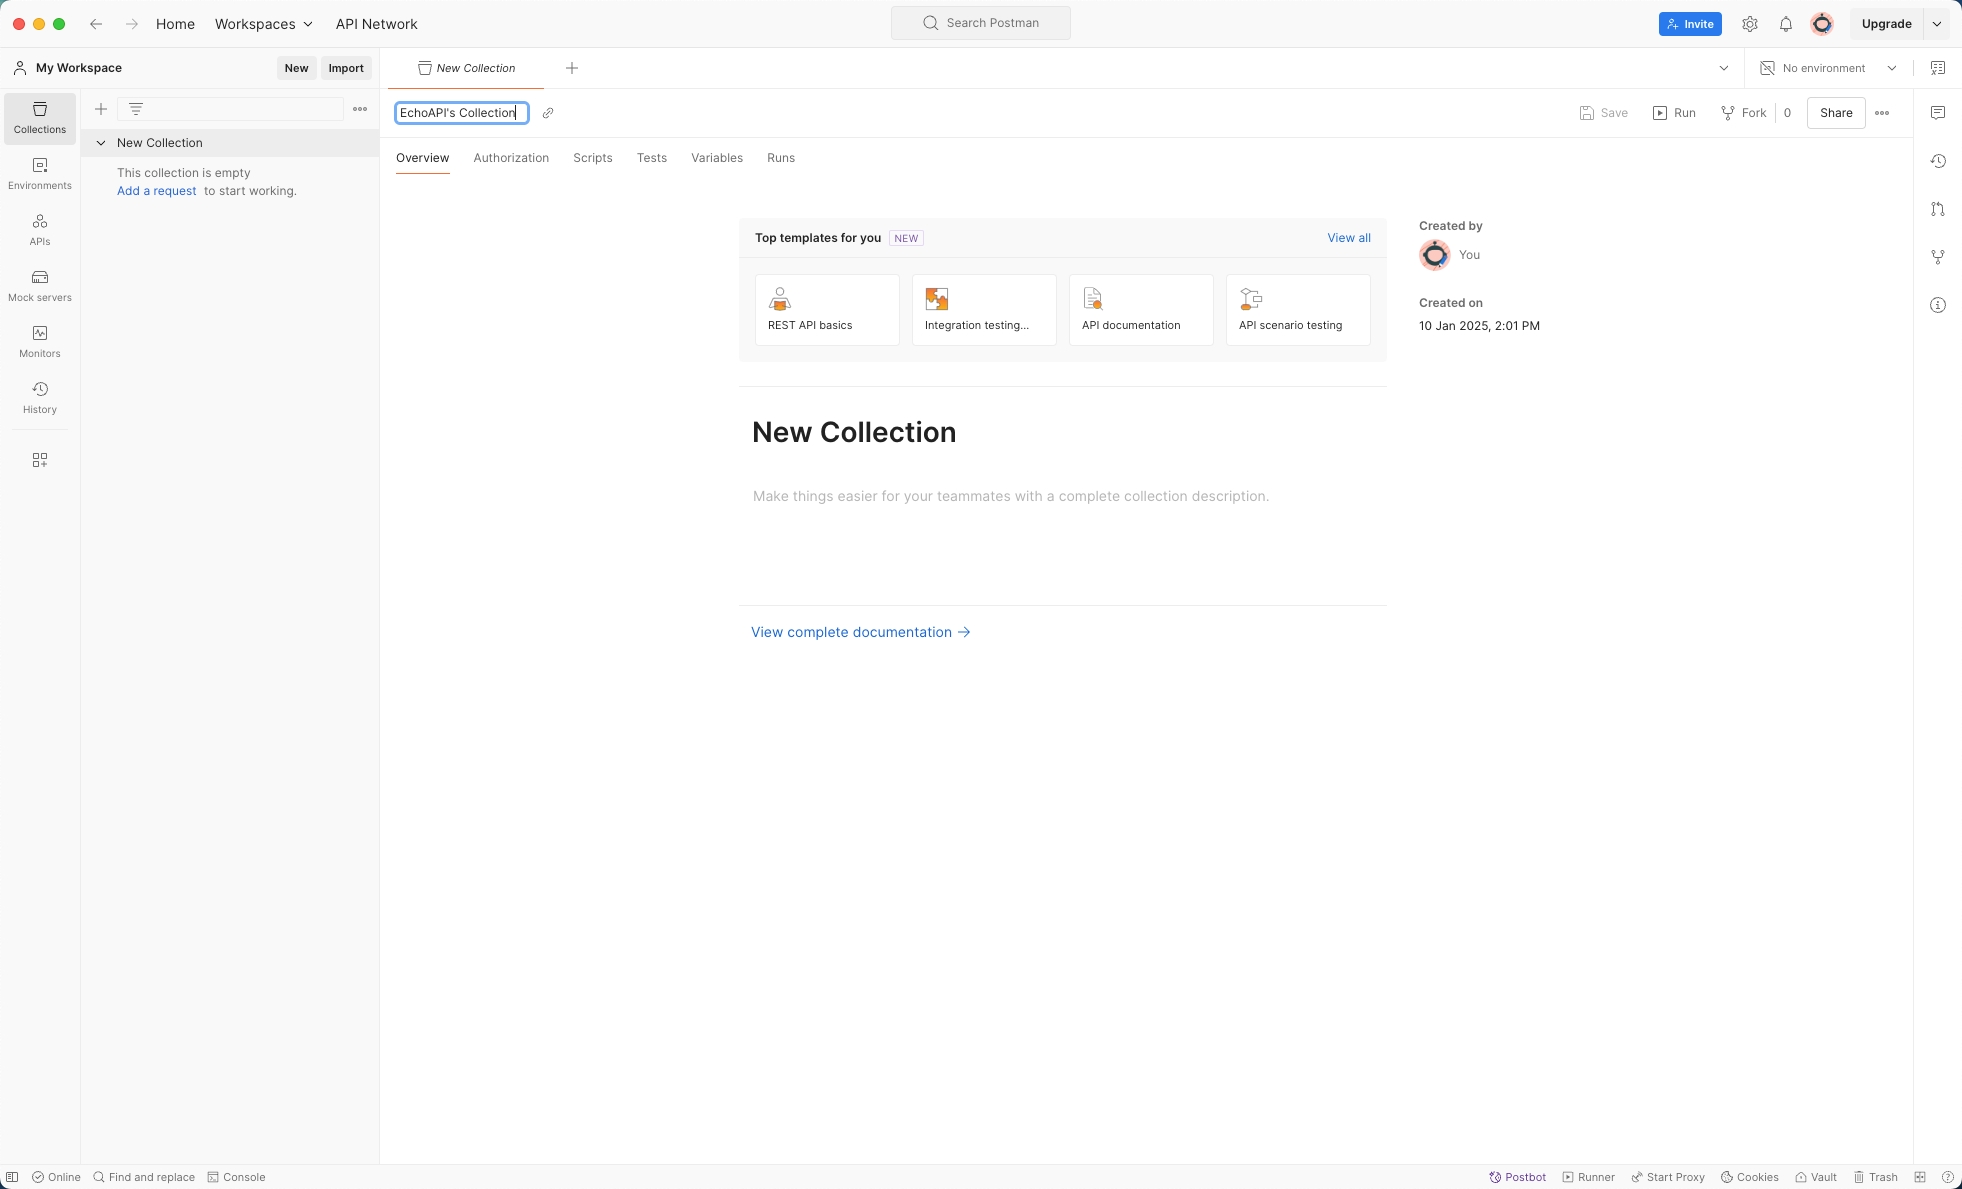

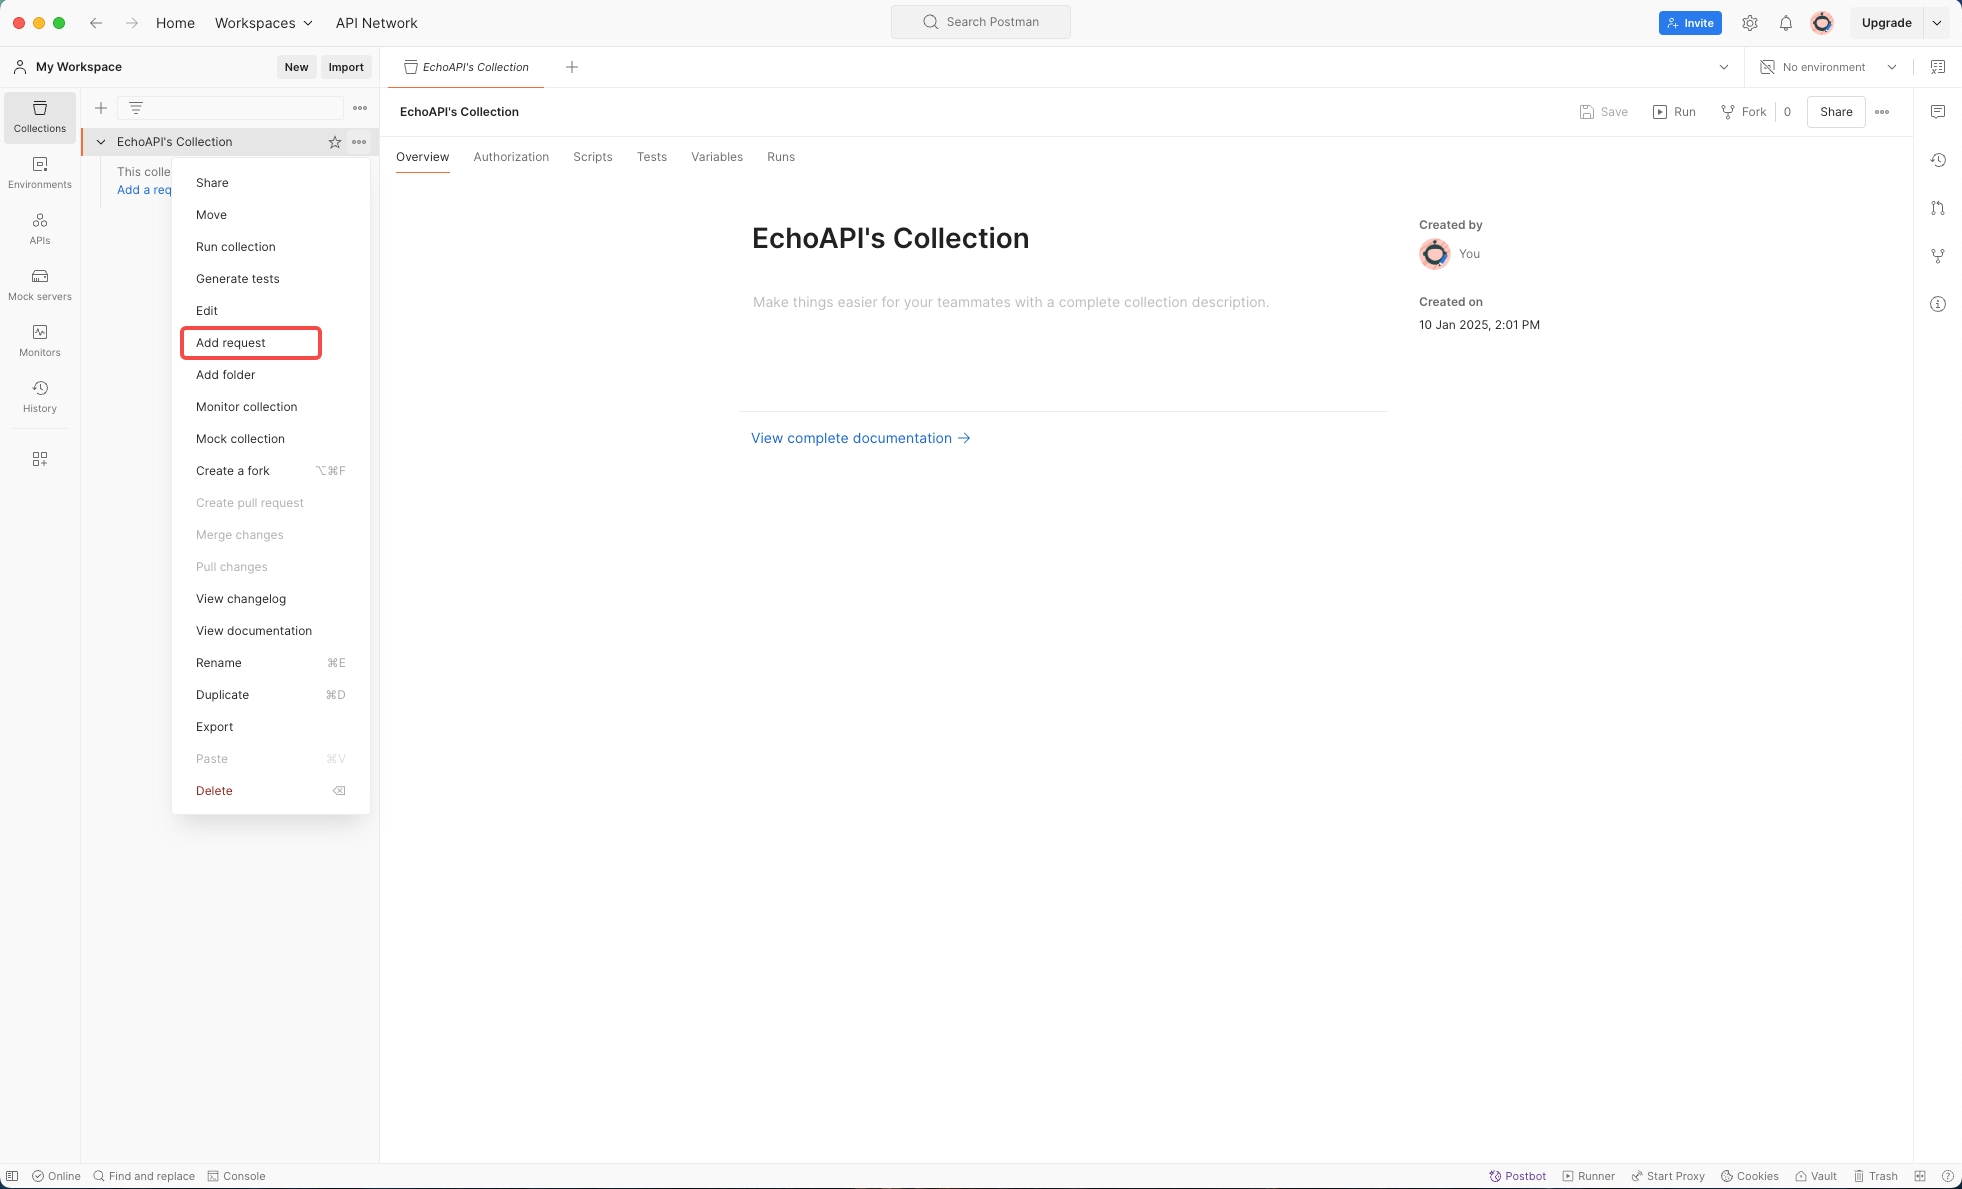
Step 2: Add a Request
Right-click the collection you just created and select 'Add Request'. This is where you'll configure your specific API call.
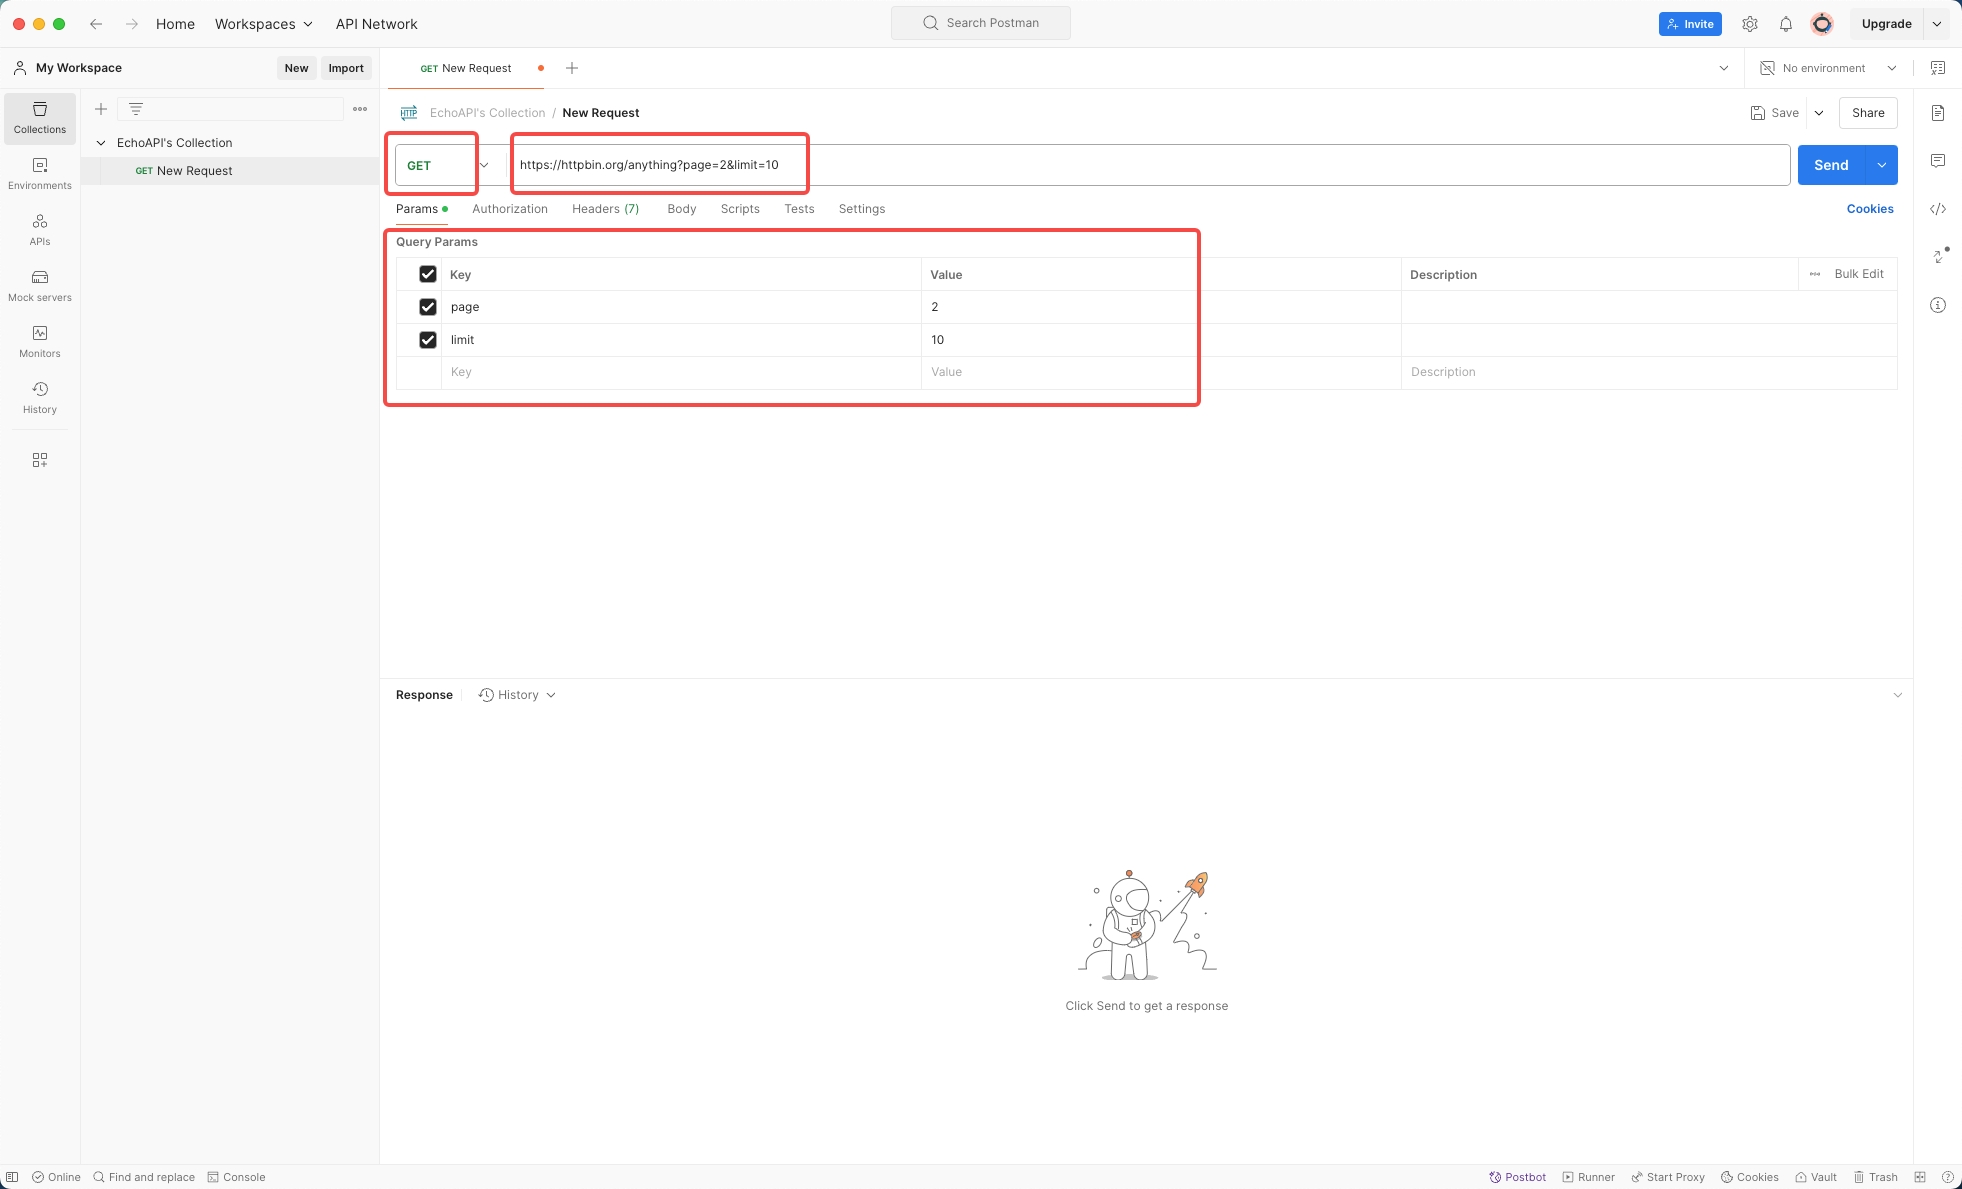
Step 3: Configure the Request
- Body: Even though the body isn't typically used in GET requests, understanding its options is useful:
- GraphQL: Input for GraphQL queries.

binary: Transfers files in a binary format.

raw: Can include various types, such as JSON, text, XML, HTML, or JavaScript.

x-www-form-urlencoded: Only allows key-value pairs.

form-data: Used for POST requests, can include key-value pairs and files.

None: No data sent in the request body.

Headers: Input necessary API request headers.

Authorization: Set the required authorization for the API, such as Basic Auth, Bearer Token, JWT Bearer, or Digest Auth.

Params: Used to include query parameters in the GET request.

Method & URL: Select 'GET' as the method and fill in the URL tailored to your API's documentation.
Step 4: Send the Request and Analyze the Response
Once your request is configured, hit the 'Send' button to receive the response.
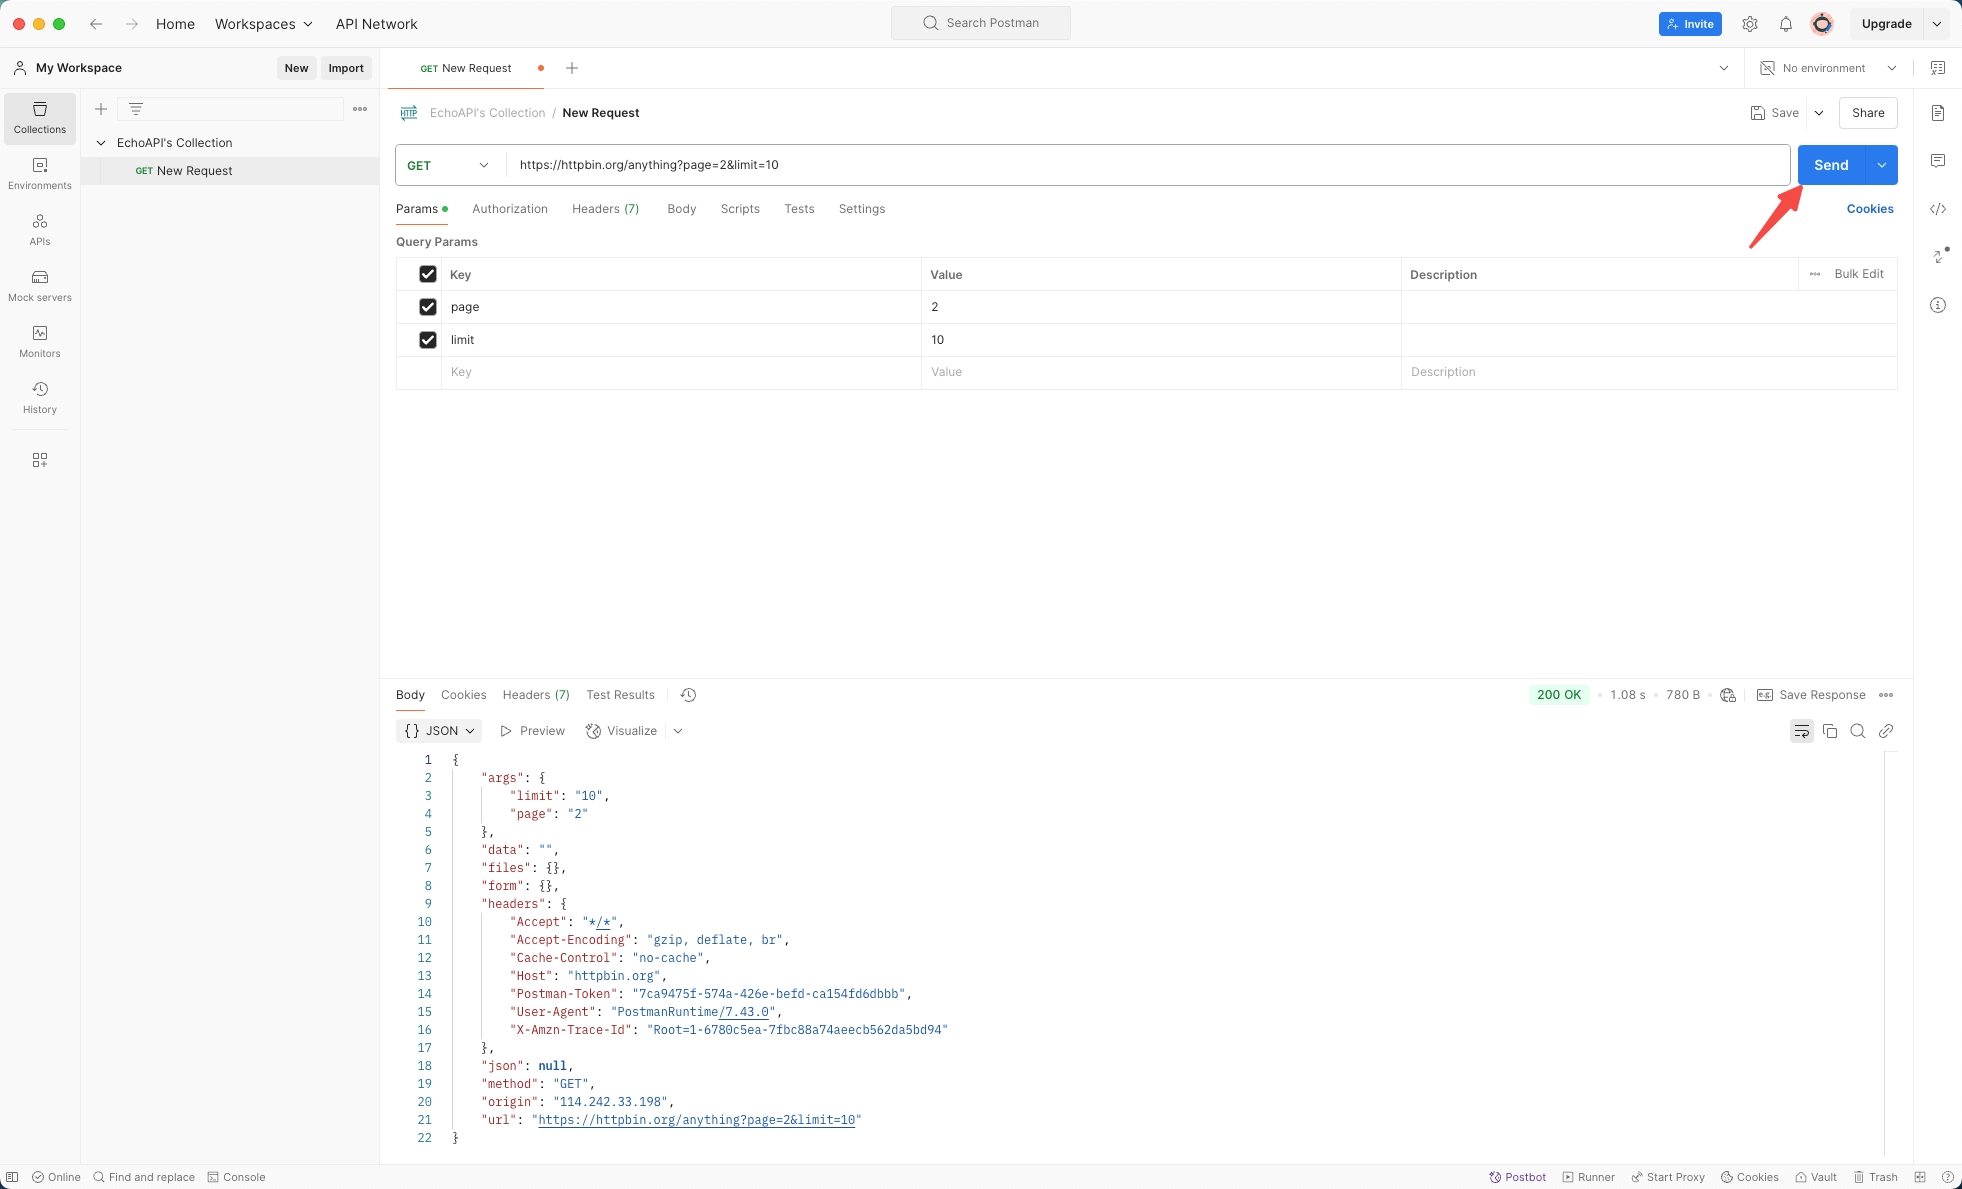
Understanding the Response in Postman
- Body: The main area to view the content returned by the API. It can be displayed in several formats:
- Save Response: Allows you to save the response data for later review or comparison.

Details: This sidebar shows response metadata like status code, response time, and size of the data returned.
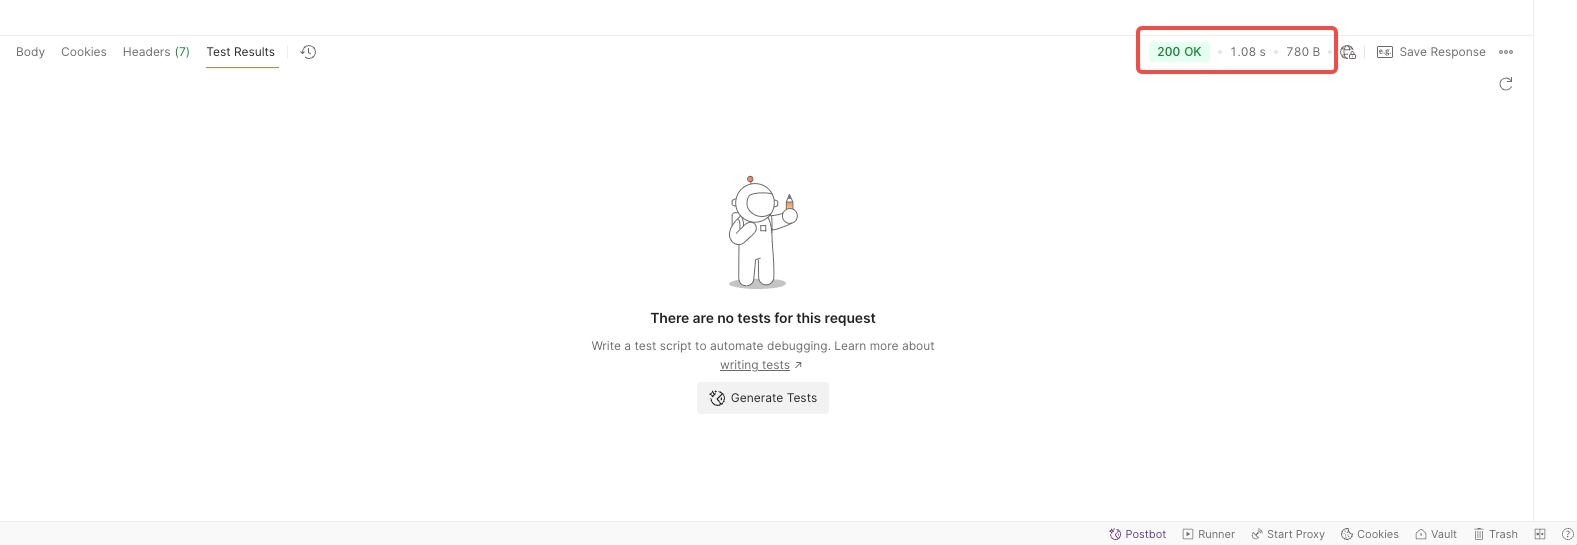
Test Results: Displays results from any tests (assertions) you have scripted to run after the response is received.

Headers: Shows the response headers, which can be crucial for debugging and understanding the server's configurations.

Cookies: Lists the cookies returned with the response if any.

Hex: Displays response in hexadecimal format.

Base64: Shows the response encoded in Base64 format.

Raw: Displays the raw data as it is returned.

Pretty: View structured data in JSON, XML, or HTML.

Conclusion
This detailed explanation covers everything you need to know about sending GET requests and analyzing responses in Postman. Utilizing this tool effectively can greatly streamline your API development and testing phases, ensuring you deliver robust, error-free software products. Mastery of Postman not only enhances your productivity but also deepens your understanding of the mechanics of web communication.


 EchoAPI for VS Code

 EchoAPI for IntelliJ IDEA

 EchoAPl-Interceptor

 EchoAPl CLI
 EchoAPI Client
 API Design
 API Debug
 API Documentation
 Mock Server


