User Guide: How to Send HTTP/HTTPS Requests using Postman
How can you send HTTP/HTTPS requests? Here's how to send them using the popular tool Postman. Additionally, since Postman doesn't support Japanese, I'll also introduce how to send requests using EchoAPI, which has a Japanese-friendly UI and is easier to use than Postman.
HTTP and HTTPS Requests
HTTP (Hypertext Transfer Protocol) and HTTPS (Hypertext Transfer Protocol Secure) are protocols used for exchanging data between clients and servers, such as web browsers and web servers. HTTP is typically used for displaying web pages and exchanging data over the Internet.
HTTPS is the secure version of HTTP, providing data encryption and safe communication. HTTPS requests are sent through an encrypted SSL (Secure Sockets Layer) or TLS (Transport Layer Security) tunnel.
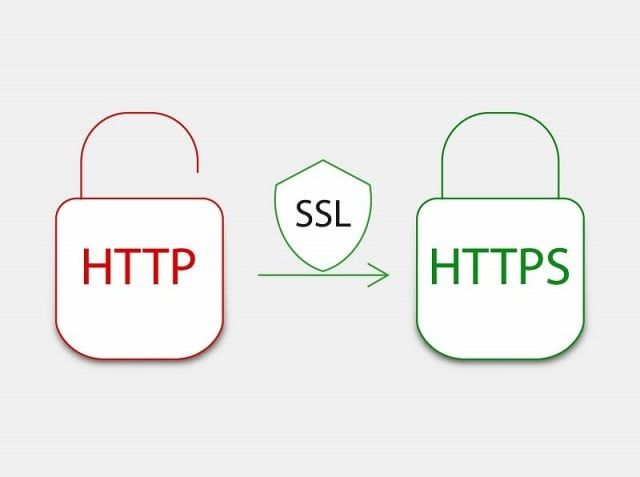
HTTP, HTTPS, and REST APIs
The most commonly used RESTful API is an architectural style for exchanging data between clients and servers, using the HTTP protocol for communication. Thus, HTTP/HTTPS requests are closely related to RESTful APIs, serving as the means to request and send data via these APIs.
How to Send HTTP/HTTPS Requests
So, how do you send HTTP/HTTPS requests? Below, I'll introduce how to send them using the well-known tool, Postman. Additionally, I'll also introduce EchoAPI, It is considered more user-friendly than Postman.
Sending HTTP/HTTPS Requests with Postman
Postman is one of the most renowned API management tools, and it perfectly supports sending HTTP/HTTPS requests. With Postman's intuitive UI, you can easily send HTTP or HTTPS requests. Refer to the steps below as needed:
Step 1
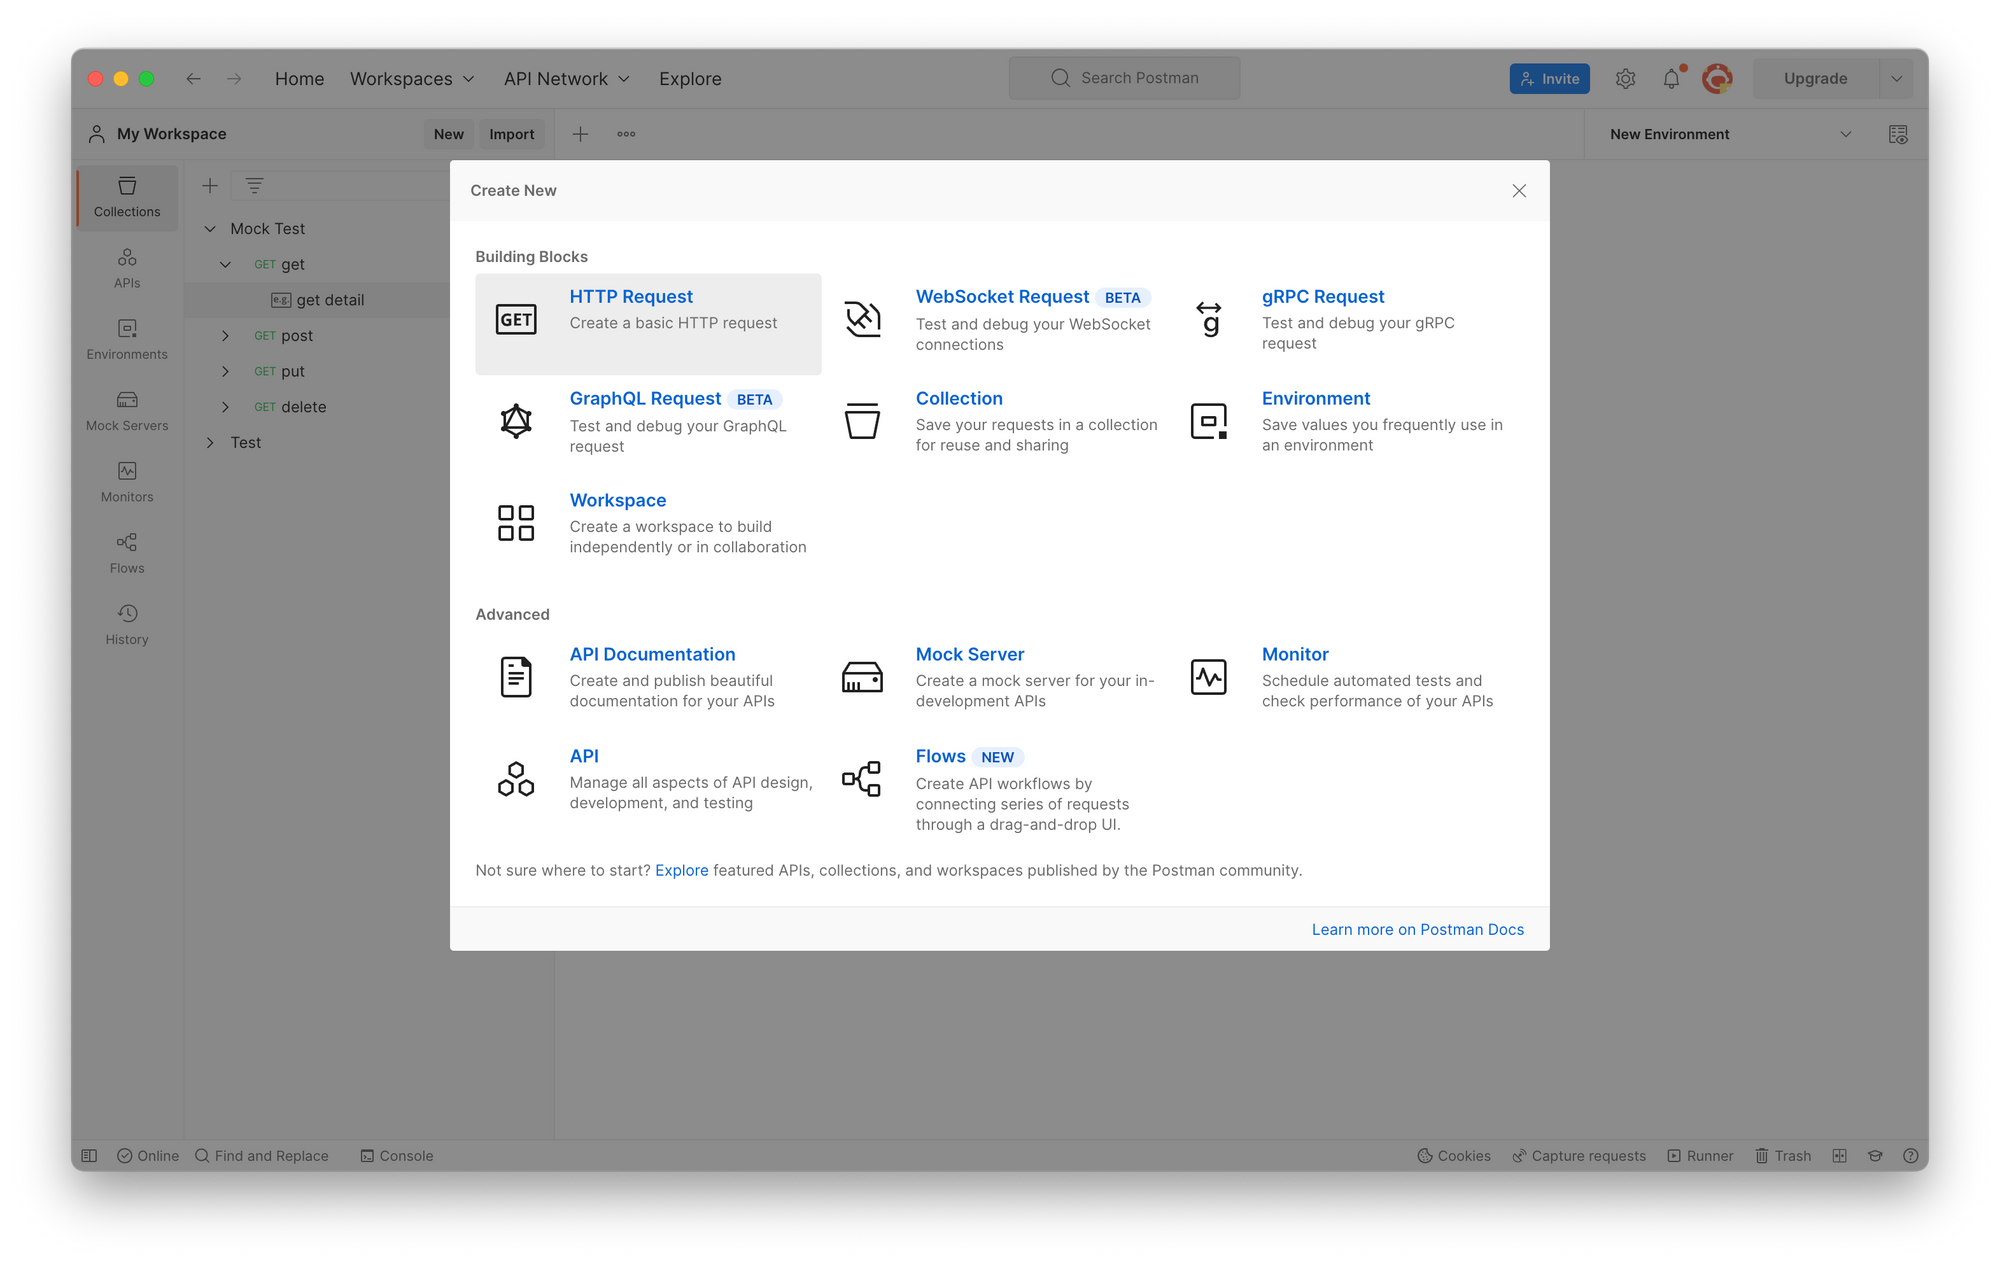
Open the Postman app and click the + button in the upper left corner to create a new HTTP Request.
Step 2
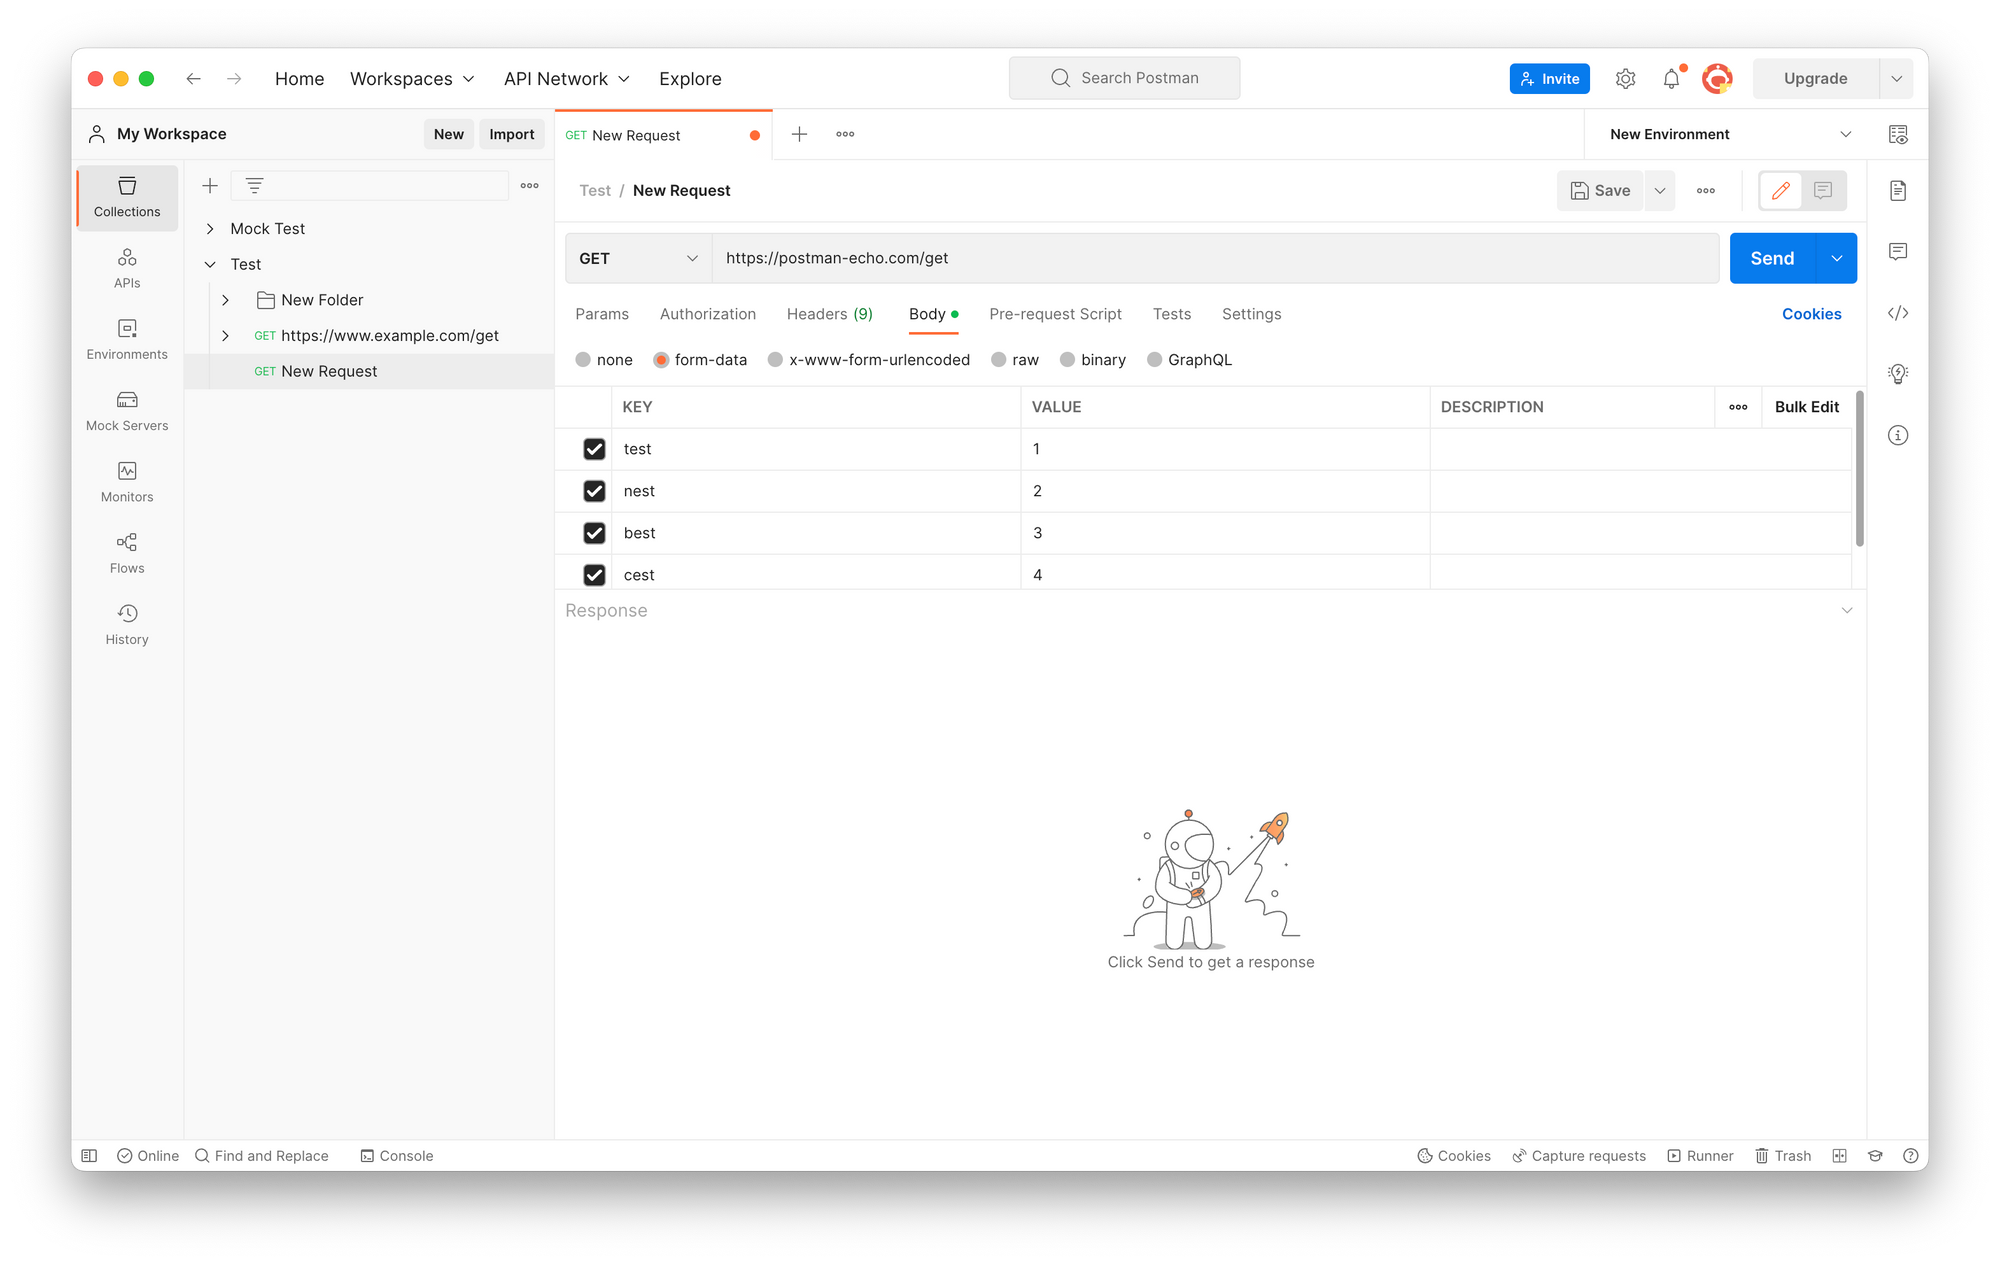
In the request creation screen, enter an HTTP or HTTPS URL, for example, https://postman-echo.com/get. This is a sample API endpoint provided by Postman. Fill in any necessary parameters as needed.
Step 3
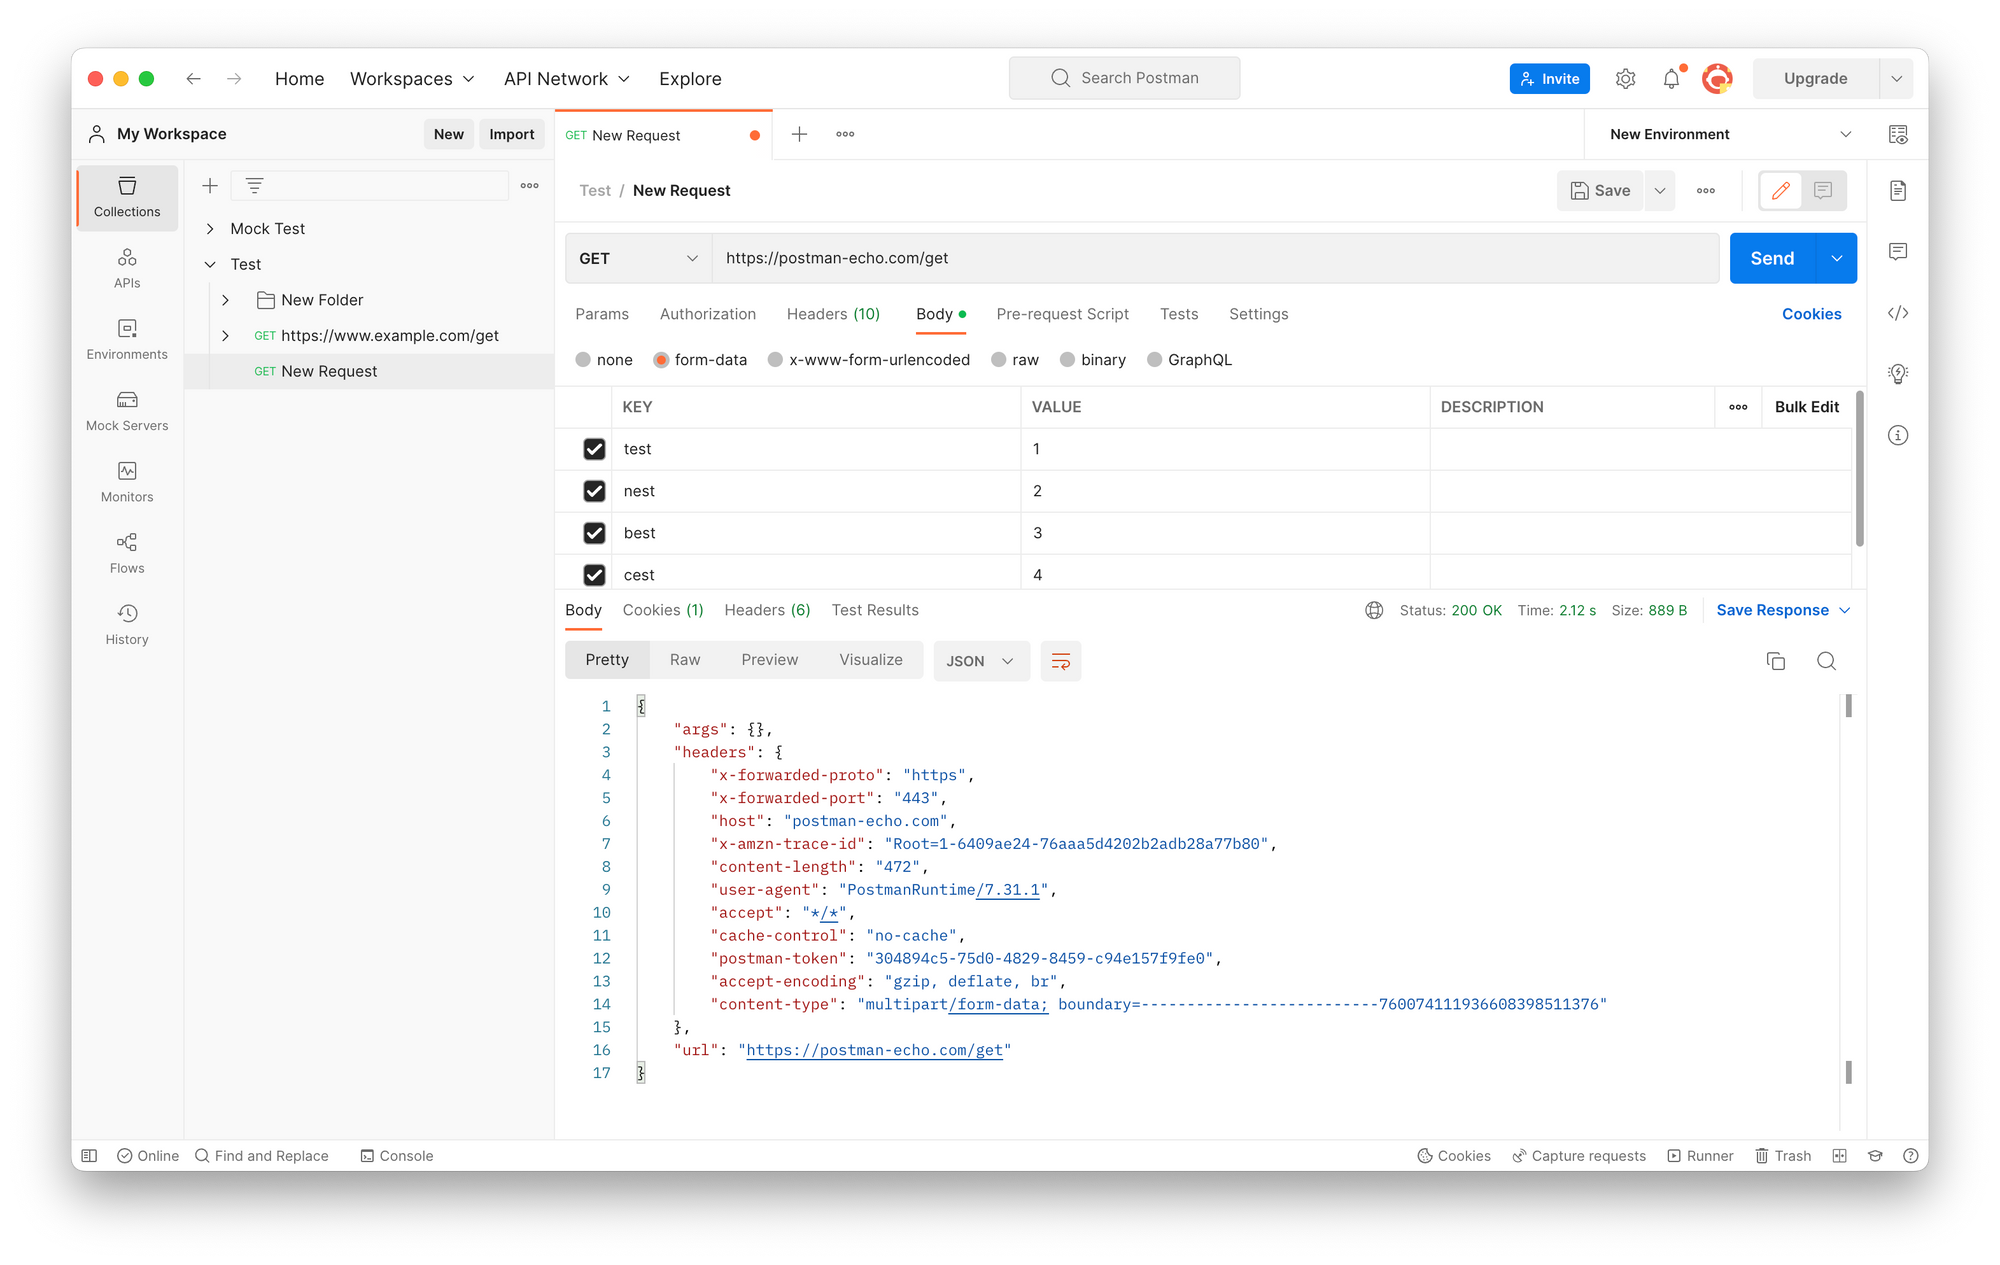
Once all required information is entered, click the blue Send button to send the HTTP/HTTPS request to the specified API endpoint. The server will then send back a response based on the information sent.
Step 4
If authentication is required to access the API, in Postman, you can add authentication details by navigating to Settings > Certificates > Client Certificates.
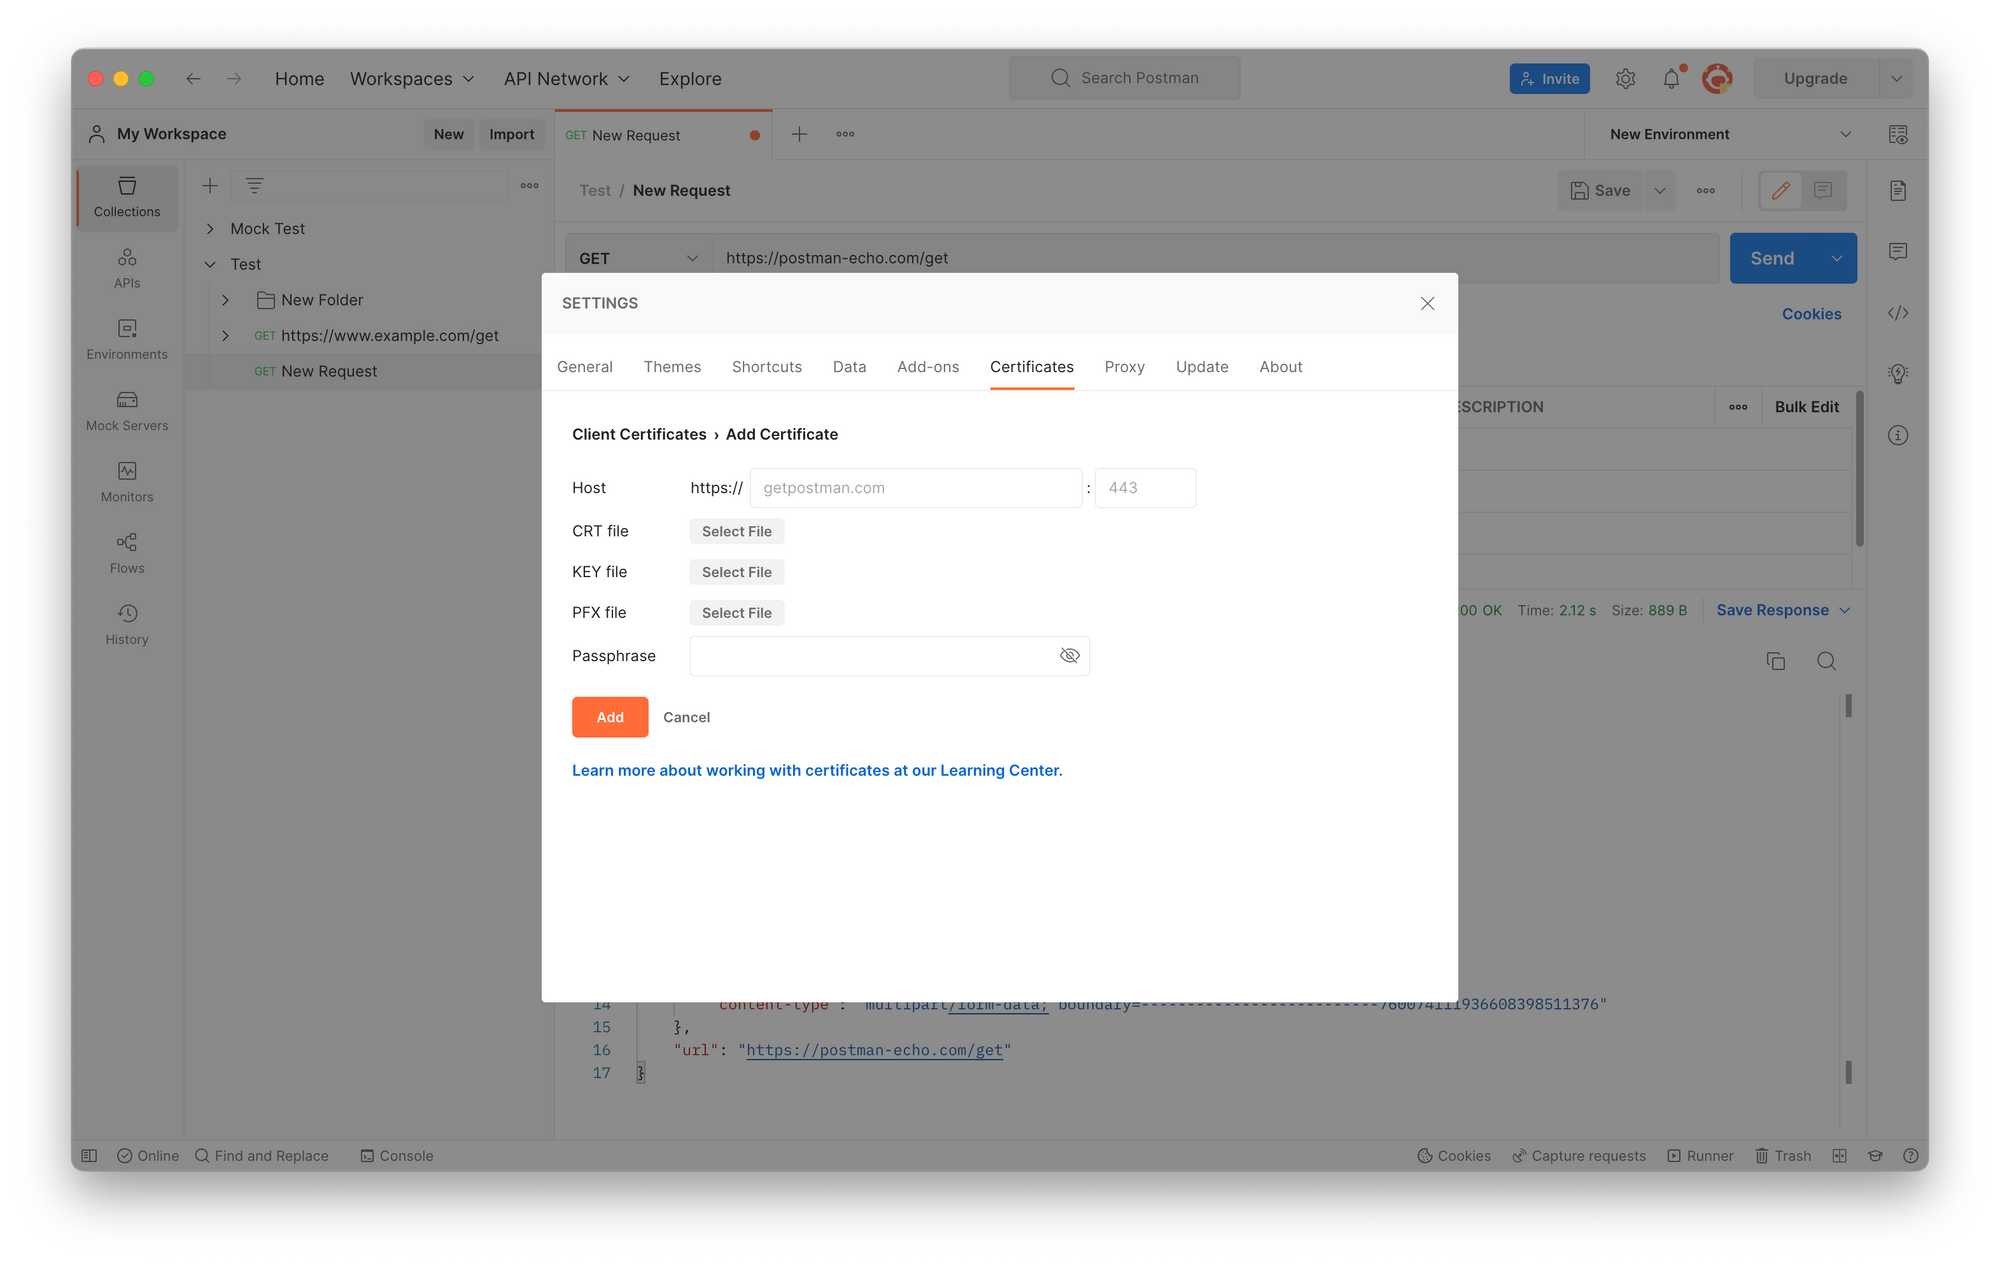
By following the above steps, you can easily send HTTP/HTTPS requests and receive responses using Postman.
It seems you're interested in using Apidog, which you've asked to be renamed to EchoAPI in this translation. Got it! Here's your text translated into American English, tailored to suit U.S. developers' preferences:
EchoAPI: A More Powerful and User-Friendly Alternative to Postman for API Testing
Postman is a go-to tool for API testing and management, but EchoAPI is a stronger, more user-friendly alternative. EchoAPI includes all the features of Postman including API design, documentation generation, debugging, development, testing, and mocking. and it offers enhanced usability. Furthermore, unlike Postman, EchoAPI's collection runner has no limitations, making test automation much simpler.
Easily Send HTTP/HTTPS Requests with EchoAPI
EchoAPI fully supports HTTP and HTTPS requests. Follow these steps to effortlessly send requests and receive responses:
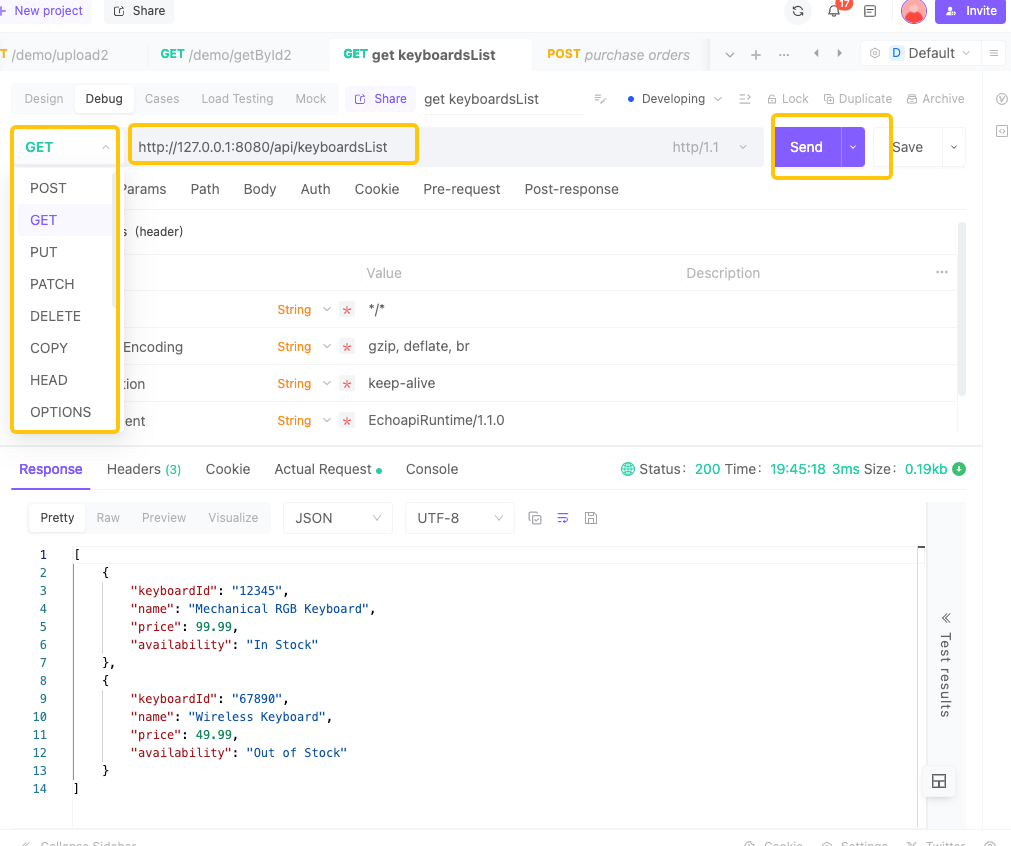
Step 1: In the API execution page, input the HTTP method, API endpoint, and parameters, then click the "Send" button to dispatch your HTTP request.
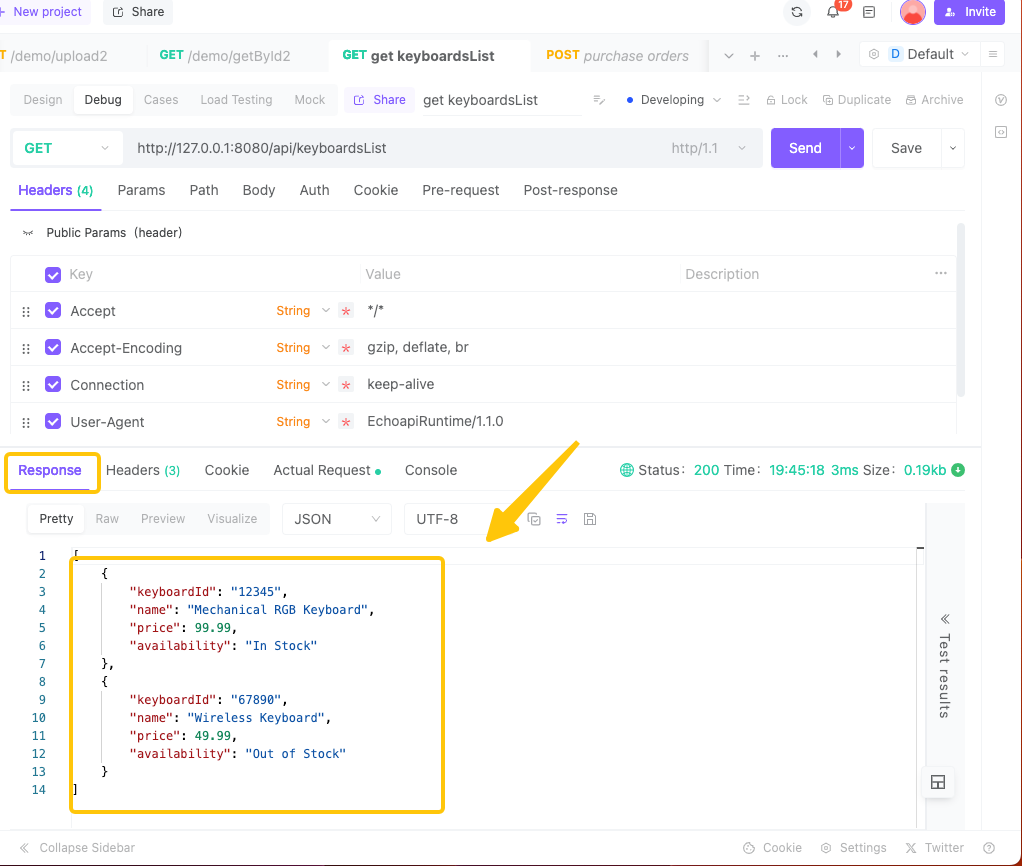
Step 2: You'll receive the response here. EchoAPI automatically verifies the accuracy of the obtained response.
Step 3: Click the save button to store your API Case. You can save the request you've sent and its response information as an API Case. Next time, simply reference this case for convenient reuse.
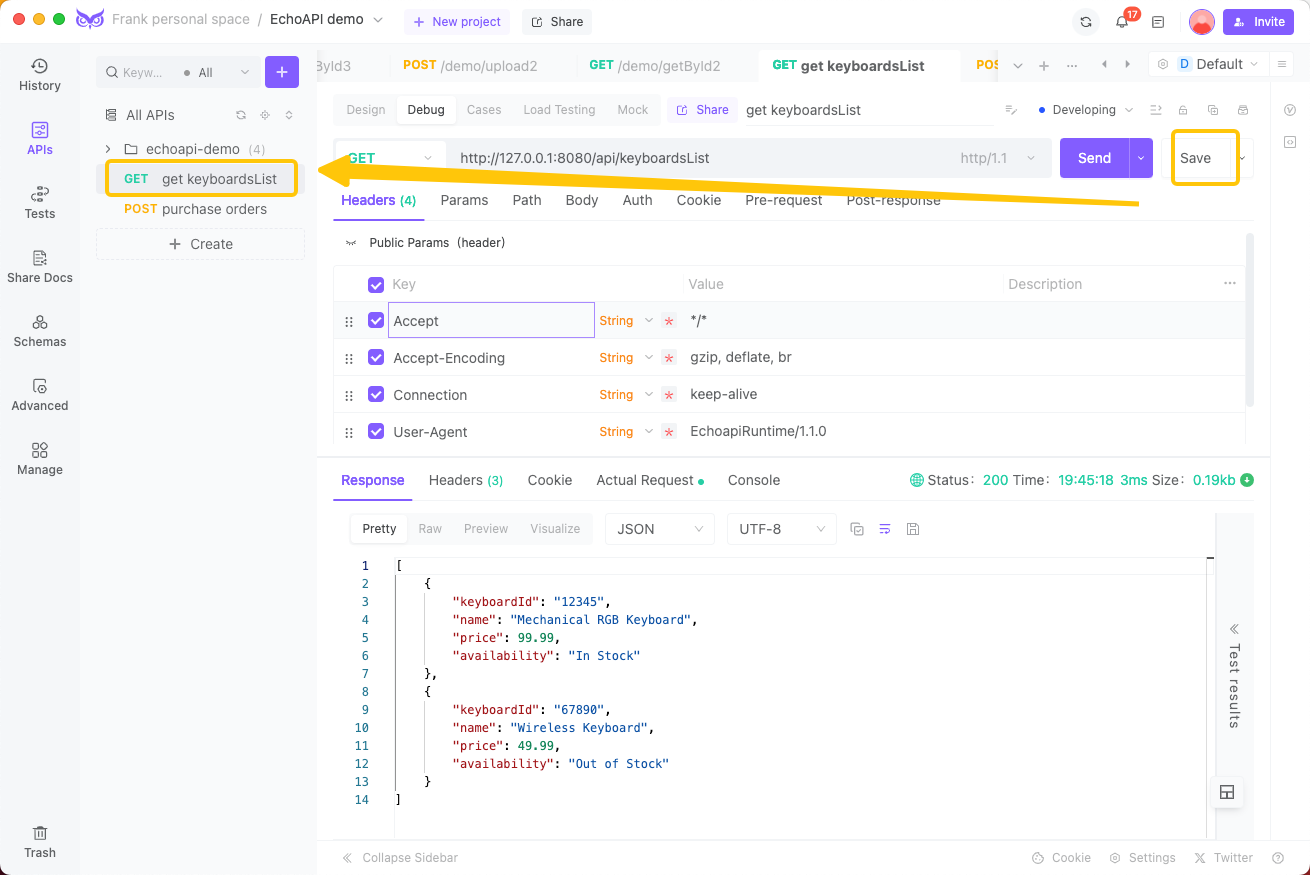
As illustrated above, EchoAPI allows you to perform not only HTTP request dispatching but also response verification and storage in just a few simple steps. Happy testing!


 EchoAPI for VS Code

 EchoAPI for IntelliJ IDEA

 EchoAPl-Interceptor

 EchoAPl CLI
 EchoAPI Client
 API Design
 API Debug
 API Documentation
 Mock Server


